Zinrelo Store Setup Guide
To create your Zinrelo store, click on the link below:
Zinrelo Store SetupFollow these steps to begin setting up your store-
Enter Store Details
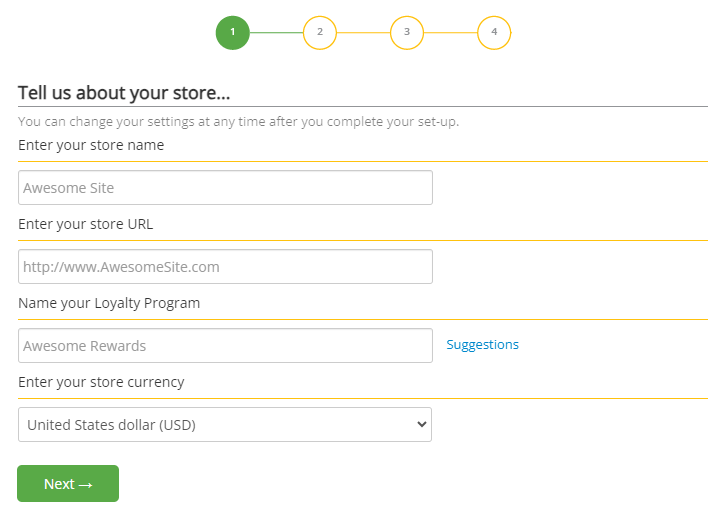
- Enter your Store Name: Provide a name for easy identification within the platform. The name will not be visible to end users.
- Enter your Store URL: Input your store's URL.
- Name your Loyalty Program: Choose a unique and appealing name for your loyalty program. You may select from the suggestions provided or create your own, as this name will be visible to end users.
- Enter your Store Currency: Select the currency that your store will support.
Once you have entered these details, click the Next button.
Store Type Selection
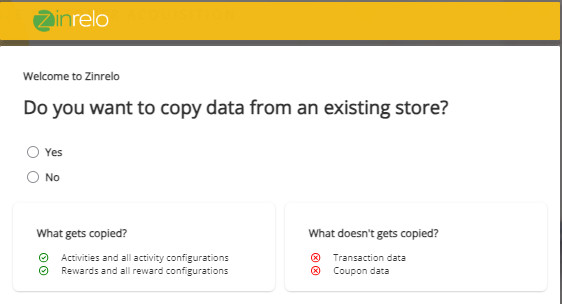
Select Yes or No based on your requirements:
- Yes: If you are cloning an existing store.
- No: If you are creating a new store.
Creating a New Store
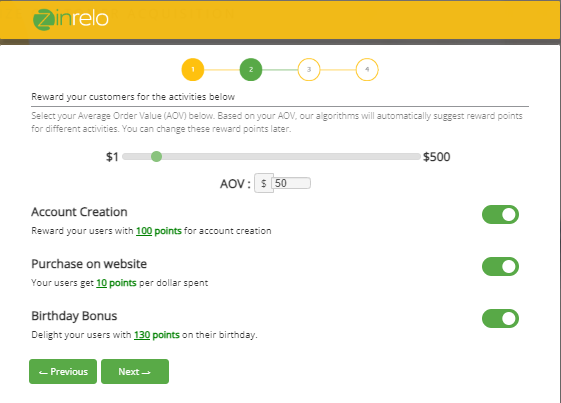
- Select your Average Order Value (AOV): Based on your AOV, our algorithms will suggest reward points for various activities. You can adjust these reward points later.
- Enable or Disable Activities: Choose the activities you want to include for your store. You can also modify the points awarded for each activity by clicking on the point value.
Note: These settings can be adjusted at any time after setup. Once complete, click Next.
Adding Rewards
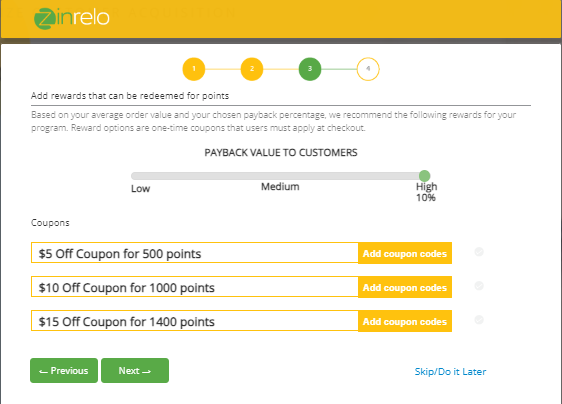
In this section, you can configure rewards that customers can redeem with points. These rewards are tailored to your average order value and chosen payback percentage. They are one-time coupons that customers must apply at checkout.
- To activate each reward, add a coupon code.
- Optional: You may skip this step and configure the reward from the admin console.
After configuring rewards, click Next.
Selecting the Plan
- Select the Custom Plan option. To get the code, write to your account manager at [email protected].
- Once you have obtained and submitted the code, click Next.
Completing the Integration
After setup, you’ll enter the Zinrelo Store interface.
To complete the installation process:
- Mark “Add the basic integration and authentication snippet to your website” and “Add the purchase tracking API to your confirmation page” as complete.


- Once done, click the Launch button to activate the program.

To add features like Campaign and Receipt scanning, write to your account manager at [email protected].
Cloning a Store
To clone an existing store, follow these steps:
- Update the store’s basic details.

- Select Yes to clone the existing store and enter the partner ID of your current store.

Go to Settings >> Partner ID in the existing store to obtain the Partner ID.
Note: If a non-administrator user attempts to submit the Partner ID, an error message will appear, preventing the action.
A screenshot of the error message is attached below for reference.
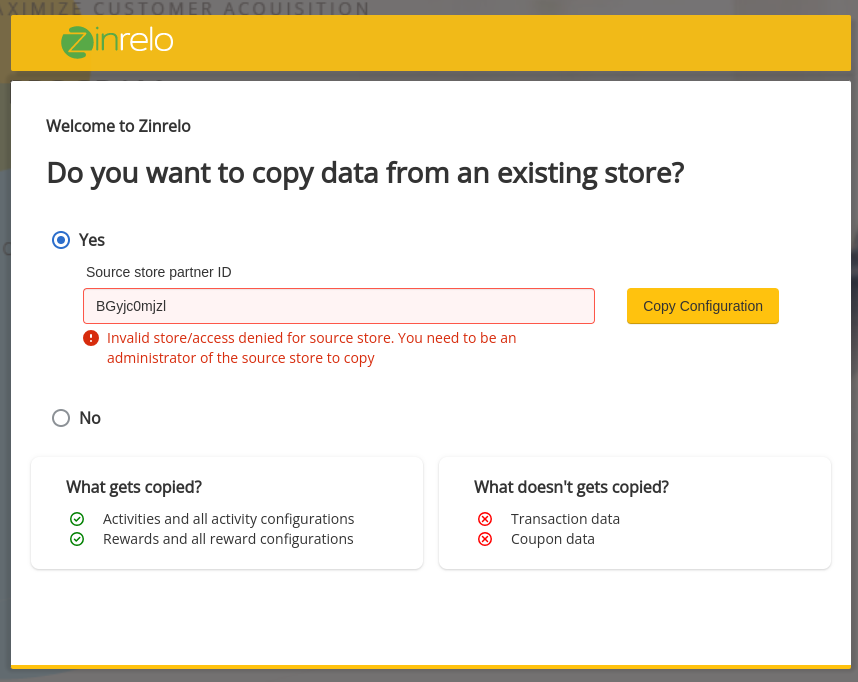
- After entering the Partner ID, click Copy Configuration and continue. To confirm the cloning process, click on “Continue.”
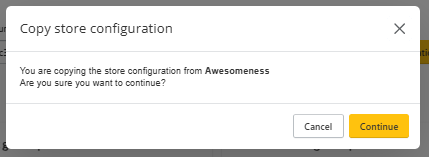
The admin cloning the store will receive an email notification upon completion. Click the store link provided in the email to enter the Zinrelo Store interface.
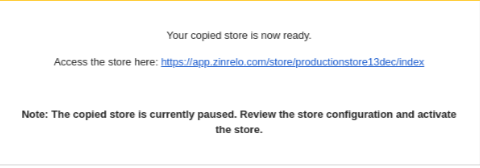
To complete the integration for the cloned store:
- Click on “Integrate the Zinrelo code snippet on your website.”
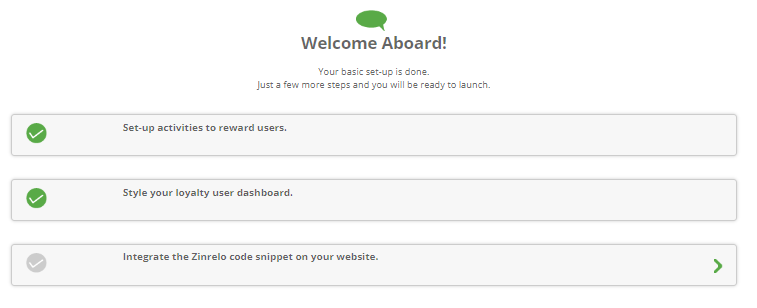
- Mark “Add the basic integration and authentication snippet to your website” and “Add the purchase tracking API to your confirmation page” as complete.


- Click Launch to activate the program.

- When you click on Launch, a list of all features will pop up. Check the configuration of each feature. Once done with the configuration and setup, select all listed features and then click on “Create.”
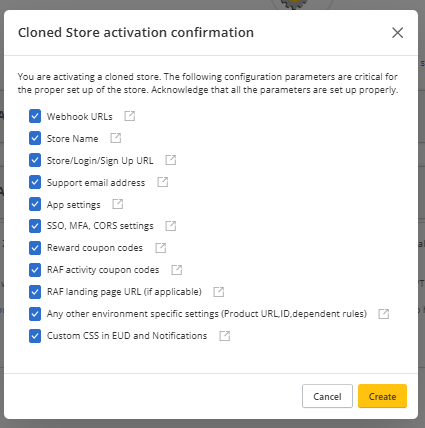
Points to be considered if you are copying the store-
- The new store will initially be in a paused or inactive state.
- There is no limit to the number of stores you can clone.
- Only administrators with full access have the authority to use the store cloning feature.
- The cloning process will take approximately 10 minutes to complete.
- The admin who initiated the cloning process will receive an email notification once the process is complete.
- The cloned store will automatically have the latest version of the Klaviyo app installed, ensuring access to the most up-to-date features and integrations.
What gets copied?
The table below shows which features the system will copy from the existing store and which features it will exclude.
What feature will be cloned? | What feature will not be cloned? |
|---|---|
| Members |
| RAF activity coupon codes |
| Archived/ deleted activities |
To be copied-
| Transaction data |
Note: All rewards will be in paused state in the cloned store. |
|
| Coupon codes |
Tier and all tier settings | Archived/ deleted rewards |
Points expiration and all settings | Flexible redemption rewards |
Email notifications | Email logs |
Onsite notifications | Webhook logs, webhook secrets to be created |
Webhooks (copied in disabled state) | Moderation transaction data |
Receipt Moderation Settings/ UPC data | Store Settings-
|
Advanced RAF Popup | |
Language configuration for multi-language stores | |
Store Email settings | |
Batch mode (copy just the flag and rerun the workflow to create ftp account) | |
Timezone |
Updated 3 months ago
