Configuring Email Notifications
Introduction
With the Zinrelo email editor, you can effortlessly create engaging and visually appealing emails that resonate with your clients. Designed for simplicity, the editor allows you to craft professional-quality emails quickly and easily—no coding skills required.
You can begin designing your email templates by clicking the edit button of the email you want to edit.
Migration from old to new email editor:
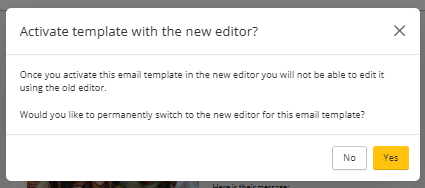
Click on the 'Use the New Editor' button to switch to the new email editor.

If you want to revert to the classic editor, click on the 'Use the Old Editor' button.

Important Notes:
- Inactive Email Notifications: When configuring an inactive email notification, you will automatically be directed to the new email editor.
- Active Email Notifications: If you modify an active email notification using the new email editor and enable it, the template will be permanently saved in the new format.
Let’s start with its configuration.
Key Configuration Options
Subject Line: Craft an attractive and engaging subject line for your email.

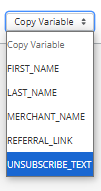
Unsubscribe Text: Enter the unsubscribe text for your email. In this section, you can customize the unsubscribe link, font size, font color, and font family.

Ways to add unsubscribe link
Using the Unsubscribe Text Variable
- Copy the unsubscribe text variable and paste it into your email template where you want the unsubscribe text to appear.
- Enter the desired text in the Unsubscribe Text input box. Ensure to include the placeholder ${unsubscribe_link} within this text. This step prevents SendGrid from attaching its default unsubscribe link.
- The unsubscribe link will be automatically inserted, directing members to the unsubscribe page when clicked.
Note: This is a global override and will apply across all email templates.
Adding Custom Unsubscribe Text
- Double-click the portion of your unsubscribe text sentence where you want to create a link. To create a link, refer to this part of the document.
- Use the toolbar to add a link, then paste ${unsubscribe_link} in the link field within the settings panel.
- The unsubscribe link will automatically be sourced from this link.
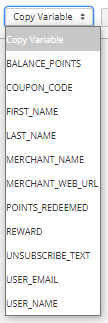
Copy Variables: Use this to copy variables you want to include in your email. This button just copies the variables into the clipboard. You need to paste the variable into the editor. To add more variables, contact your account manager at [email protected].
Basic Settings
Undo: Revert the recent change by clicking the Undo button.

Redo: Use the Redo button to restore the action you previously undid.

Reset to Default Template: Click this button to restore the template to its default settings.

Enter Fullscreen Mode: Click this option to switch to fullscreen editing mode for better visibility. Click again to Exit the fullscreen mode.

Code Editor: Use this to make HTML edits directly to the email template.

The code editor consists of two separate parts: the HTML code and the CSS code.
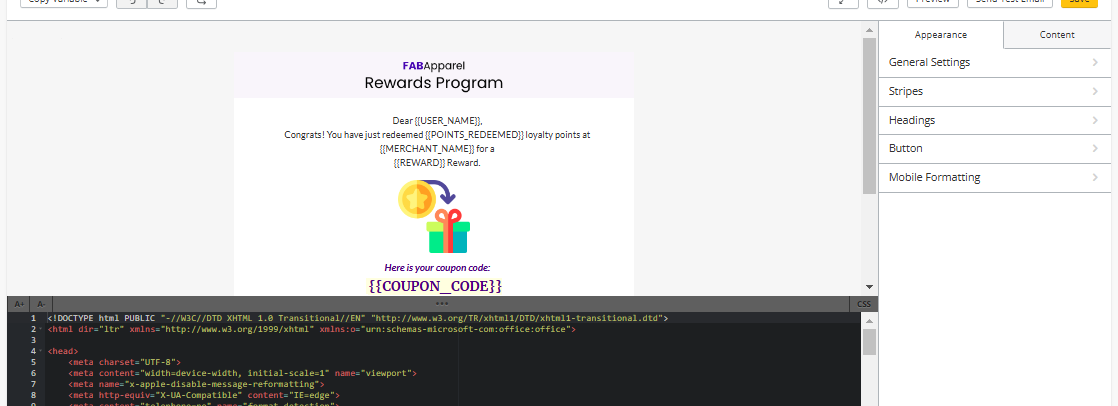
Please note: If you copy and paste or import template code from an external source, the email editor's drag-and-drop functionality will be disabled. You must edit the HTML code directly to make any changes to an imported template.
Recommendation-
- It is advisable to remove any existing CSS in the editor.
- Replace it with your custom CSS to ensure the template matches your design specifications and avoids style conflicts.
Preview: Click the Preview button to view a preview of the email.

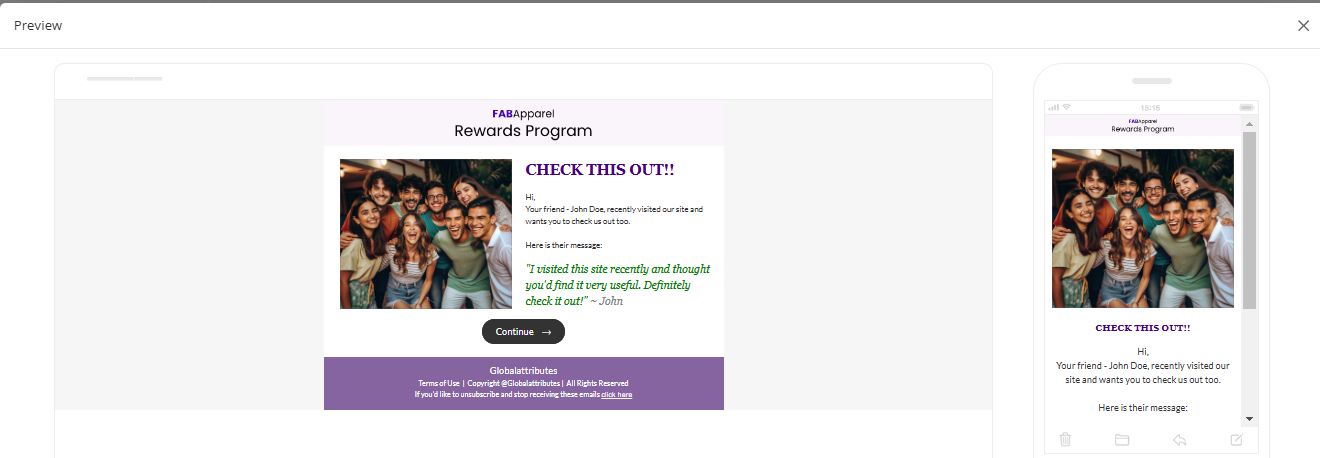
Please note: The Preview option provides only a webpage preview of your email template. Use the Send Test Email feature to see how the email will exactly look in an inbox.
Recommendation-
If your target audience includes users who access emails via Outlook, it is highly recommended to send test emails to Outlook accounts before finalizing the template. Outlook often renders email templates differently compared to other email clients. Testing ensures that the design, layout, and functionality appear as intended across all platforms.
Test and Save
- Send Test Email: Click this button to send a test email for a real-time preview. The recipient of this test email should be a store admin.
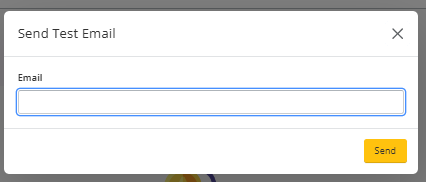
- Save: After completing all configurations, click the Save button to finalize your changes.

Setting Panel
The setting panel of the email editor is divided into two sections: Appearance and Content menu.

Appearance Menu
All the styles you set in the "Appearance" section will apply to the entire email. You only need to design a specific element once, which will automatically apply to that element throughout the entire email, regardless of how many times you use it. This will save you time by eliminating the need to recreate the element or the email from scratch.
In appearance, you have the options to make changes to following settings:
- General settings
- Stripes
- Headings
- Buttons
- Mobile Formatting
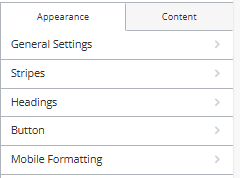
General Settings
In this section, you'll focus on customizing the design elements of your emails. The design elements include adjusting the width of the email message, setting default padding for structures, selecting background colors and images, choosing fonts, line spacing, bottom paragraph spacing, underlining links, enabling right-to-left (RTL) text direction, and ensuring responsive design.
Message Width
The standard message width is 600 pixels, which is widely accepted across email clients. Feel free to modify this to suit your needs.

Message Alignment
Message Alignment lets you position your email horizontally within the inbox workspace. You can align your template to the left or right or keep it centered.

Default Padding
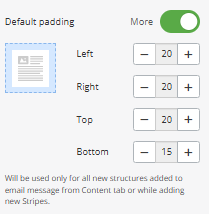
Default paddings dictate the fixed padding for any new structures you may add to your email.
- When the toggle is enabled, you can adjust the padding for each side of the structure—left, right, top, and bottom—individually.
- When the toggle is disabled, the padding for all sides will be adjusted uniformly.
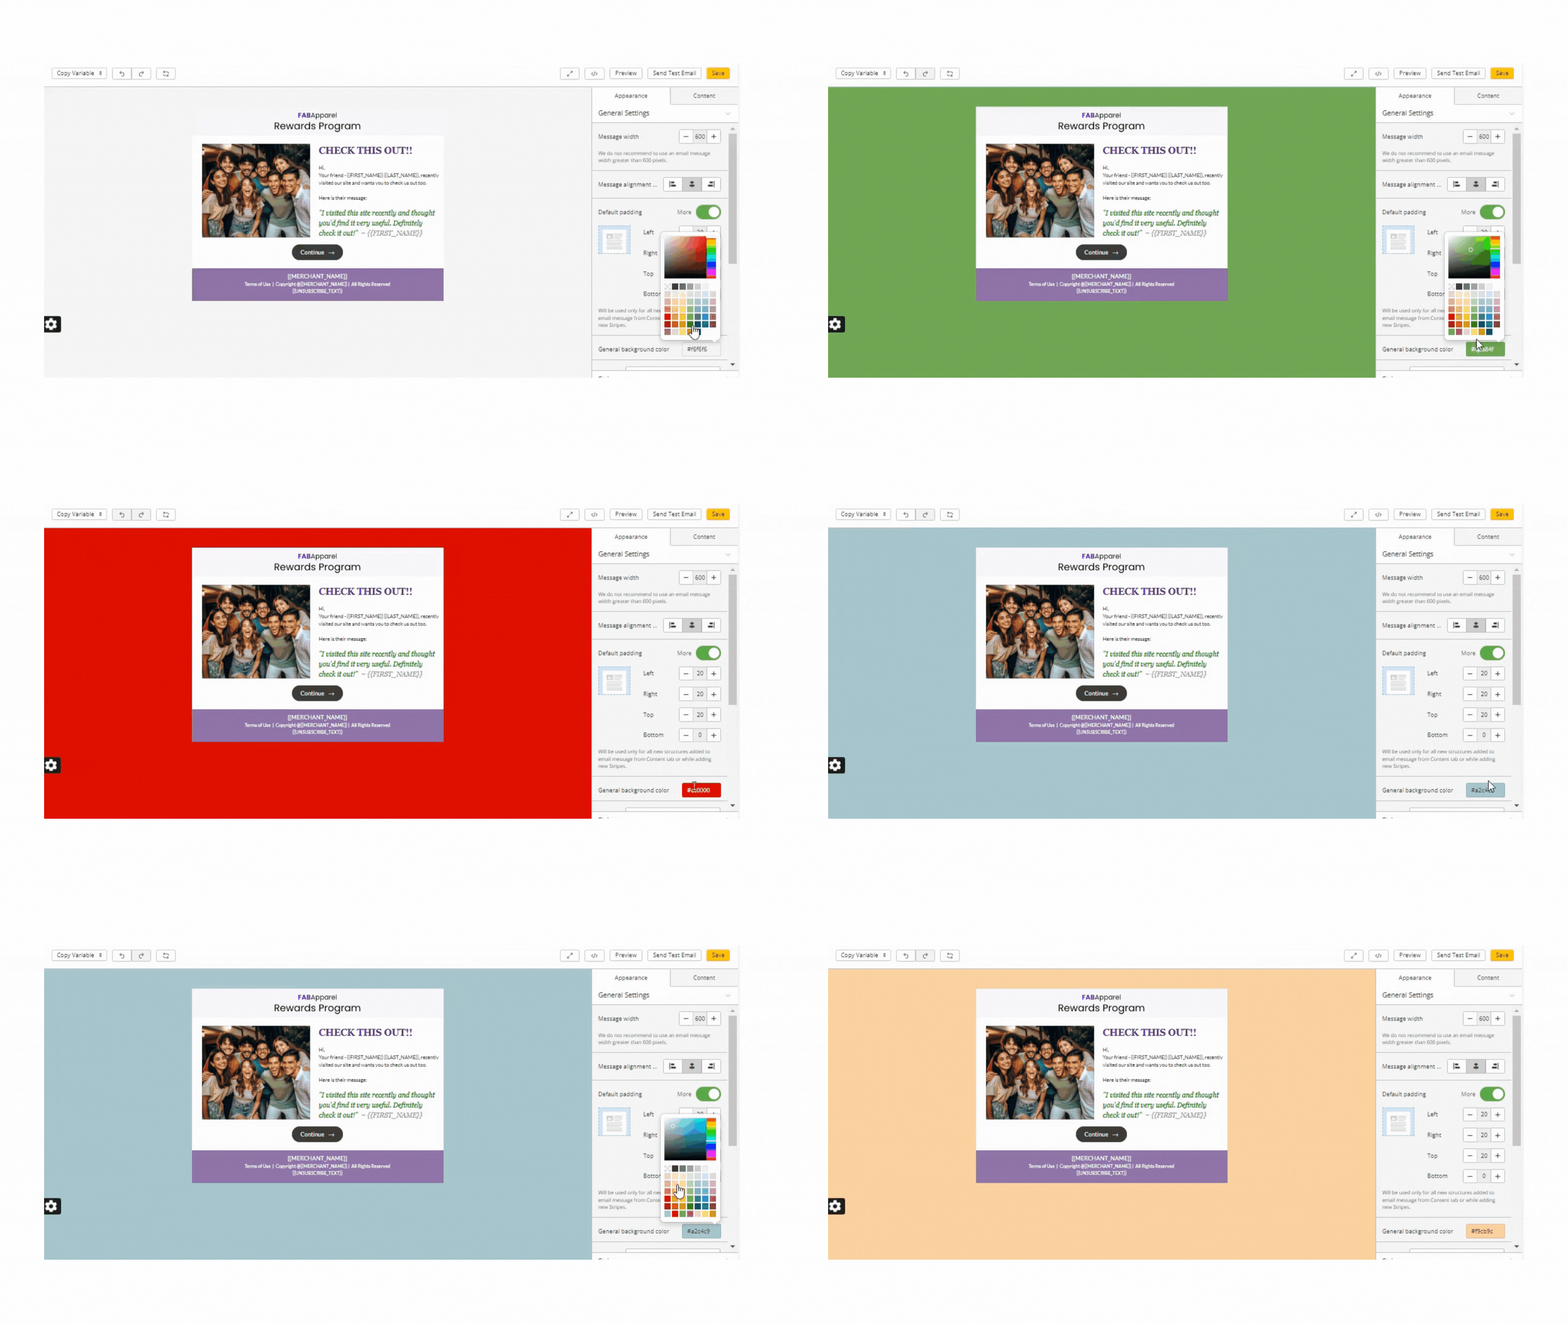
General Background Color
The General Background Color fills the entire email message area and will be visible when viewed on a desktop. However, this color won't be displayed on mobile devices.
Font
The font you choose applies to all text blocks within the email, excluding headings.

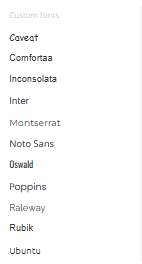
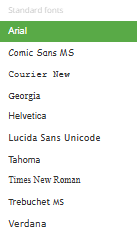
We have three types of fonts available to meet all use cases-
- Custom Fonts
- Standard Fonts
- Non-standard Fonts
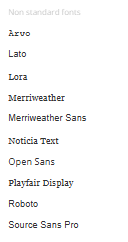
Note: If the email client does not support custom/ non-standard fonts, a similar font will automatically be replaced with a standard font.
Recommendation-
We highly recommend using standard fonts to ensure compatibility across all email providers.
Line Spacing
Line spacing refers to the space between lines of text within text blocks.

Paragraph Bottom Space
When activated, this feature adds additional spacing at the bottom of the paragraph.

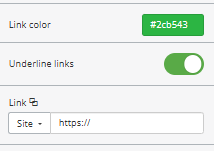
Underline Links
This feature allows you to underline links for better visibility. To use this feature, follow the given steps:
- Select the text you want to underline.
- The toolbar will appear above the email template once the text is selected.
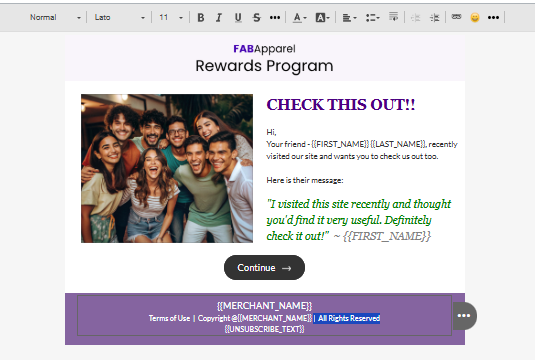
- From the toolbar, click on “Change Link”.

- The selected text will now be underlined. You can also update the link and customize the underline color as needed.
Responsive Design
Responsive design is enabled by default. If disabled, your email will appear on mobile devices just as on desktops.

Recommendation-
We recommend keeping it enabled for fluid design.
RTL Text Direction
The "RTL Text Direction" option allows writing text from right to left, which is suitable for languages like Arabic and Urdu. Activating this option ensures that texts, including numbers and punctuation, are accessible to a global audience.

Background Image
The Background Image overlays the general background of the email. Selecting the appropriate image size and setting its position correctly in the editor is key to achieving the desired look.

Stripes
Stripes are the designated areas within your email comprising various structures and containers. In this section, we’ll explain how to manage these stripes effectively.
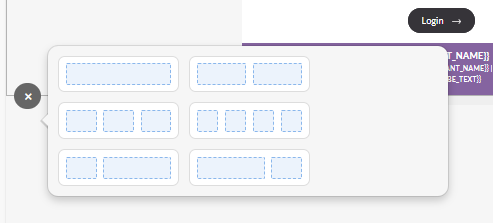
- To add a stripe, click the "+" icon in the current stripe's lower left corner.

- Select the pattern of the stripes.
- Once you add a stripe, you will be taken to stripe Appearances. Each stripe can be categorized into Header, Content, Footer, or Info Area types. You can specify the type manually in the "Message Area" settings.
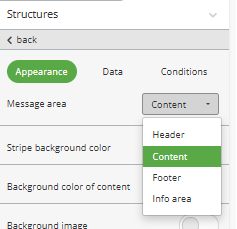
Utilizing different stripe types can facilitate more nuanced adjustments to your email design.
Within the Stripes settings, you have the ability to:
- Adjust the font size for each stripe (this is particularly important for the "Footer" stripe, where smaller font sizes are often preferred);
- Choose specific colors for the font and links;
- Emphasize the stripe and its contents with background colors, which is especially effective for highlighting some aspects of your email;
- The "Background Image" option is another way to customize the look of your email. This is particularly relevant if your corporate guidelines require the use of images or logos in the background.
Certain email clients, such as Outlook, may not display background images. To ensure consistency, it is recommended to set a background color that closely aligns with the background image's color for the entire email.
Headings
Headings are essential as it draws attention to specific words and distinguishes different sections of an email visually.
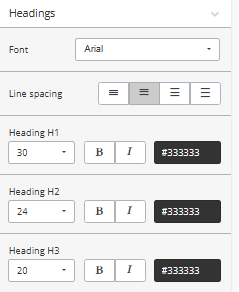
To add a heading to a section of text, highlight the text and select the appropriate heading option from the text formatting menu.
Afterward, in the Settings panel, you can customize the headings' font type, size, style, color, and line spacing to suit your preferences.
Buttons
Buttons serve as calls to action, encouraging recipients to take specific steps such as placing an order, following social media accounts or leaving feedback.
When using the email editor, you can customize their appearance to ensure they stand out effectively.
The button settings menu lets you define default characteristics that will apply to all buttons within the email. You can adjust the following options:
- Font size, style, and color
- Button background color
- Border radius
- Overall border settings or customize each side with specific border colors
- Internal padding
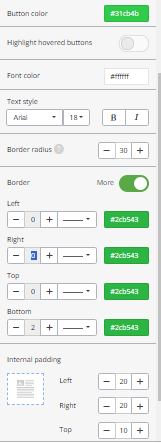
Additionally, you can activate the "Highlight hovered buttons" feature, allowing you to specify different colors when users hover over the buttons.

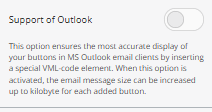
The "Support for Outlook" feature enhances the appearance of Outlook buttons by incorporating a special VML code element for better display.
Recommendation-
We recommend this flag to be enabled if your user-base uses outlook.
Mobile Formatting
This feature allows images to resize according to the width of the mobile device's screen. Note that adaptivity works only on devices that support it.
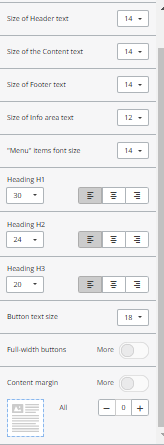
To ensure your emails are easily readable on any device, you can adjust font sizes for headings, stripes, buttons, and other elements to differ from the desktop version. Additionally, you can modify internal padding within containers and hide or disable specific elements for mobile view.
Here’s how to do it:
- Navigate to the "Appearance" tab.
- Open the section labeled "Mobile formatting."
- Adjust font sizes for headings H1, H2, and H3, and for different stripes.
- Set button text size. The ideal size for optimal readability is 18px or larger.
- Enable the "Full-width buttons" option to ensure the buttons fit mobile users' screens.
Content Menu
In the "Content" menu, you can make changes to the following settings:
- Structures
- Blocks
- Modules
Structure
A structure is a child element of a stripe, automatically included in every stripe by default.
How to Add a Structure
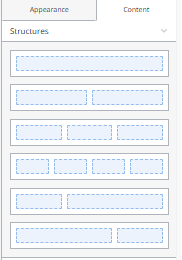
- Go to the Content menu.
- Drag and drop the structure to your desired location in the email template.
Managing Structures
Like other email components, structures can be saved as modules for reuse. Hover over a structure to access a drop-down menu that allows you to move, copy, or delete it.

Appearance Tab
- Click on the structure to open the Appearance tab.
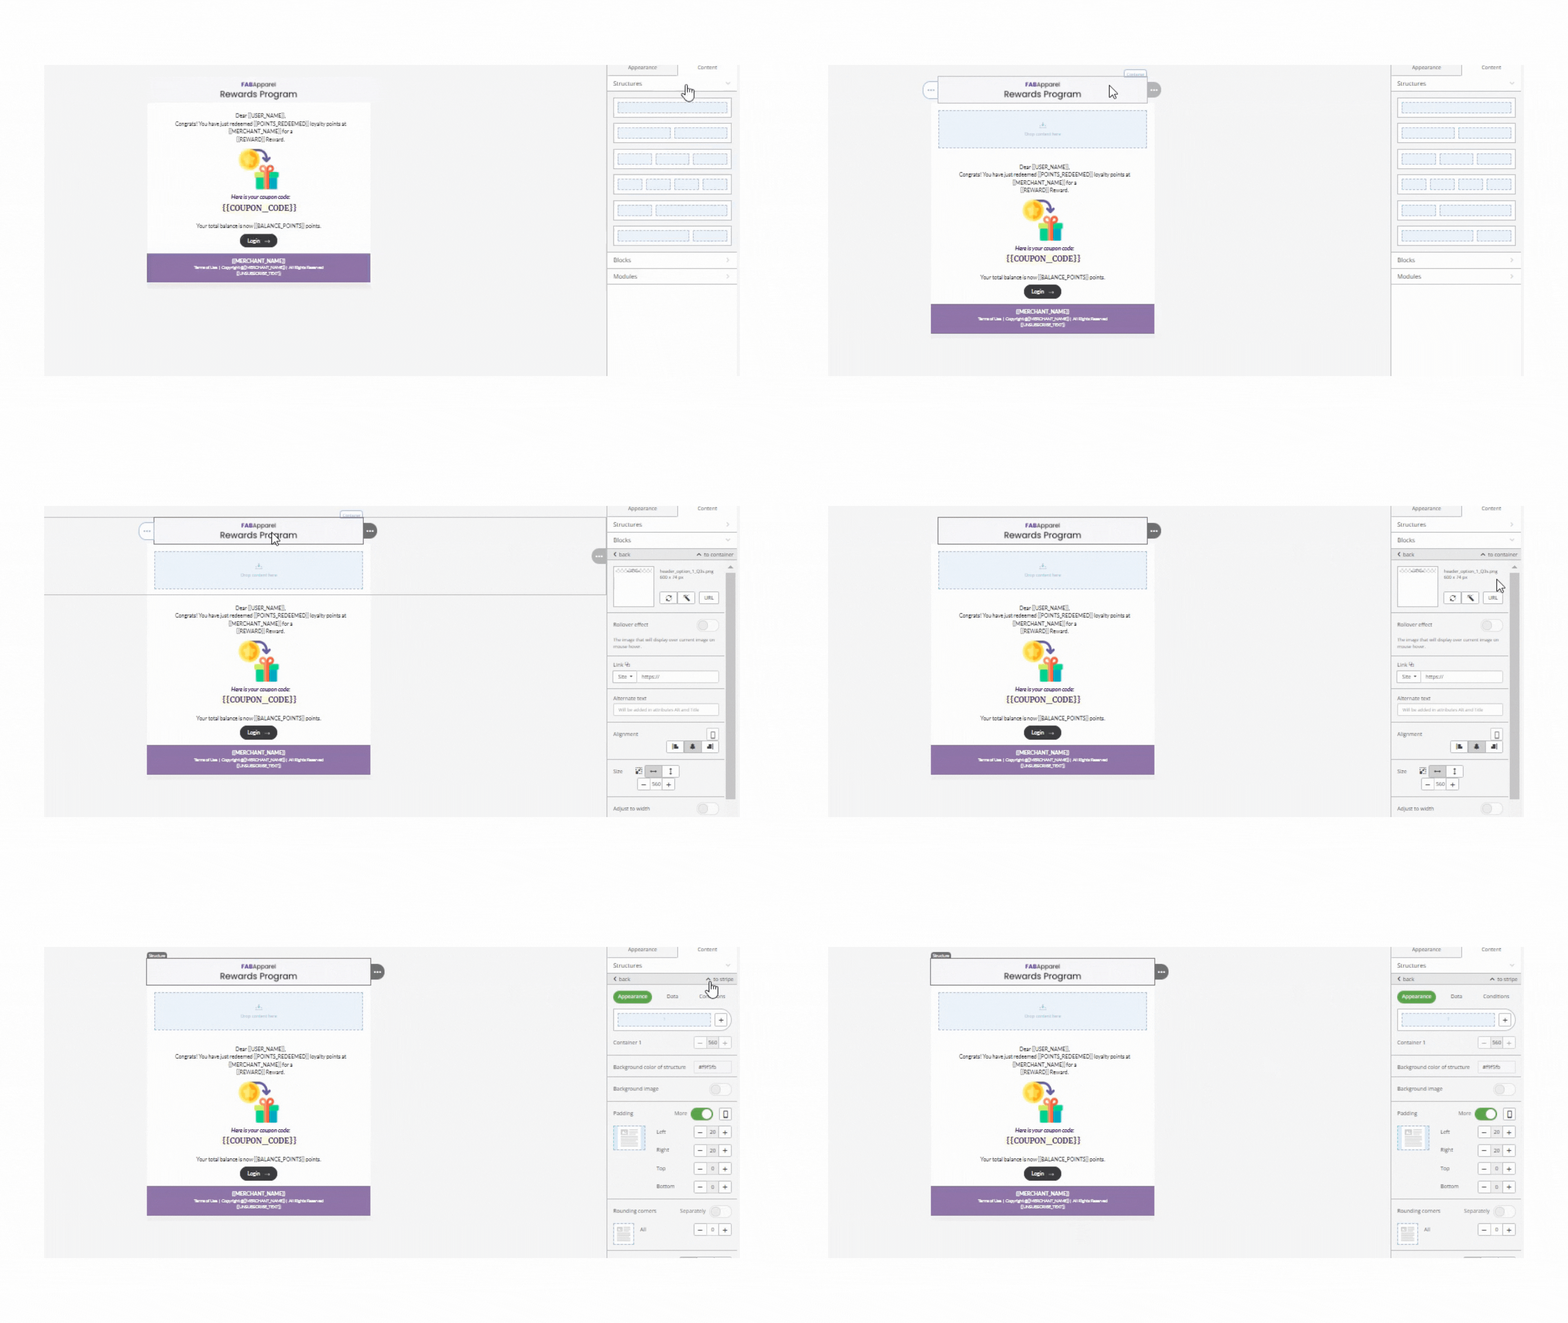
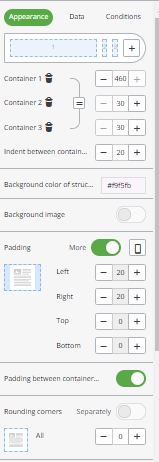
- In the Appearance tab, you can:
- Include additional containers within the structure.
- Define container dimensions by entering specific values or resizing them as needed.
- Adjust the space between containers.
- Add a background color or image to the structure.
- Configure padding separately for desktop and mobile views.
- Set overall borders or define individual border colors for each side.
- Make the structure responsive for different devices.
- Choose to hide the structure on either desktop or mobile views.
- Specify the type of structure as HTML, or both.
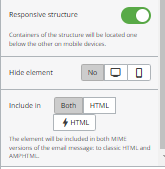
Please Note: We do not support “AMPHTML.”
Data Tab
Currently, the Data tab is not supported in Zinrelo. This feature is typically used to pull external data from other sources, which is not available at this time.
Condition Tab
Zinrelo email editor has prefined conditions set for rewards and tires.
- Conditionals: The Conditionals feature lets you control the visibility of rewards and tiers for end users based on selected conditions. For instance, if you choose allrewards-3 from the dropdown, the template dynamically adjusts to display three or more rewards for those who have rewards greater than or equal to 3.
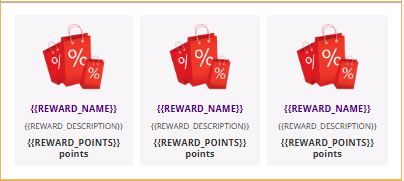
Note: To add custom conditions, please contact us at [email protected].
- Containers: When the Containers feature is enabled, it displays the variables linked to rewards.
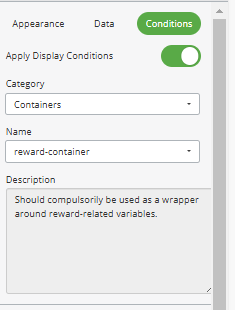
- Custom: Custom conditions are currently not supported. If you require custom conditions, please reach out to your account manager for assistance.
Blocks
Blocks represent the foundational level of the email element hierarchy.
When in editor mode, you can access all 9 fundamental blocks from the "Content" → "Blocks" menu.
These blocks include essential components for building email elements: image, text, button, spacer, video, social media links, banner, menu and custom HTML element.
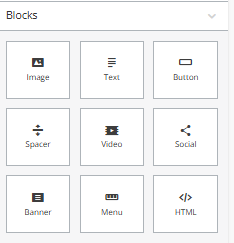
To incorporate any of these blocks, simply drag and drop them into your email template and then customize as needed.
For additional details about each block, please check this link.
Modules
Modules are universal building blocks of email templates, encompassing containers, structures, and stripes, designed to enhance and expedite the email creation process. With Zinrelo email editor, you can create, save, and customize your own modules for consistent and efficient design.
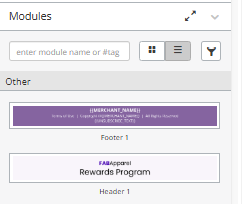
To save a custom module:
- Hover over the Element: Identify the stripe, structure, or container you want to save and click on the "Save as module" option.

- Assign a Name: Provide a meaningful name in the settings panel.
- Add a Description (Optional): Include details about the module’s purpose or content for future clarity.
- Categorize the Module: Choose or create a category to streamline searching.
- Use Tags for Organization: Add relevant tags to group similar modules; multiple tags can be applied.
- Click "Save": The module is now stored under Modules and ready for reuse.
Once saved, simply drag and drop the module into other emails or templates within your project for quick application.
Synchronized Modules
Synchronized Modules make it simple to update designs or details across multiple email templates effortlessly. Instead of manually changing every module, activating synchronization ensures that edits to a module are automatically applied to all templates that are using this module.
To activate synchronization, navigate to Content>> Modules>> specific module for which you want to activate synchronization.
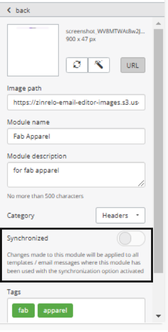
Turn On Synchronization
- Identify Unsynchronized Modules: When synchronization is not activated, a "Sync OFF" symbol appears on the email template.

- Activate Synchronization:
- Click the "Sync OFF" symbol on the module.
- In the settings panel, toggle the "Synchronized module" control.
- Use the Module Across Templates: Add the synchronized module to any number of email templates.
Edit and Update the Module
You need to update the module when you make any change to it and want it to be reflected in all other modules where it has been used. Updates to synchronized modules apply instantly across all templates.
- Open the email template containing the module.
- Click the "Sync OFF" symbol, then update the module in the settings panel.
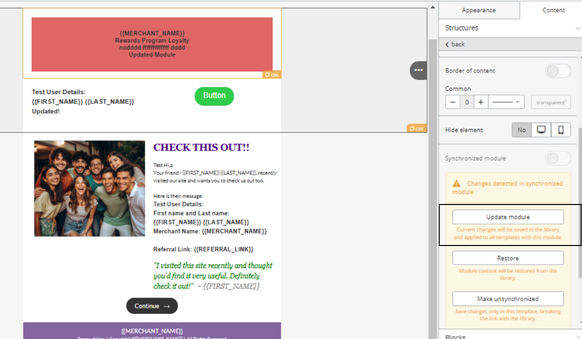
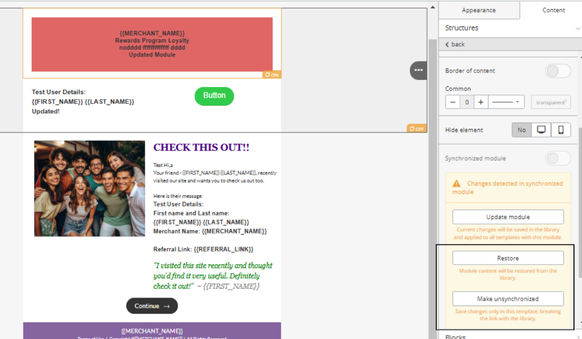
Restoration and Customization: Revert the module to its default version, which is stored in the library.
Make Unsynchronized: Break the synchronization to customize the modules individually.
Frequently Asked Questions
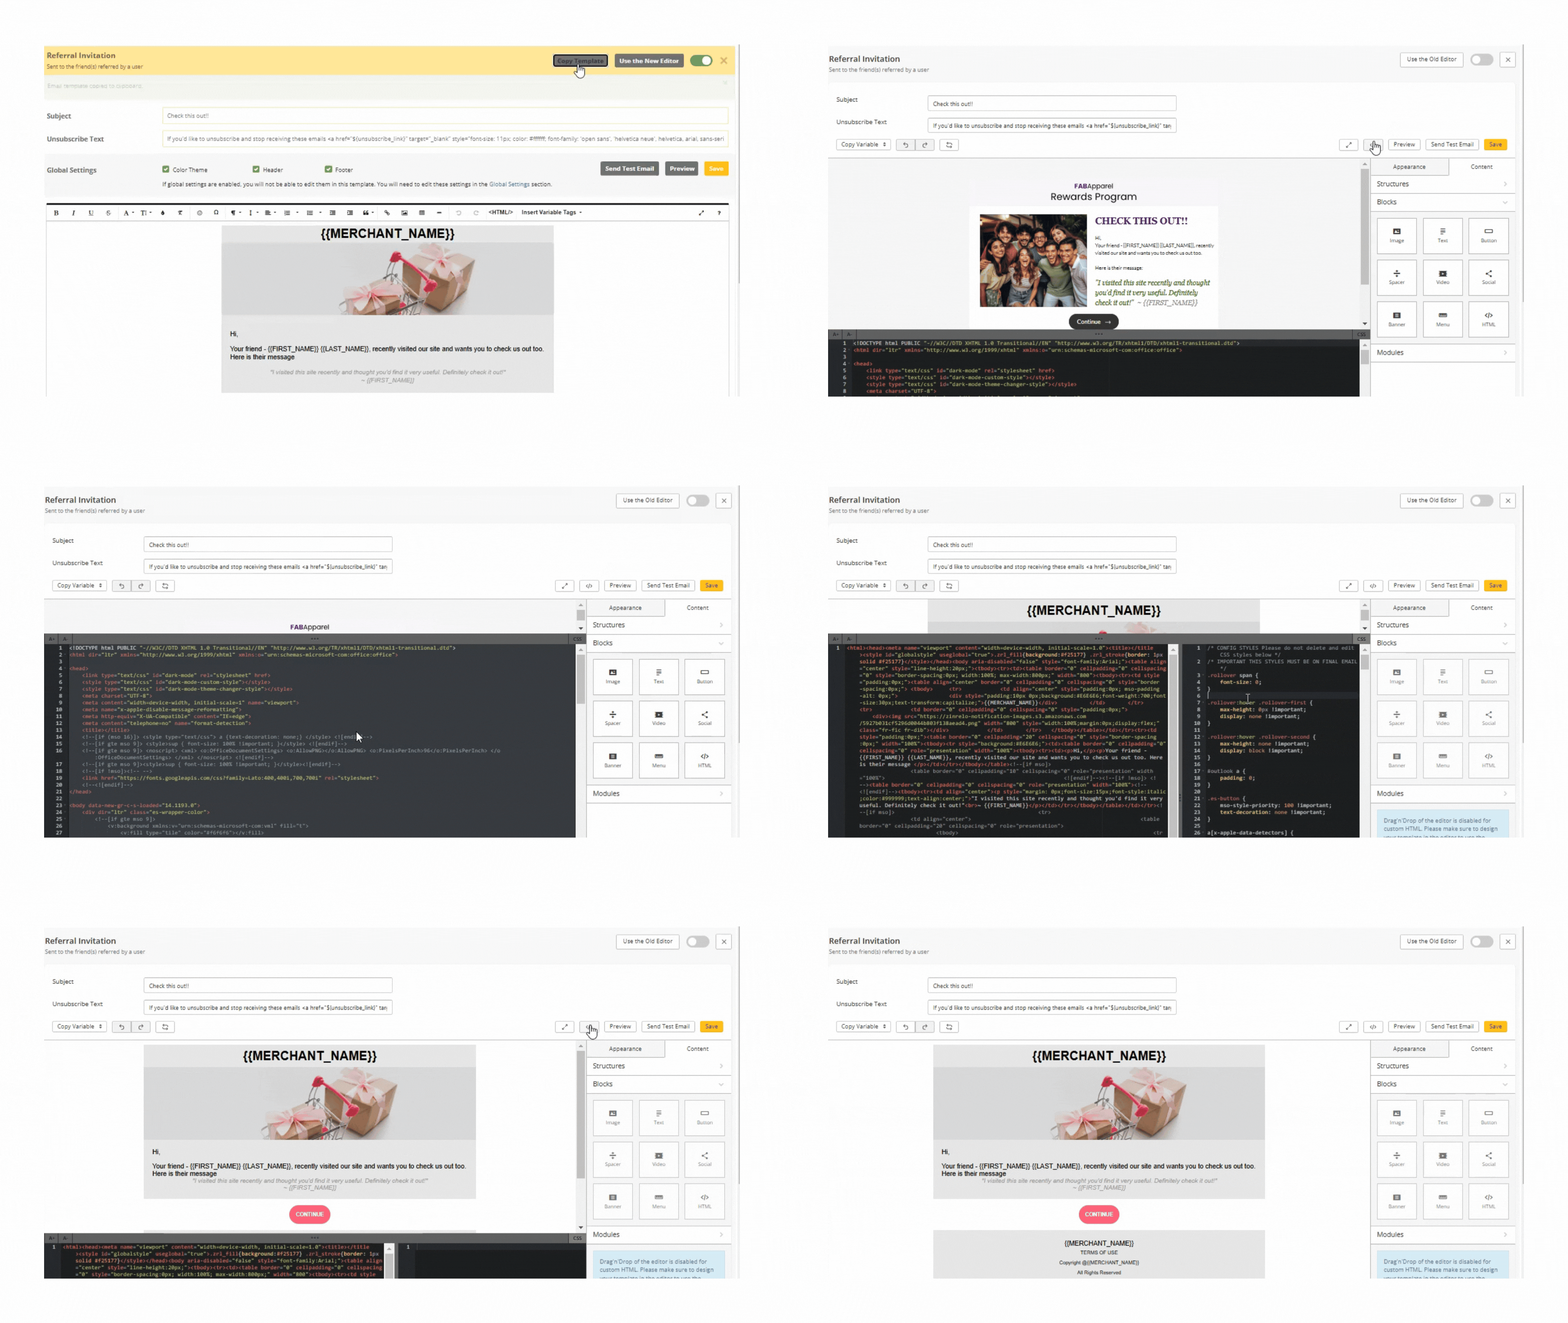
I want to import my old template into the new email editor. How can I achieve this?
To import your old template into the new email editor, follow these steps:
- Click on “Copy Template.”

- Switch to the new editor by selecting “Use the New Editor.”
- Open the “Code Editor” and remove all the existing HTML.
- Paste your copied template code in the editor.
- Ensure that all old CSS is removed to prevent any style conflicts and match your new design specifications.
For additional guidance, refer to the GIF for further clarification.
Updated 2 months ago

