
Import Members into the Loyalty Program
This article contains information about the procedure to import new members to your loyalty program or to update attributes for any of the existing loyalty members.
Introduction
This help document will guide you through the process of importing members in the loyalty program by uploading a csv file. The import process can also be used to update information of existing members.
Disclaimer:
- If you have enabled member information sync with Listrak, please note that the information of members imported using this functionality will not be synced. However, the updates occurring henceforth to loyalty points information will be synced seamlessly.
- If you have implemented ‘Webhook’ for receiving event updates from Zinrelo, please note that webhook events for the bulk import of members will not be posted to your webhook URL. However, the updates occurring henceforth will be posted to the webhook URL.
If you wish the CRM information to sync, or the webhook to post events to happen for bulk member import, please contact Zinrelo Customer Support at [email protected] to discuss the alternatives.
Please Note:Points Balance and Account Creation activity should not be kept in a pending state.
How to import members?
To import loyalty member data into your program, please follow these steps:
Go to the "Members" section and locate the "Import" button.

Step 1: Download the CSV file
The member data is imported into the program using a CSV file. Therefore, you need to download the file from the admin console and fill in the required details.
To download the CSV file, click on the hyperlinked text "Sample CSV."
Step 2: Add the member details to downloaded CSV
Enter the details of the members in the downloaded CSV. Please refer to the gif of the sample file containing the columns expected by the member import process.
Add user records that you are going to import into Zinrelo to this file with the right values going into their respective columns.
Please note that the maximum file size allowed is up to 25MB, and it supports approximately 60,000 member data. For instance, if a file contains only 25,000 members but exceeds 25MB in size, it will not be accepted.
Below is an explanation for each of the columns:
Fields | Description | Mandatory? |
|---|---|---|
member_id | Unique Identifier (Member ID) for the member object in the client’s system. | Yes |
email_address | Email address of the loyalty member. | Yes (when “make email as the primary identifier” is enabled”). Detailed in "Important Note" section of the document. |
first_name | First name of the loyalty member. | No |
last_name | Last name of the loyalty member. | No |
phone_number | Phone number of the loyalty member. | No |
preferred_language | Enter a member's preferred language.
| No |
birthdate | Birthdate of the loyalty member. | No |
member_tags | List of tags that you’d want to tag this member with. Please Note: The system generated tags cannot be created, modified or removed. | No |
member_status | Enter the status of the member, either “active”, “blocked" or “opted_out”. The member status should be passed in small cases. | No |
points_balance | Points to be awarded to the member while importing. | No |
anniversary_date | The anniversary date for the loyalty member can either be their wedding anniversary date or their enrollment anniversary date. If you wish to set the "Enrollment Date as Anniversary Date," please get in touch with your account manager at [email protected]. Expected date format: MM/DD/YYYY or MM/DD, for example-09/31/2022 or 10/31 | No |
tier_qualification_units | The total amount or points of qualifying activities performed. Please Note: For spend-based tiers, decimal values can also be passed. For example, 230.10.
| No |
twitter_handle | Twitter username of the loyalty member. | No |
address.line1 | Address of the loyalty member. | No |
address.line2 | Address of the loyalty member. | No |
address.city | Address of the loyalty member. | No |
address.state | Address of the loyalty member. | No |
address.country | Address of the loyalty member. | No |
address.postal_code | Address of the loyalty member. | No |
Custom attributes | You can pass in custom attributes that you want Zinrelo to associate with the member. The types of attributes you can create:
| No |
Important note:
- Please note that you can use the member import functionality to update all the fields of existing members except “point balance.”
- “Points balance” will not be updated for existing users. The system will read and register “point balance” only for new members enrolled in the program, for all existing members, this field will be ignored by the system.
- Member ID is the primary identifier for a member. If your program uses email address as the primary identifier, the email address value should be updated in both the Member ID as well as the email address columns.
- By default, the email address column is mandatory. However, if you wish to make this a non-mandatory field, please contact your account manager at [email protected].
- The custom attributes that you have created for your store will be automatically available in the CSV file once you download it. You can easily add or update the attributes associated with a member by simply passing the respective values in the CSV file.
- Please ensure that when passing the values of the list custom attributes and member tags, the values should be passed without any spaces within the values. For example, the value should be passed as "London,Paris,Canada".
- The CSV fields are case-sensitive.
- The file must be encoded in UTF-8 format and saved as a CSV file.
Note:Please ensure that you review the "numeric data" before adding it to any field. There is a possibility that it could be converted to a scientific data format when inserted into the CSV file. To address this, one potential solution is to modify the cell format from "General" to "Text" by using the "Format Cells" option.

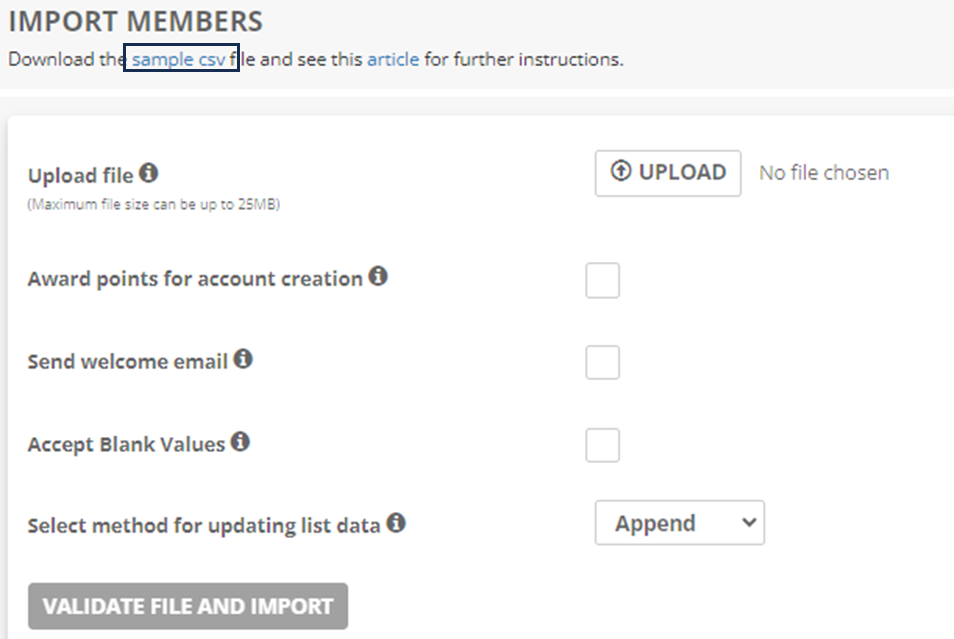
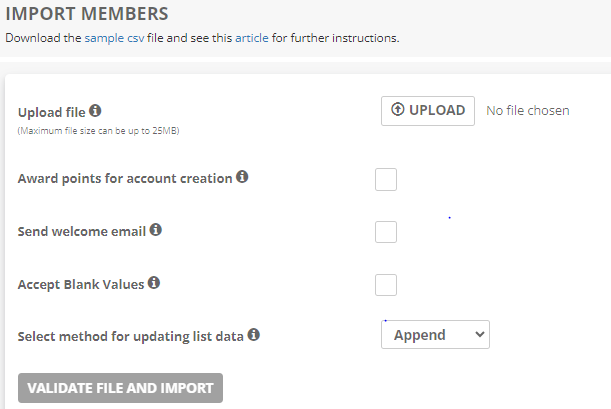
Step 3: Upload the pre-filled CSV file
Once you are ready with the file, click on the upload button and browse and select the file you wish to upload.
After you upload the file, the button “Validate File and Import” will become active.
Please Note:The csv file name should not contain any special characters.
Flags
- Award points for account creation: Enable this flag, if you wish to award points to the imported users for “account creation” activity. You can configure the settings of account creation activity, refer to the document here.
- Send welcome email: Enable this flag, if you wish to send a welcome email to the imported members. The send email flag from the member import functionality will override the notification enabled/disabled state from the notification section.
- Accept Blank Values: This flag is relevant for updates to existing member data. If the flag is enabled, blank values in the csv will be treated as valid values to overwrite existing member data. In the default state, the flag is disabled and all blank values in the csv file are ignored.
Note: Empty values cannot be passed for mandatory fields. It is compulsory to include the required information for all mandatory fields in the CSV file.
- Select method for updating list data: This flag is relevant for updates to list attributes of existing members. You can append, remove or overwrite values in existing list attributes of members.
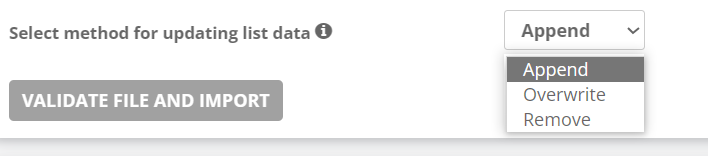
- Append: This operation will append values given in the csv file to the existing values in the member profile.
- Overwrite: This operation will overwrite values given in the csv file to the existing values in the member profile.
- Remove: This operation will remove values given in the csv file from the lists in the member profile.
Step 4: Wait for Zinrelo to run a validation scan
- Zinrelo will run a basic validation scan on the file. During this process, Zinrelo scans the entire file to run some checks. This may take a few seconds.
- If Zinrelo finds any of the columns missing or invalid values, an error popup will be shown. You will need to rectify the errors and do a fresh upload.
- If Zinrelo finds any non-fatal issues with the file, a popup will be shown with warnings and an option to “Continue” in spite of warnings or “Cancel”. Clicking on Continue will schedule the import job.
- If there are no errors or warnings during the scan, the import job will be scheduled. You will see an entry for your import job in the “Status” table below with the status - Scheduled.
- If an empty file is provided, it will be marked as invalid, and the same applies if a file with a filename that has already been uploaded is encountered.

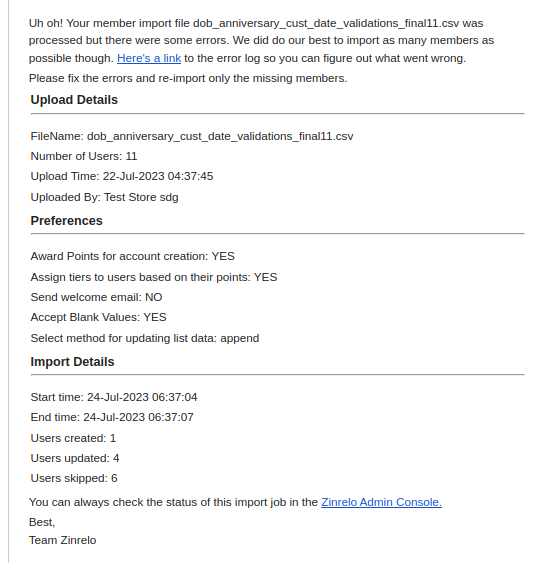
Step 5: Receive a confirmation email after the import is complete
After the import job is complete, you will receive a confirmation email with the details of the completed import job.
You can check the status of the uploaded CSV file.
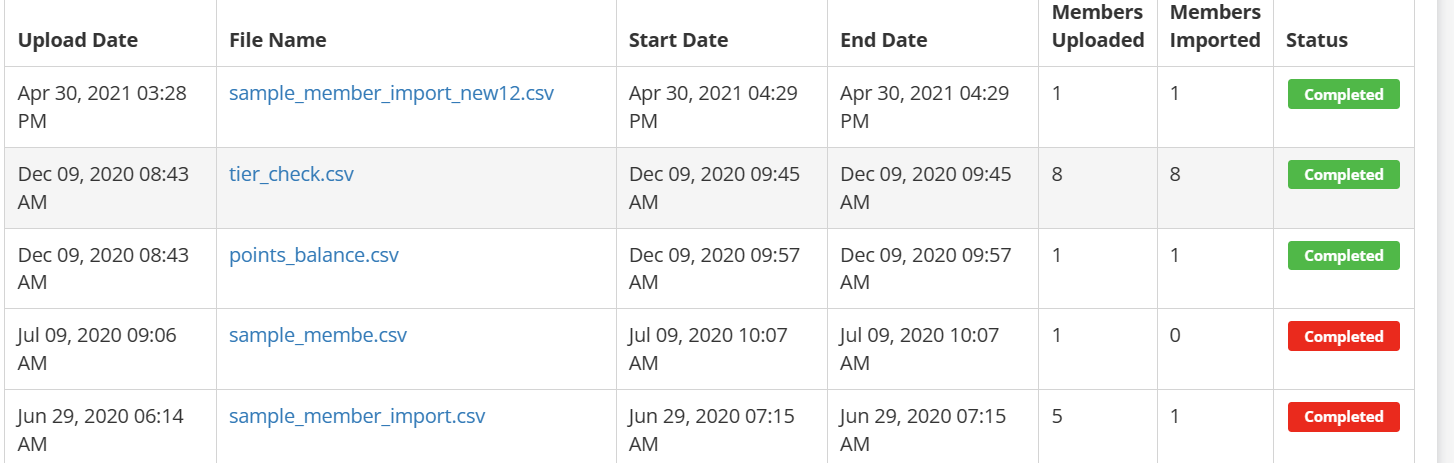
- The green color indicates successful completion of the upload process. It means that the data was processed without any critical errors and that the information has been successfully integrated into the system.
- On the other hand, the red color signifies an error during the upload process. This error could be a result of missing or invalid data, formatting issues, or any other problem that prevented the system from successfully processing the data. As shown in the provided screenshot, the "Members Uploaded" column represents the count of successfully uploaded members, while the "Member Imported" column indicates the number of member data that could not be uploaded due to errors in the file.
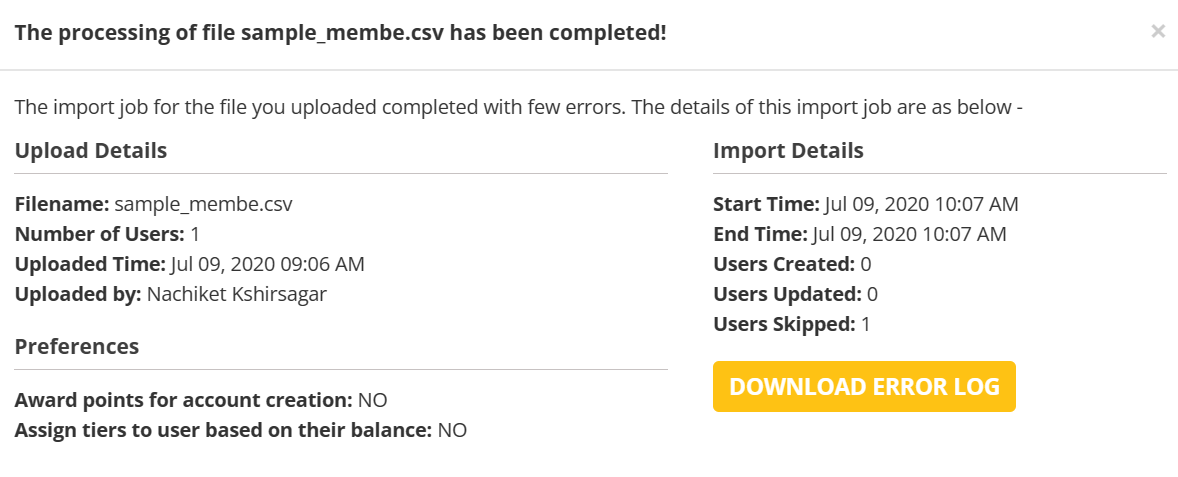
How can I check the error log?
- To have a detailed view of the errors encountered, click on the "Completed" button.
- Then, click on the "Download Error Log" option.
- The Excel file containing the error log will be downloaded. Open the file to check the list of members whose data was not imported due to errors in the file. The specific errors will be detailed in the "error" column.
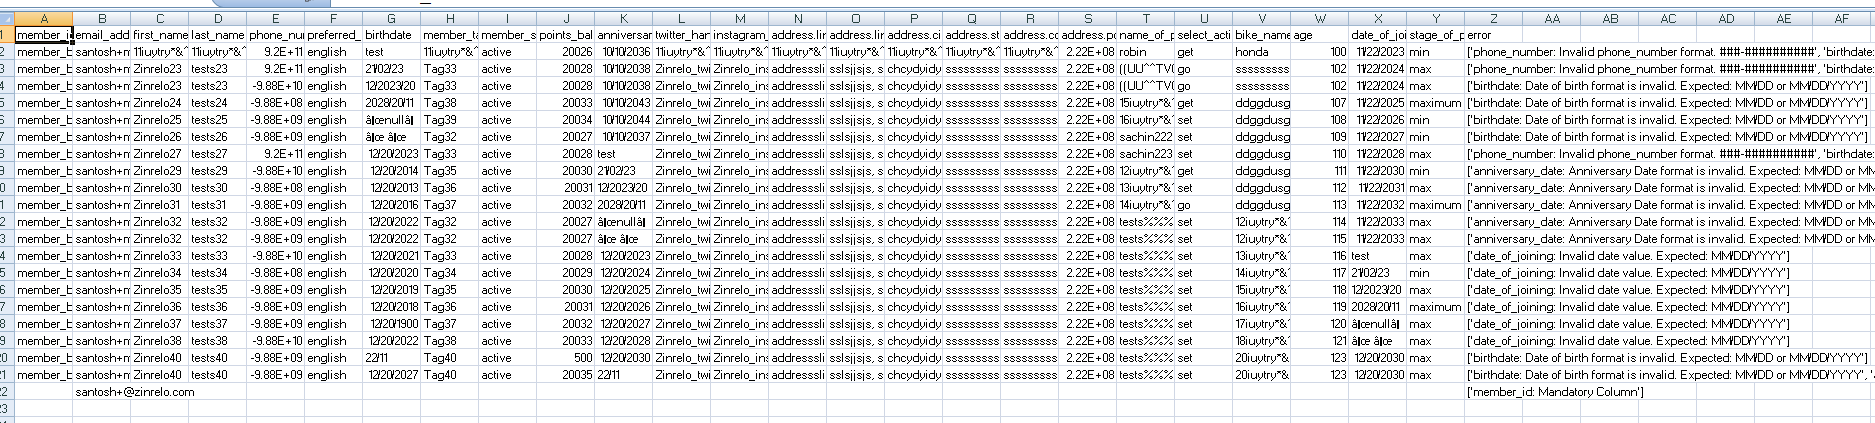
- To resolve the issues, make the necessary fixes to the CSV file.
- Finally, upload the corrected CSV file again to ensure successful data import for those members with resolved errors.
Updated 3 months ago