Upload a Photo Activity
Introduction
Zinrelo's 'Upload a Photo' activity is designed to reward customers with points when they share photos of their purchased products. This strategic initiative is aimed at motivating customers to actively participate in showcasing how they incorporate the products into their real-world scenarios. By encouraging customers to upload photos, the goal is not only to enhance user engagement but also to generate valuable user-created content.
This user-generated content serves as excellent social proof. Observing content from real customers not only increases your credibility but also puts your brand's promises into perspective. You can leverage these visuals significantly to boost your marketing efforts, providing potential customers with genuine insights into the practical and real-life applications of your products.
Create a gallery of user-generated content
How will members upload the photo?
- The member logs into the website store and navigates to the dashboard.
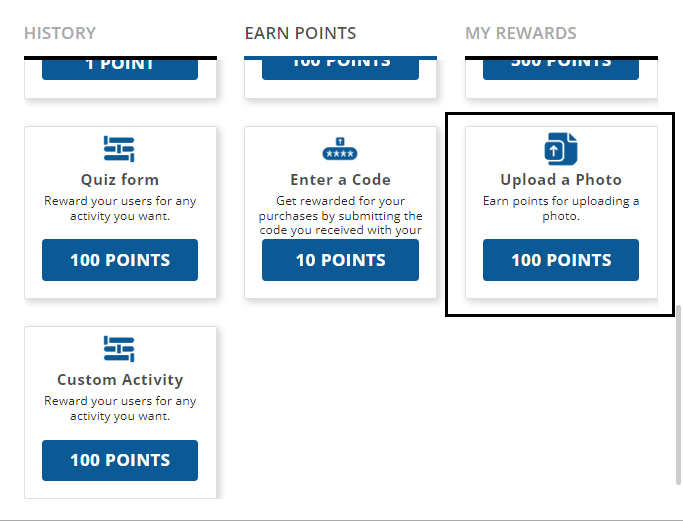
- Upon logging in, the member clicks on the "Earn Points" tab.
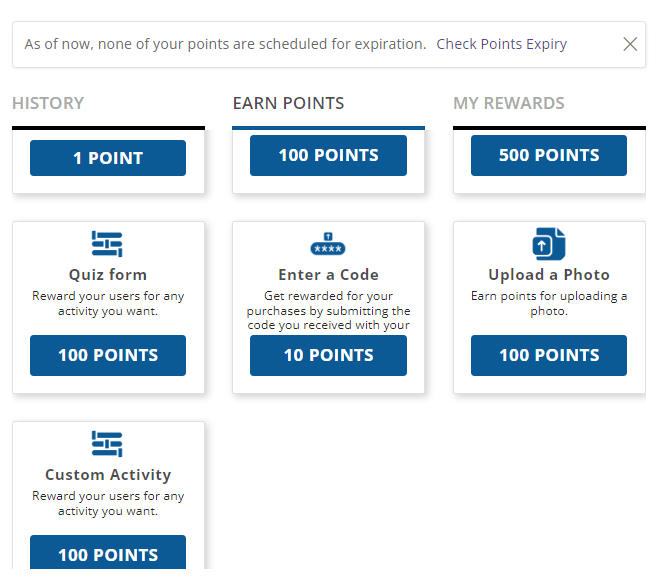
- Next, the member selects the "Upload a Photo" activity.
- Then click on the “Upload a Photo” button and select the photo to upload.
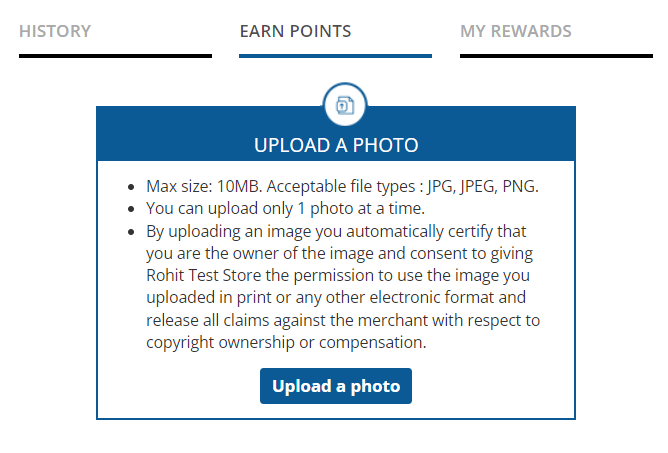
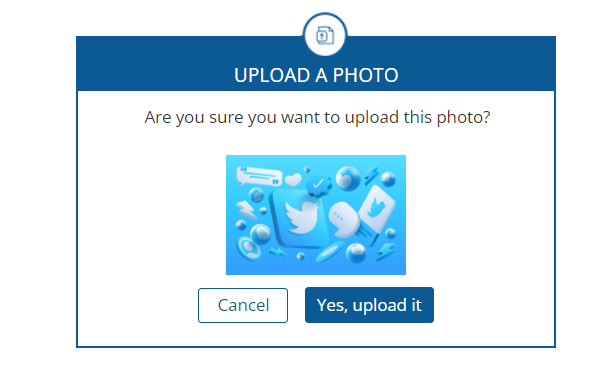
- Click on the “Yes, upload it” button.
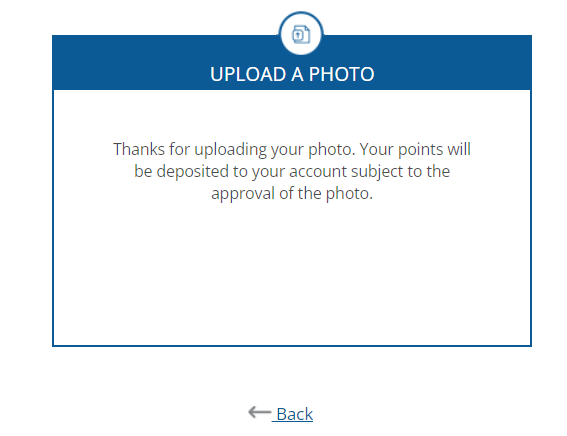
- A notification confirms the successful photo upload.
- The member can check the photo's status in the “History” tab.
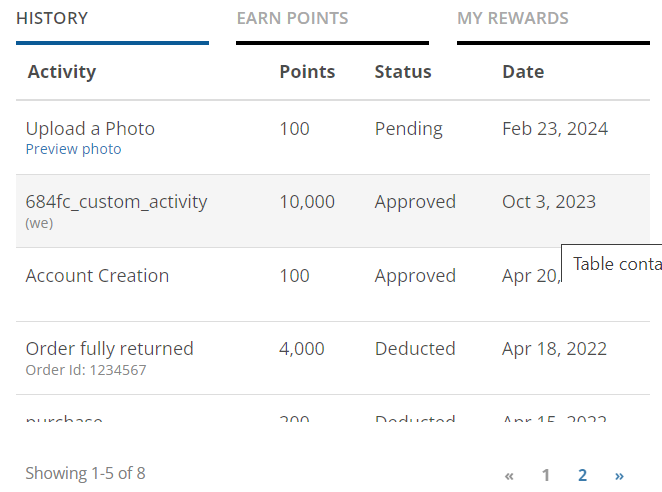
Once approved, the status in the end-user dashboard changes to “approved.”
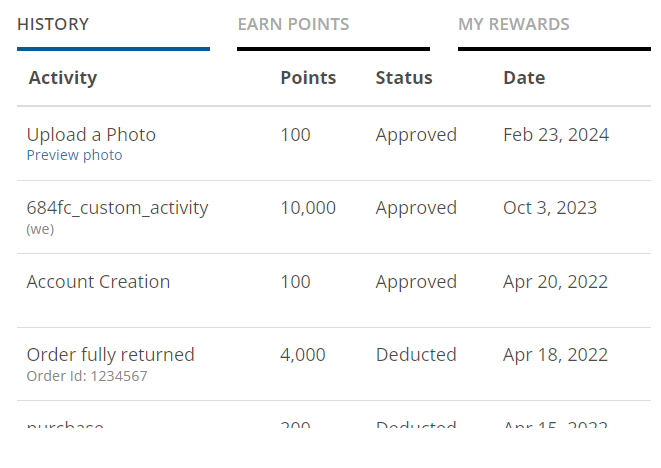
Note:Points will be awarded only after the activity is approved.
Points to be noted
- Max size of the photo should not exceed 10MB.
- The acceptable file types are JPG, JPEG, PNG.
- You can upload only 1 photo at a time.
How to manage uploaded photos?
To approve or reject the uploaded photo, follow the given steps:
- Navigate to Moderation >> Point Activity.

- Locate the desired photo and click on the hyperlinked text "Preview photo" to view the image.
- To approve or reject the photo, click on the check button and choose "Approve" or "Reject."

How to configure the activity?
Go to Program Settings >> Activities >> Click on Upload a photo activity edit button.
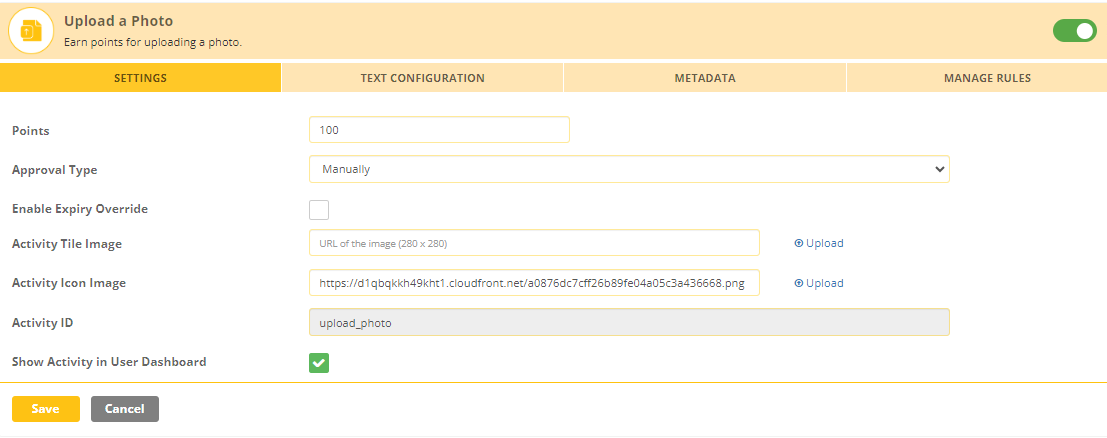
Settings
- Approval Type: You can set the approval of point allocation in different ways. It could be:
- Immediately
- Manually ( where you manually approve the request)
- After a fixed duration: You can set up a fixed duration of days after which the point will get approved automatically.
- Activity Tile Image: If you select " Visual" the system will let you upload an image of your own that will be displayed on the End-user dashboard.
- Activity ID: This field cannot be edited for the in-built activities.
- Show Activity in User Dashboard: You can opt if you want to display this activity on the End-user dashboard or hide it.
- Enable Expiry Override: Transactions for a specific activity can have a different expiry setting. To override the global settings for point expiration of an activity, enable this setting. Select the expiring period from the “Expiry Override Settings” dropdown and save. To know more about point expiration click here.
Text Configuration
You can set up the text for the activity. This text will be displayed on the end-user dashboard.
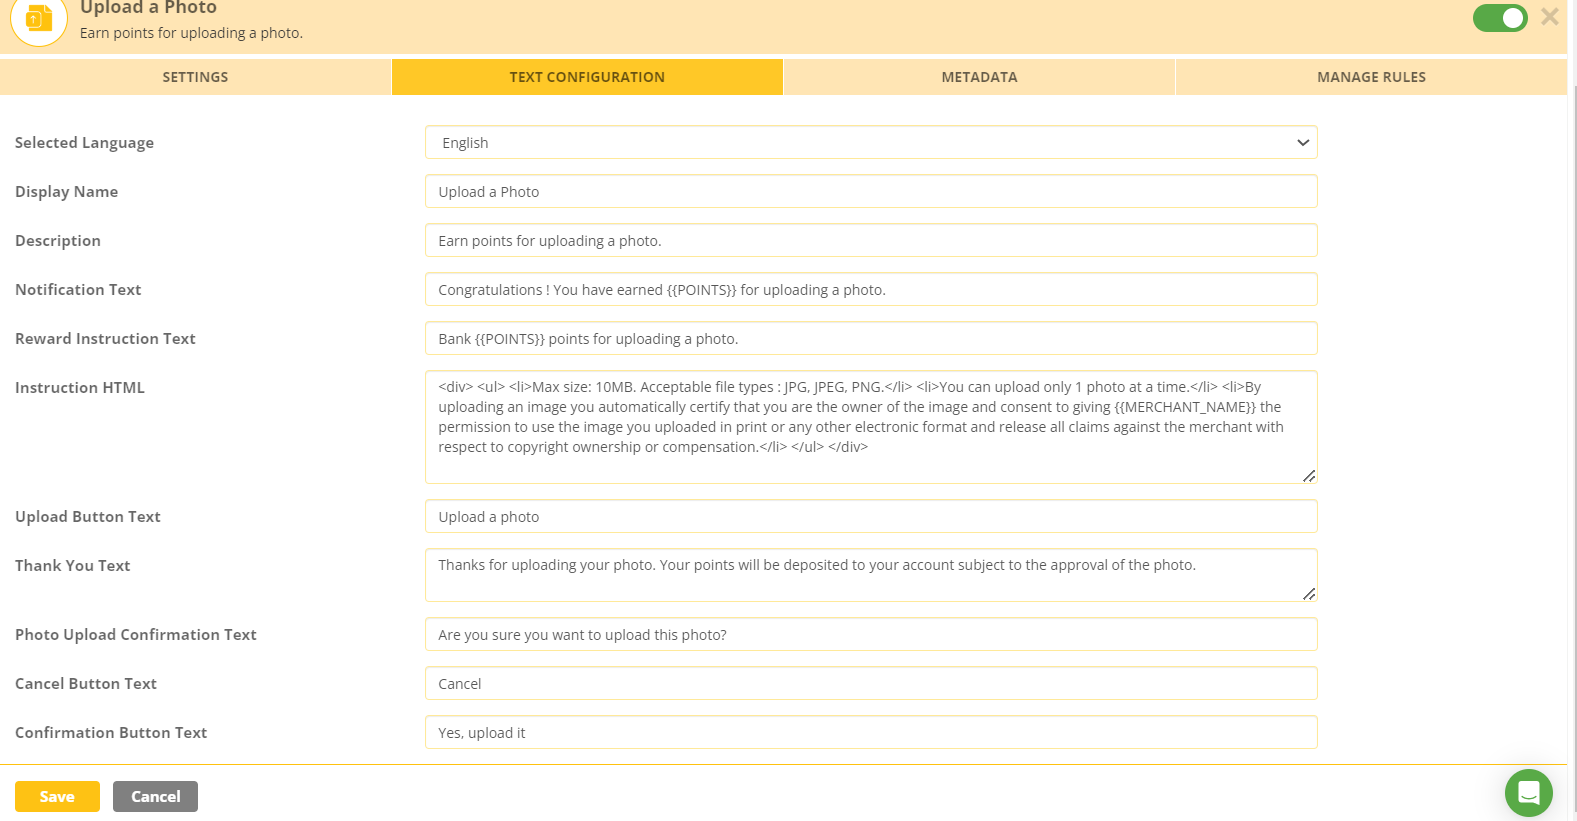
Metadata
Metadata provides additional information about activities and rewards beyond the system-defined fields. This setting allows you to program a custom experience for the activity. To learn more about metadata and its usability, click here. .
Manage Rule
You can configure different rules for the activity, allowing members to earn points based on the defined rule in addition to the default points. For more information on activity rules, refer to this help document.
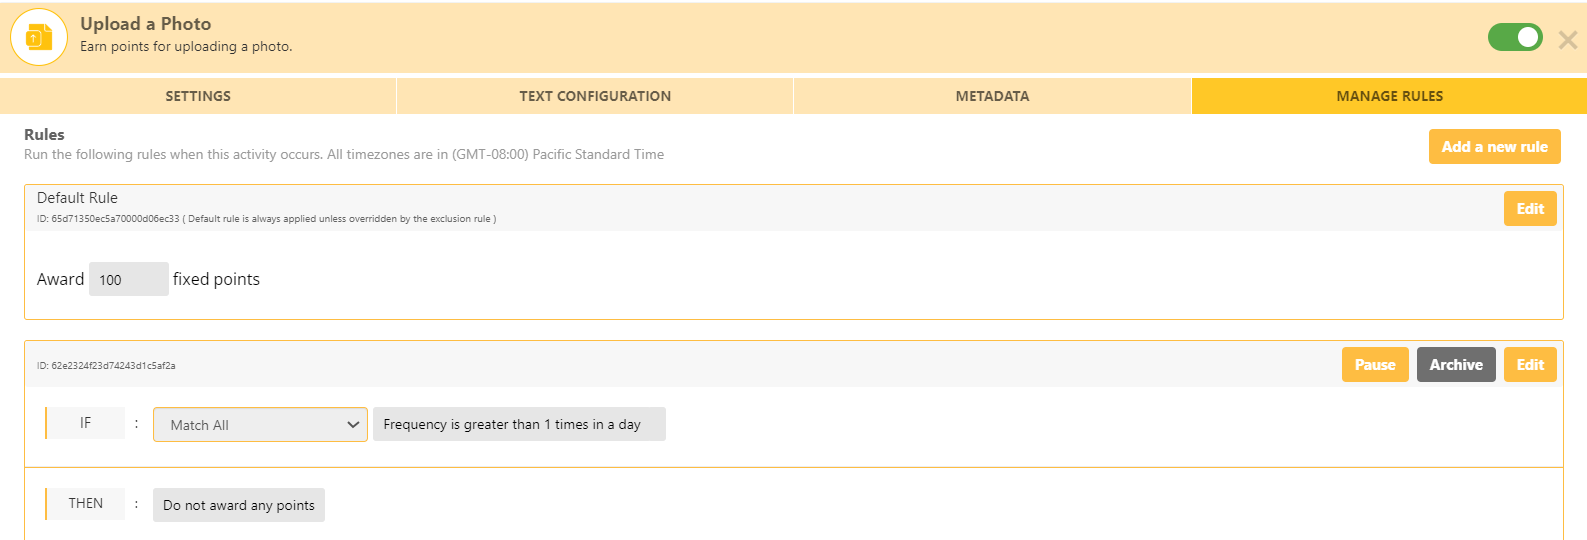
To configure the default rule, click on the "Edit" button and enter the value.

Please Note:A rule with a yearly frequency is hardcoded into the system, but you have the flexibility to add additional rules as needed.
How do I utilize the uploaded photos?
You can utilize the user-generated content to effectively harness its potential and enhance brand visibility, credibility, and engagement.
You can display the uploaded photo on your website, social media platforms, or marketing materials.
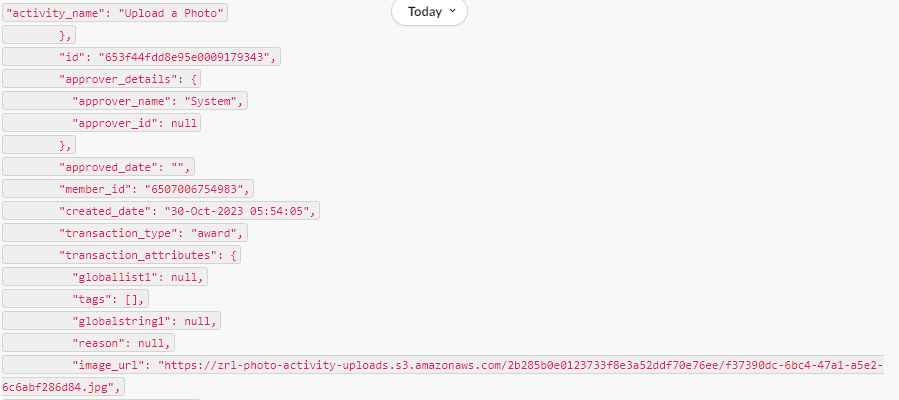
The uploaded photos can be accessed through the List all Transaction API. . Within the API response, users can retrieve image URLs and save the images.
Updated 2 months ago
