HubSpot Integration
Integrate Zinrelo and HubSpot.
If you use HubSpot’s marketing hub, you can send loyalty program notifications through your HubSpot account. You can also use loyalty data attributes from the program in your regular marketing communication. This article explains how to integrate Zinrelo with your HubSpot Marketing Hub.
Note: To integrate Zinrelo and HubSpot, you need to be on the ‘Professional’ or ‘Enterprise’ plan in HubSpot.
Integration Overview
The integration between Zinrelo and HubSpot allows you to easily set up Zinrelo’s default email notifications in HubSpot. This section will give an overview of how integration works.
Creation of Contact Properties in HubSpot
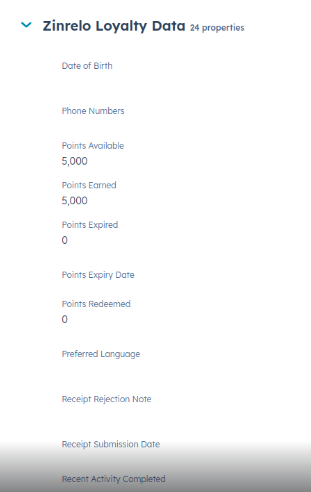
When Zinrelo is connected with HubSpot, a new group of contact properties by the name ‘Zinrelo Loyalty Data’ is created. New contact properties are created in this group to store the data from the loyalty program. These contact properties can be used in other email campaigns in HubSpot. That said, some of the properties are created for specific loyalty program notifications and won’t be applicable for other marketing campaigns.
The list of contact properties created can be viewed in HubSpot under the ‘Zinrelo Loyalty Data’ group.
Data Synchronization
After Zinrelo and HubSpot apps are connected, every new transaction in the loyalty program triggers a data push to HubSpot. The data of the respective member is updated in the HubSpot contact properties. Since data is updated after a transaction, only data for members who have some transaction in the program after the integration is set up will be available in HubSpot.
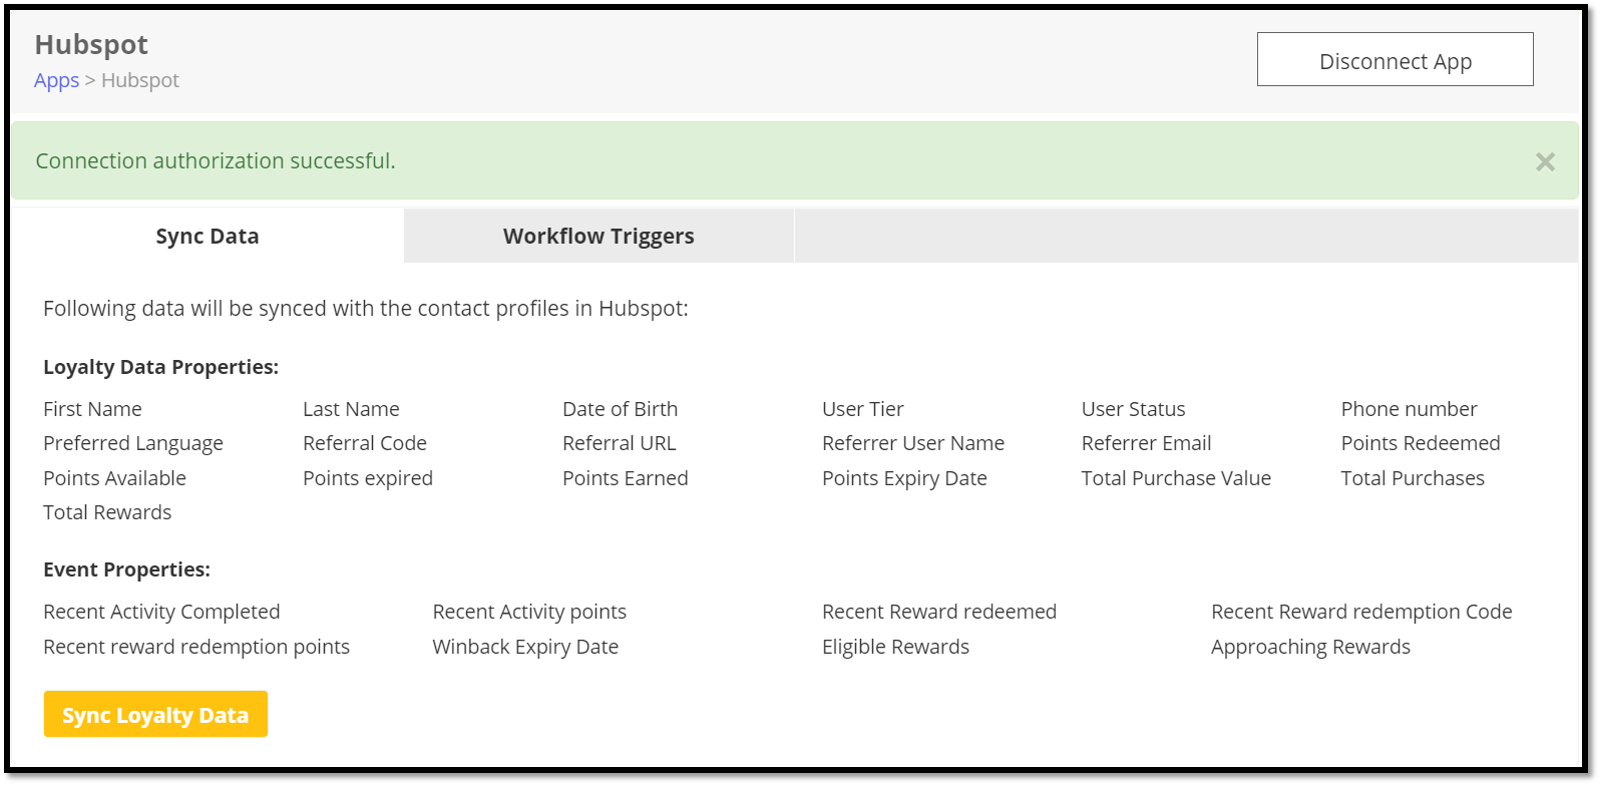
An option is provided in the Zinrelo admin to sync the loyalty data for all members.
Workflow Setup
Zinrelo’s standard email notifications can be configured in HubSpot easily. These can be enabled from the Zinrelo admin and corresponding workflows are automatically created in HubSpot. Further, the HTML for the notifications is also provided in the Zinrelo admin so that it can be copy-pasted in the respective HubSpot workflows.
Setup Instructions
The integration can be completed in 3 easy steps. Let’s look at these steps in detail
Step 1: Connect Zinrelo to HubSpot
- Login to your Zinrelo admin account and navigate to the ‘Apps’ section in the “General” menu. Select HubSpot and proceed to connect your HubSpot account with Zinrelo.
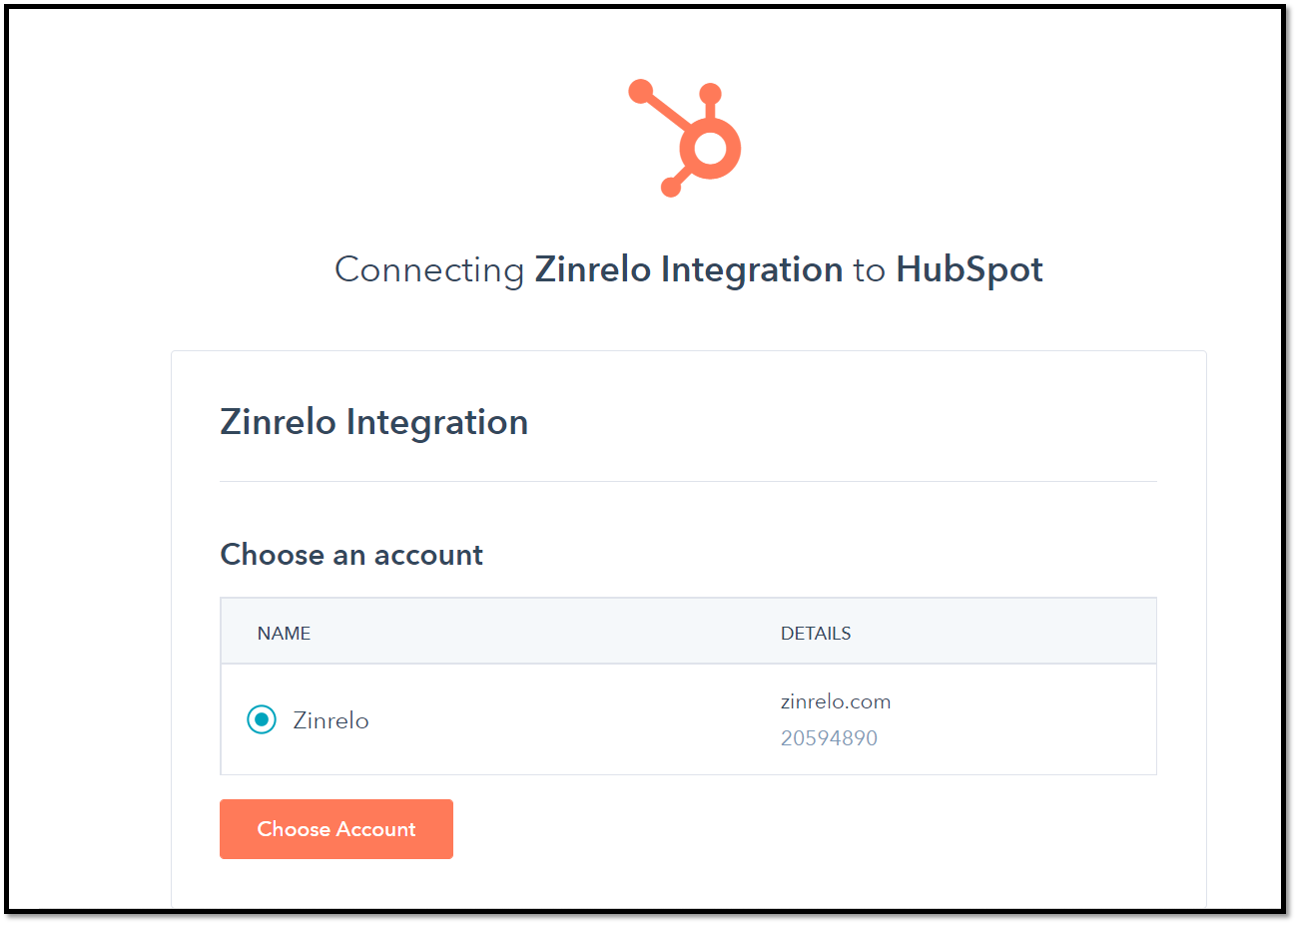
- When you click “Connect to HubSpot”, you will be prompted to log in to HubSpot and select the HubSpot account that you wish to connect to.
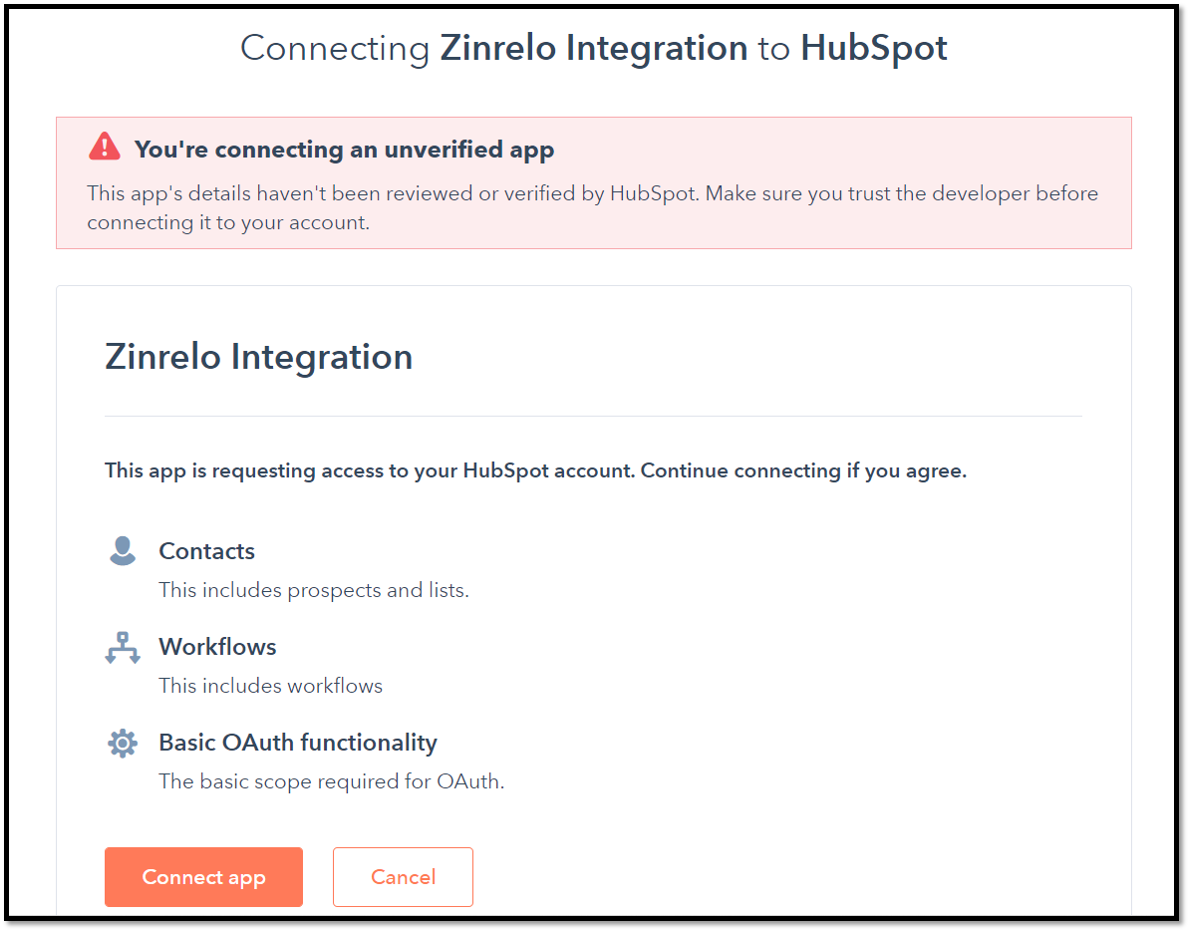
- Grant the required permissions and proceed to connect the app. (If you get a warning about an unverified app, ignore it. The app will be verified by HubSpot when there are a certain number of active users of the integration)
Please Note:You may encounter a redirect_uri mismatch error while setting-up the integration. Please contact your account manager at [email protected] to resolve that.
- On successful integration, you will be redirected to the Zinrelo admin and will see a success message confirming the connection.
Step 2: Sync Loyalty Data (Optional)
After the integration is set up, every new transaction in the loyalty program triggers an update in HubSpot. So data for members who perform any transaction after the integration will be available in HubSpot. But if you wish to sync the data for all members, you can use the ‘Sync Loyalty Data’ option provided in the Zinrelo admin.
This needs to be done only once as later updates will be automatically pushed to HubSpot.
Step 3: Set up Workflows in HubSpot
Create Workflows in HubSpot through Zinrelo
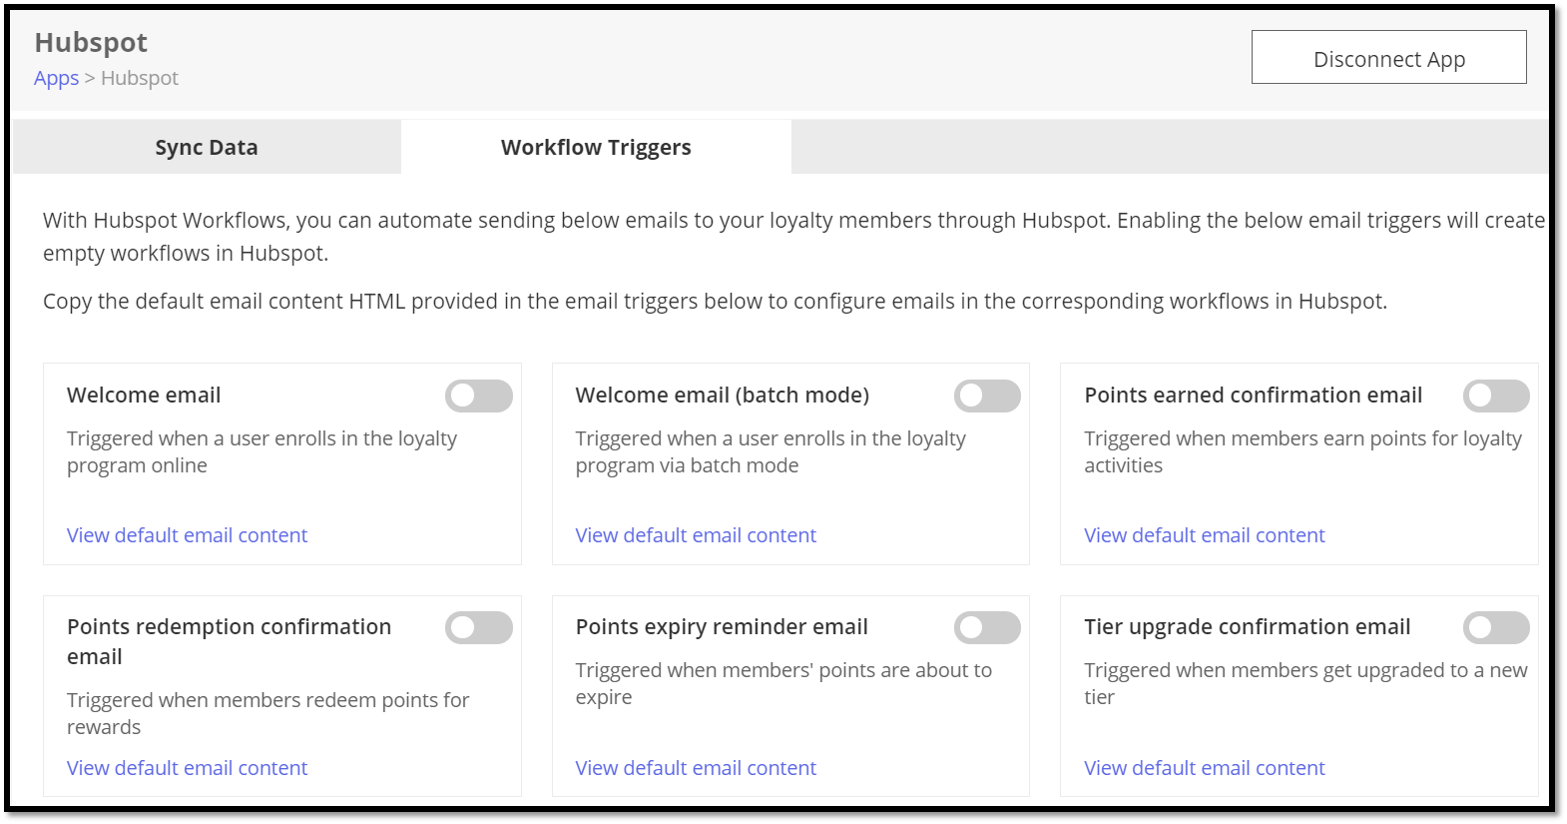
Navigate to the ‘Workflow Triggers’ tab in the HubSpot app in the Zinrelo admin. Enable the emails that you want to send.
When the emails are enabled here, corresponding workflows are automatically created in your HubSpot account.
Note: Disabling notifications from here does not delete the workflows from HubSpot.
Configure Emails in HubSpot
Emails corresponding to each workflow need to be created in HubSpot before the workflows can be published.
-
To configure emails, you first need to set up a template. You can upload Zinrelo’s default email template or use one of your existing email templates. If you want to use Zinrelo’s default email template, you can download the HTML file from this link and upload it to your HubSpot account. To upload the default Zinrelo template, go to Marketing >> Files and Templates >> Design tools option in HubSpot. Upload the Zinrelo HTML file here. Once done, this template can be used for any new emails that you create.
-
To set up the emails, log in to your HubSpot account and navigate to the Marketing >> Email section.
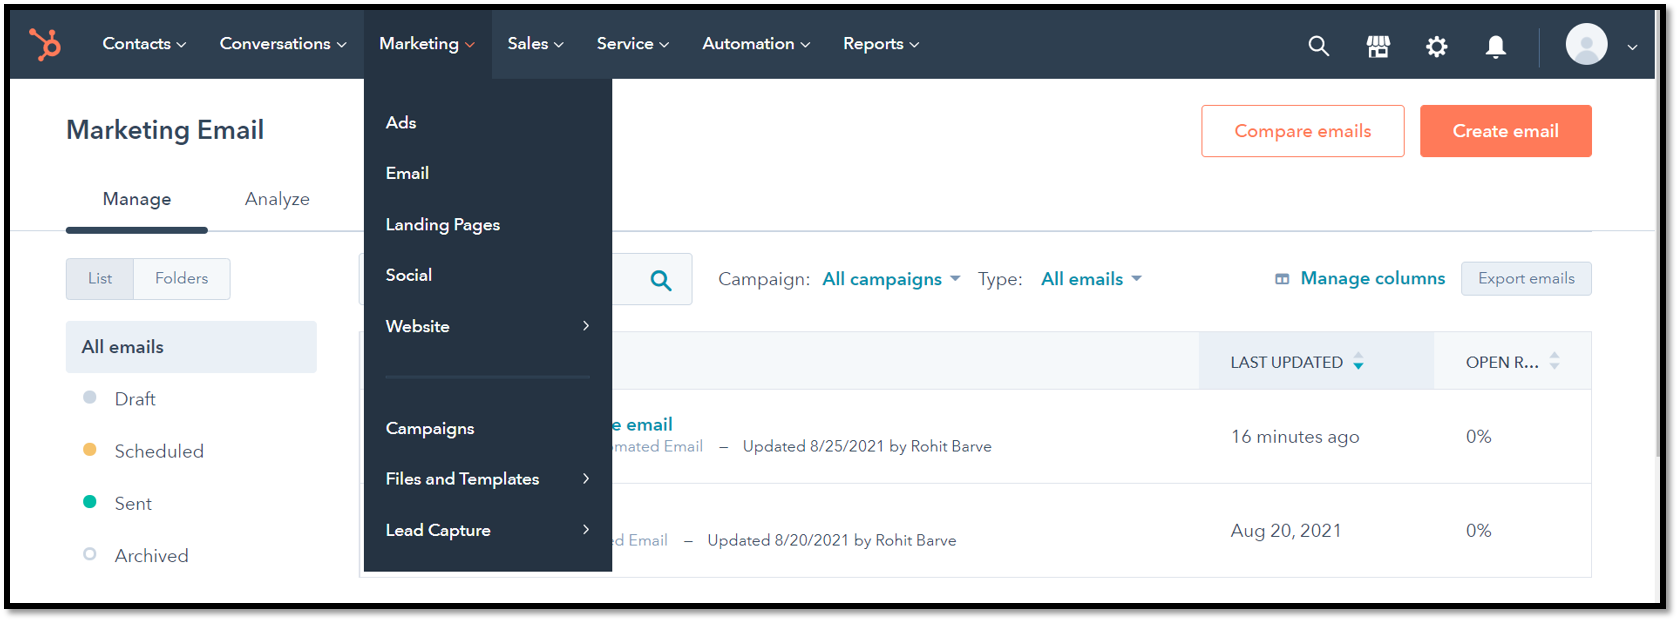
- Click on the ‘Create Email’ button and select the “Automated” email type. You will see an option to select a template. You can select your own template or use Zinrelo’s default template. If you are using one of your own templates, it is advisable to use one that allows you to edit the source HTML of the email. Zinrelo provides the HTML that needs to go in the body section of all standard emails.

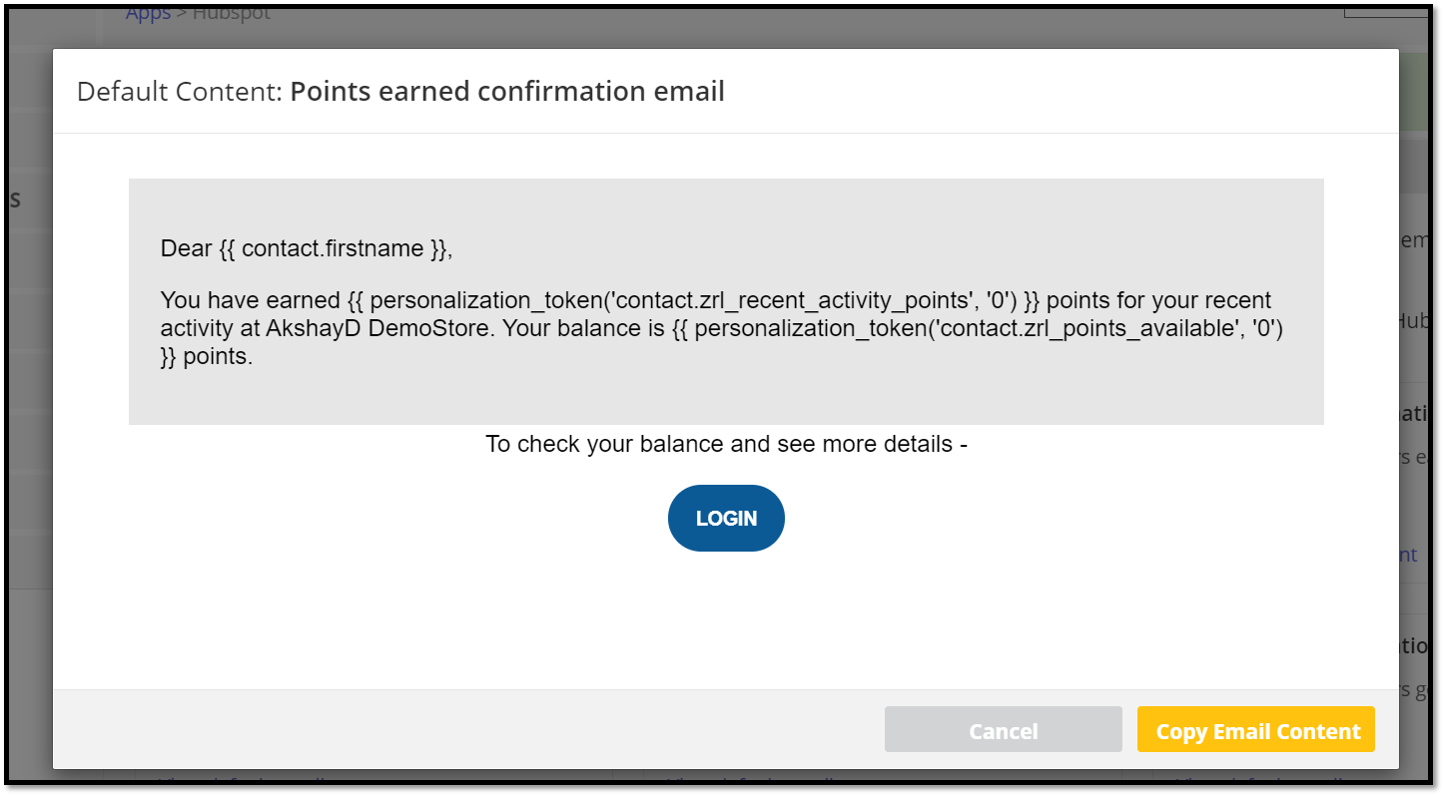
- Give a name to the email you want to create and then proceed to edit the contents. To make it easy to set up the standard email notifications, Zinrelo provides the HTML code that can be pasted in the body section of each email. The HTML code is available in the HubSpot integration section of the Zinrelo admin console. Click on the ‘View default email content’ link on the card for any of the emails. Here you will see a button to copy the email content. When clicked, the email HTML is copied to the clipboard.
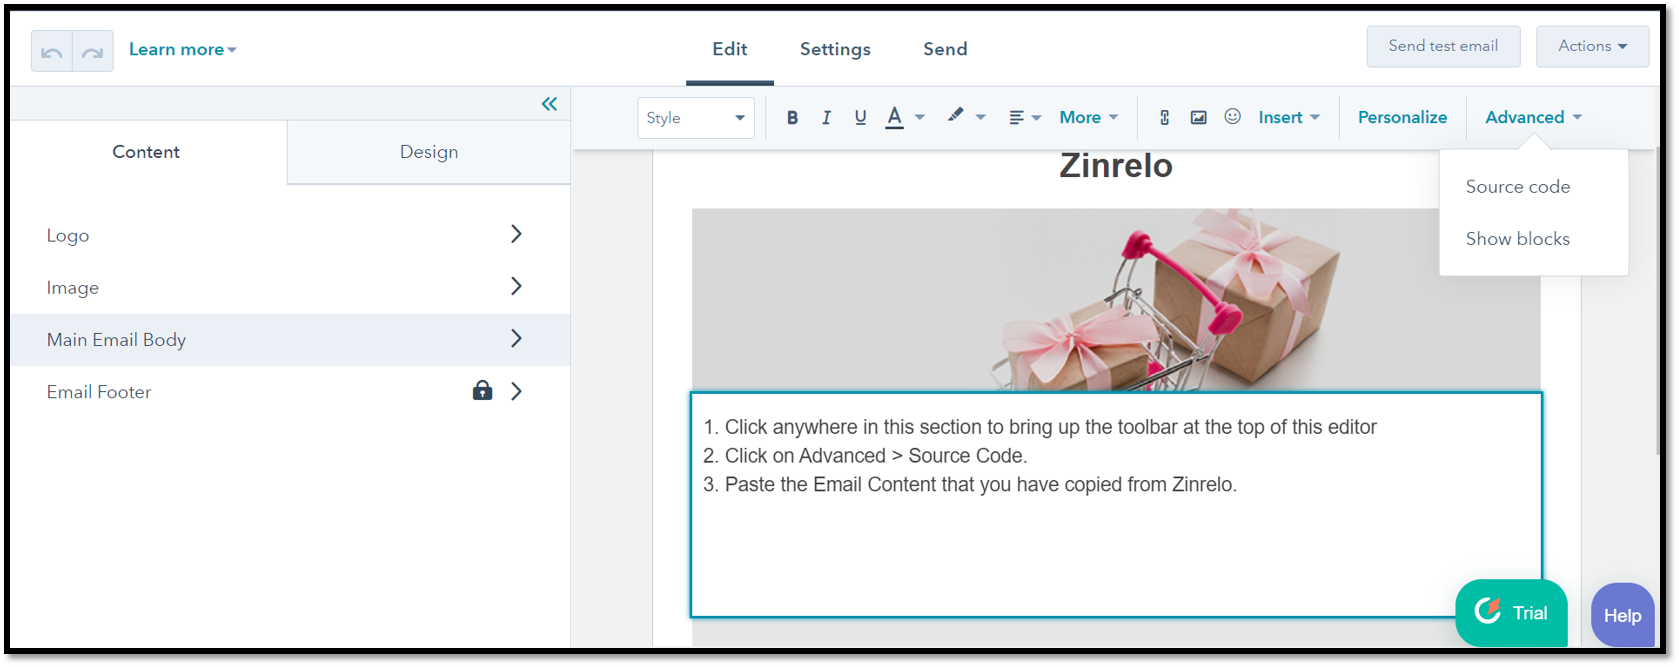
- In the HubSpot email that you are creating, go to the ‘Advanced options for the body content and choose ‘Source code’. Paste the HTML copied from Zinrelo here.
(If you don’t see an option to enter the source code, you should opt for the Zinrelo email template in HubSpot or any other template that allows you to edit the source code of the email)
- Before you can save the email, you will be prompted to update the ‘Settings’ section of the email which includes the ‘From Name’, ‘From Address’, and the ‘Subject’. Once done, click on ‘Review and Save’ to save the email created. The email is now ready to be linked to a workflow.
Link emails to Workflows
- Navigate to the workflows that you created in HubSpot through Zinrelo. Workflows can be accessed from the Automation >> Workflows section.
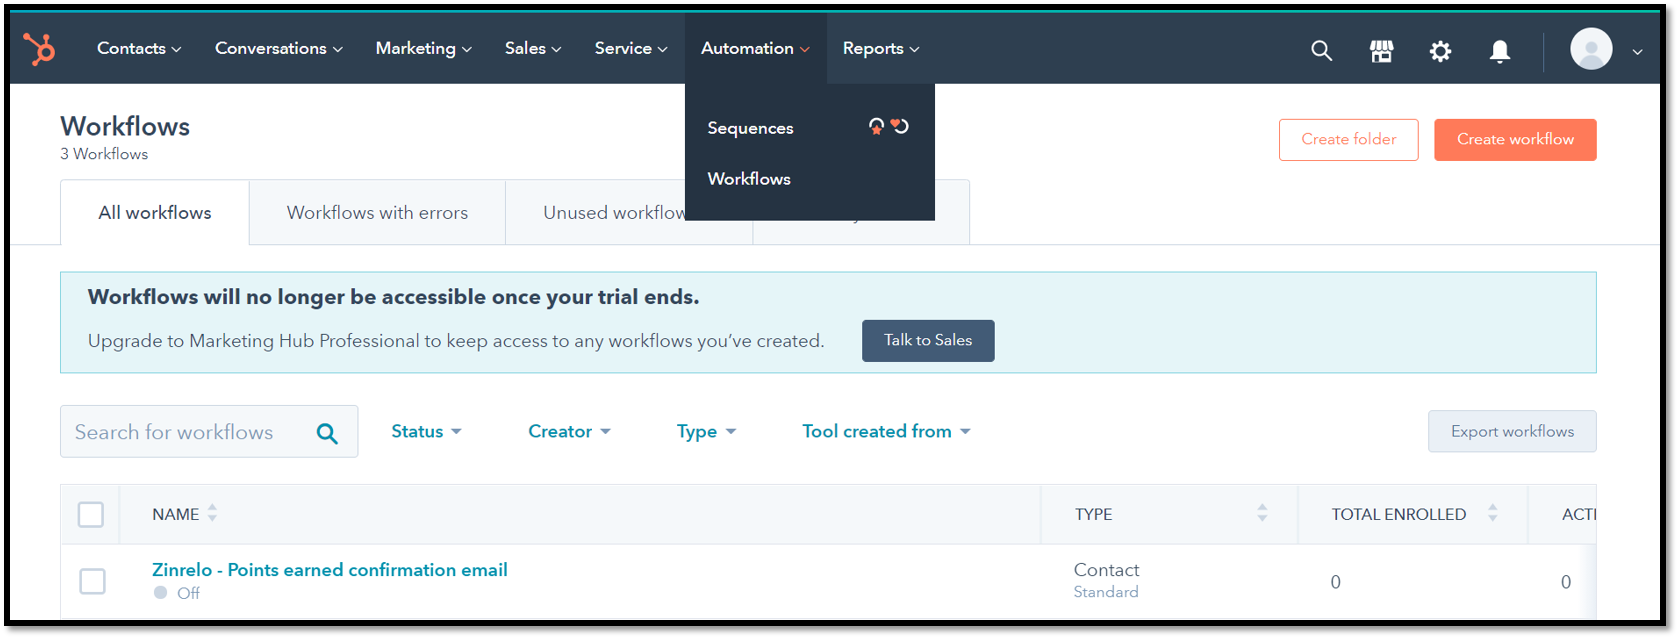
- Select the workflow that you want to publish. Click on the ‘+’ icon to add an action to the workflow and select the “Send email” option. Choose the email corresponding to the workflow. Once this is done, the workflow can be published and turned on.
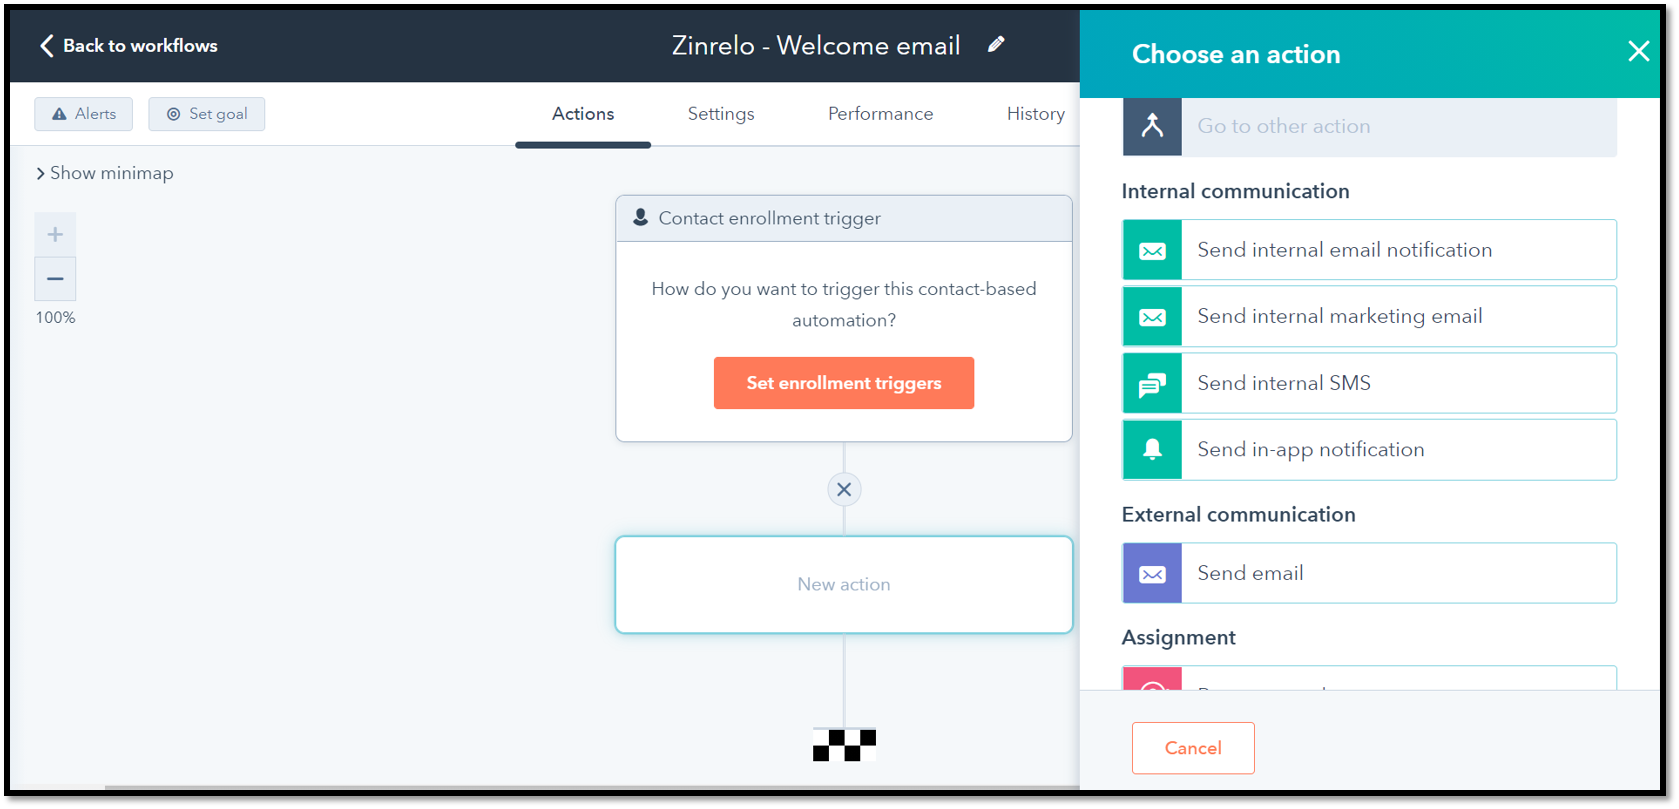
- Test the workflows you have configured by triggering the necessary events in the loyalty program.
Validating HubSpot Functionality
To validate if HubSpot is functioning correctly, follow these steps:
- Navigate to the contact page.
- Click on "Contact."
- In the "Contacts" section at the bottom, click on "View all properties."
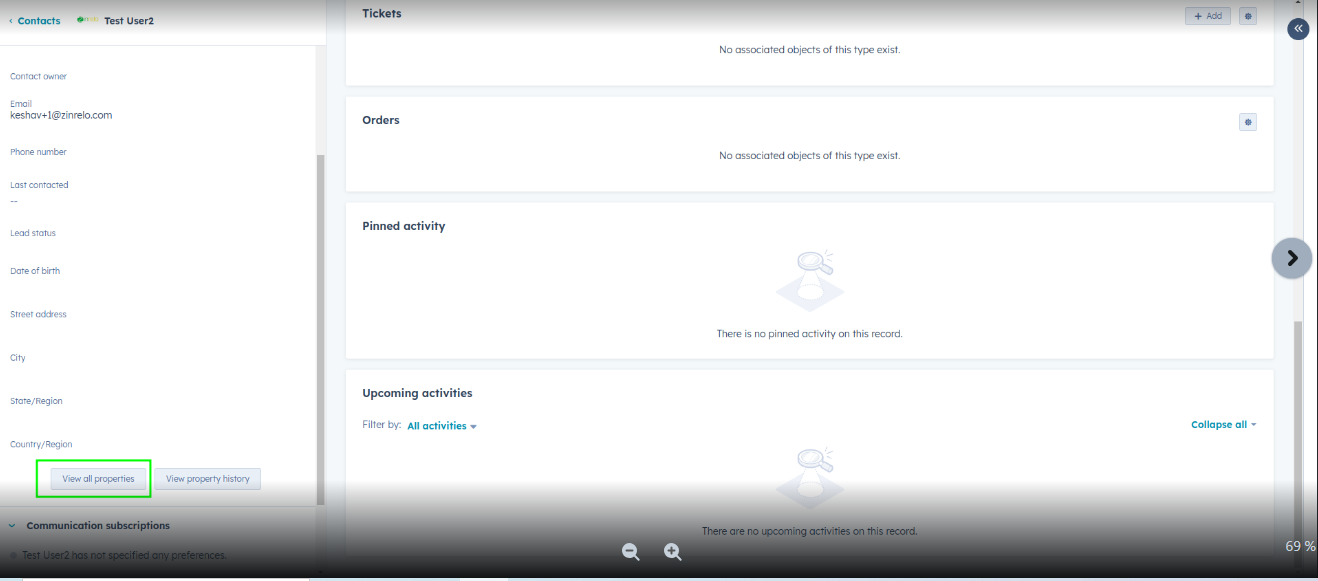
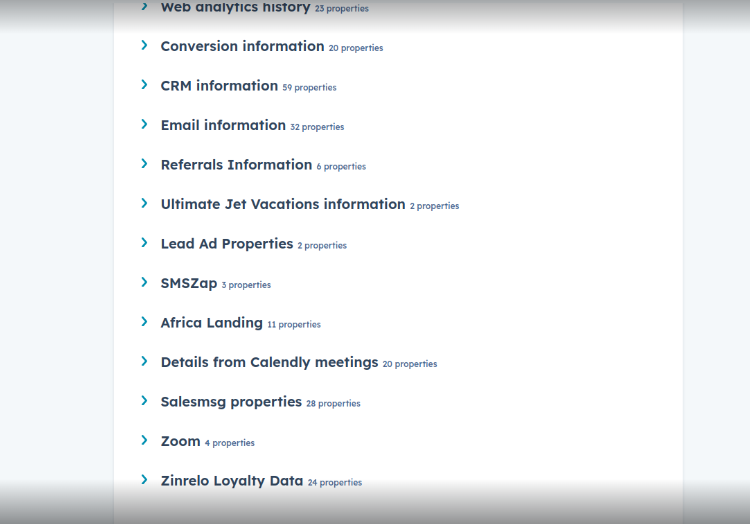
- Scroll to the end of the page.
- Under "Zinrelo Loyalty Data," you can verify the data.
Updated 2 months ago
