
Zinrelo Cartridge Integration with Salesforce Commerce Cloud
This article will guide you through SFCC integration with Zinrelo.
Introduction
In this document, you will learn how to install Zinrelo’s Salesforce Commerce Cloud cartridge and run the loyalty program on your Salesforce Commerce store.
Cartridge Installation Steps
Follow the below steps to integrate the cartridge:
Please Note:Zinrelo's plugin is compatible with SFCC version 22.7. If your platform doesn't support this version, write to us at [email protected].
Install the plugin
Click on the given link to download and install {Source code-(zip)} SFCC plugin-
https://github.com/zinrelo-org/plugin-sfcc/releases/tag/releaseV22.7
Import metadata
Compress the metadata folder, upload it to Administration > Site Development > Site Import & Export, and import the file. This will import the metadata required (System Objects, Services, Jobs, etc.).
Note: The metadata folder is available within the package parallel to the cartridge folder.
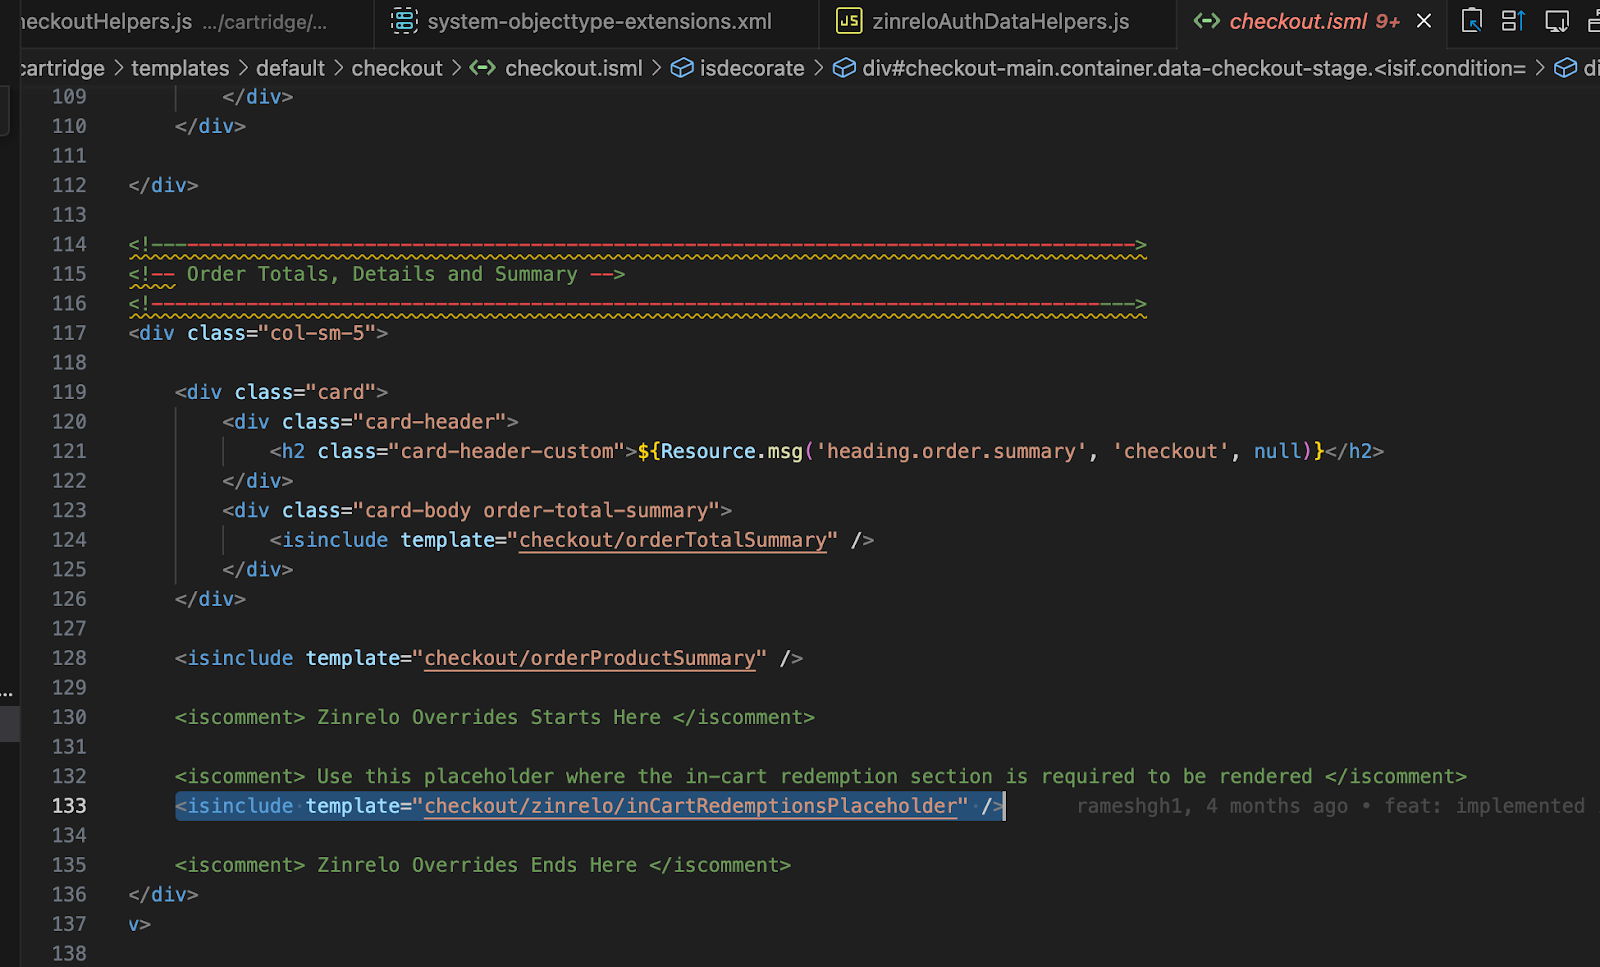
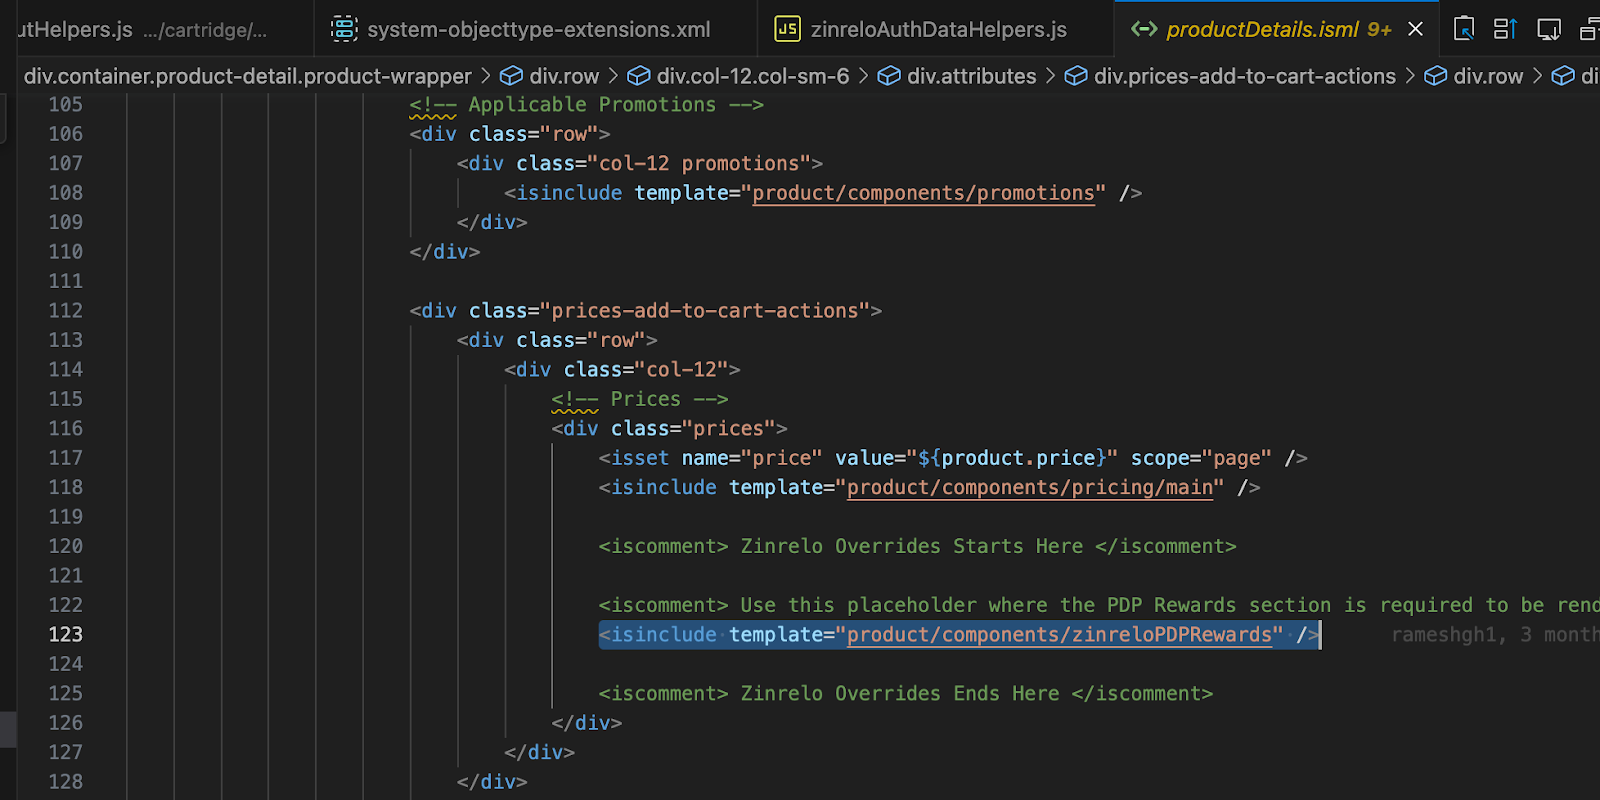
Templates Override
Some SFRA templates- checkout/checkout.isml and product/productDetails.isml are overridden in order to add Zinrelo components. These are the templates that show checkout flow and the PDP page in SFCC.
Note:This is an optional setting. Enable it only when you want the product price to be displayed in the checkout page.
Compilation
- Put the int_zinrelo_sfra cartridge in parallel to other cartridges of the project. “int_zinrelo_sfra” is the plugin cartridge that consists of all the code changes that are needed to meet Zinrelo requirements. (Zinrelo repo currently contains other required cartridges such as base cartridge and webpack plugin which can be ignored.)

- Compile the code using the regular compilation process in the project. Make sure that the Zinrelo cartridge is included in the webpack configuration. For example, if webpack is being used for compilation, add the Zinrelo cartridge in the sfraBuilderConfig.js file.
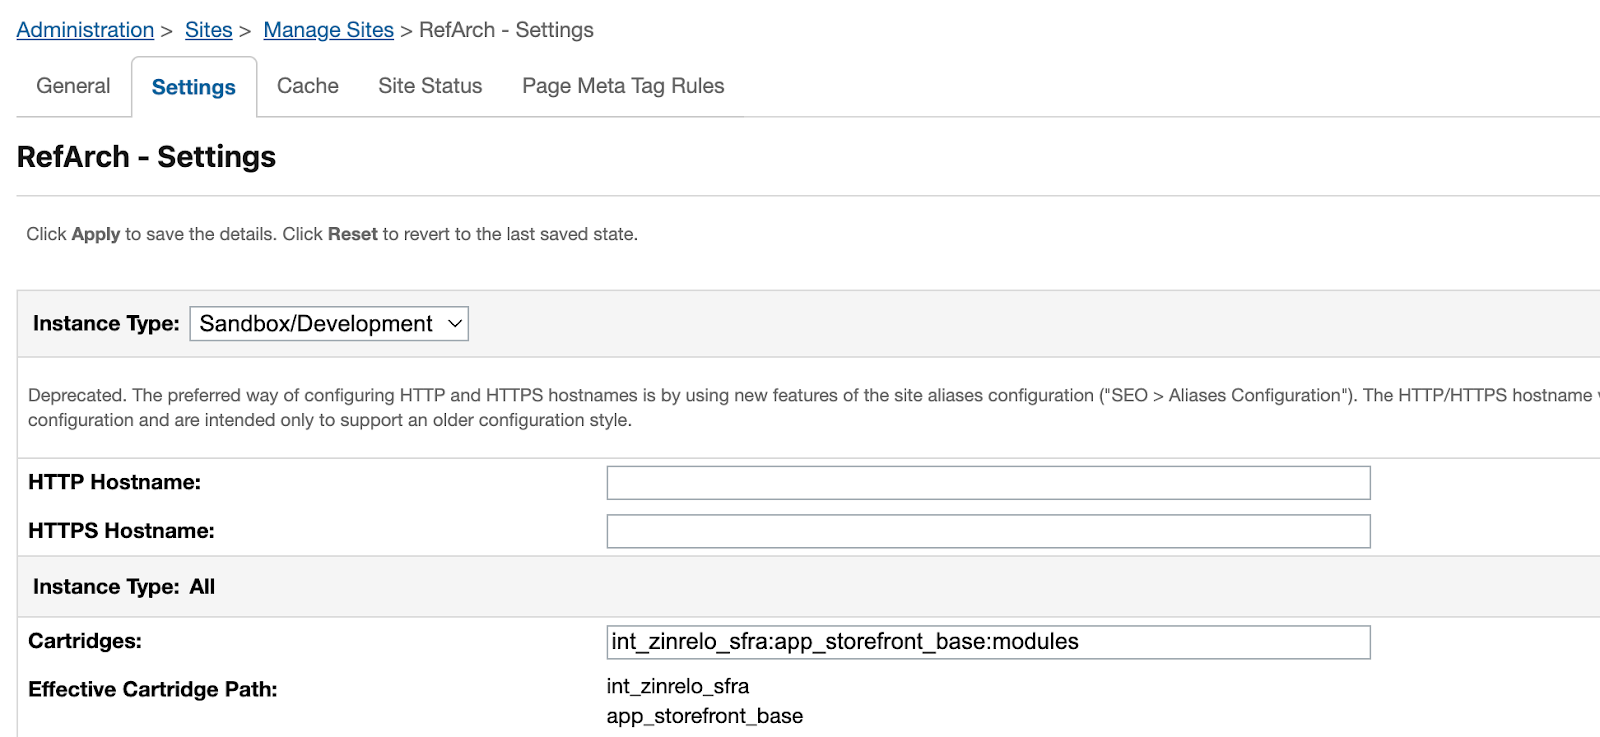
Cartridge Path Setup
Upload/deploy the code in the active code version and include int_zinrelo_sfra in the cartridge path of the site. It should be on the left of the base cartridge and on the right of any custom site cartridge.
For e.g. app_custom:int_zinrelo_sfra:app_storefront_base
Client ID Setup
In the Zinrelo integration, we’re using OCAPI and SCAPI endpoints. To be able to use these endpoints a client ID setup is required. Follow the below steps for the setup -
- Create a Client ID and Password in Account Manager > API Client.

- Provide the required roles for the test environment.
- Add the following scope in the Allowed Scope section -
sfcc.customerlists.rw and save. - Go to Business Manager Administration > Site Development > Open Commerce API Settings and configure the following settings:
Shop API OCAPI Settings
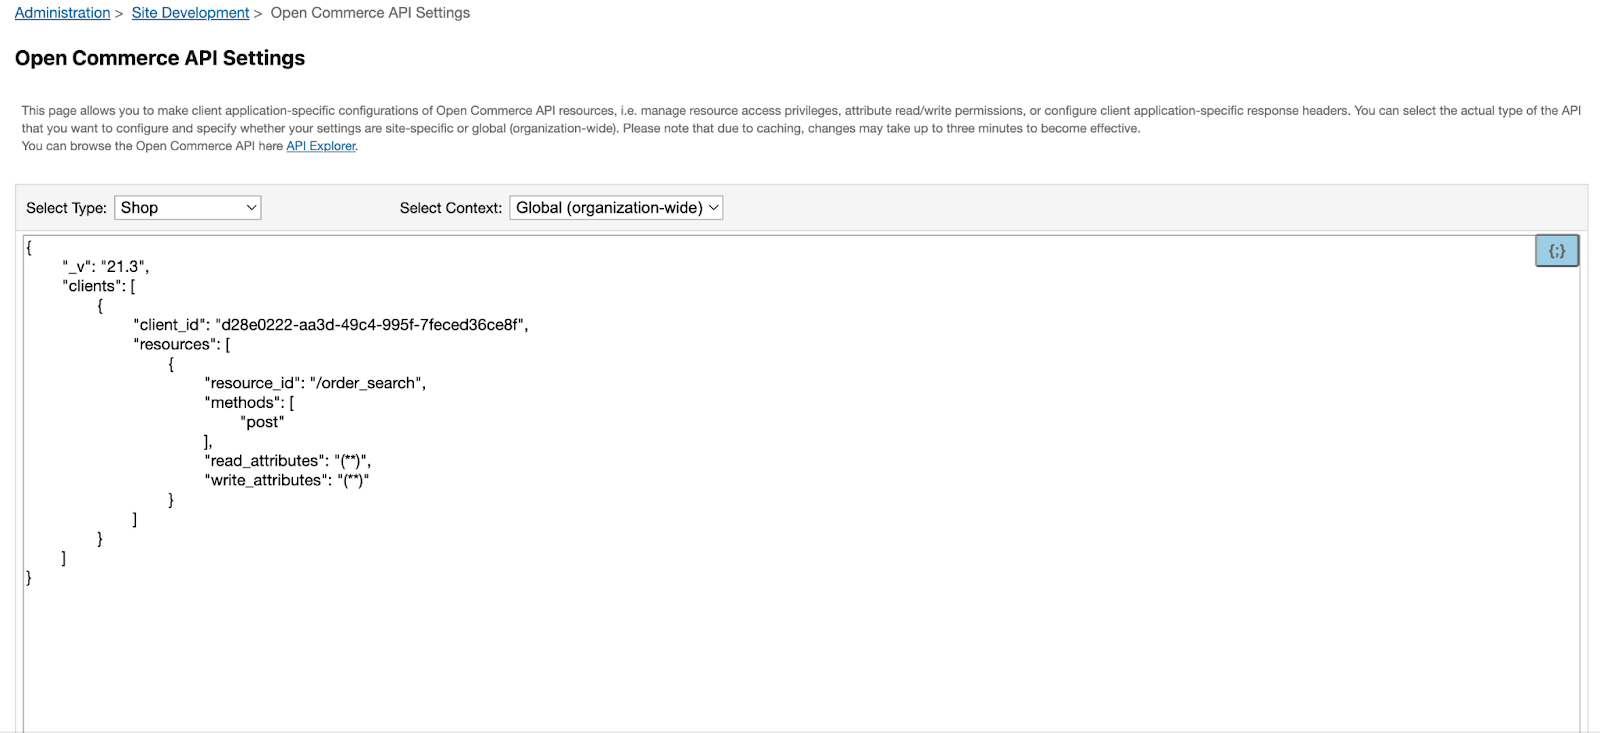
{
   "client_id": "<CLIENT_ID_HERE>",
   "resources": [
       {
           "resource_id": "/order_search",
           "methods": [
               "post"
           ],
           "read_attributes": "(**)",
           "write_attributes": "(**)"
       }
   ]
}
Data API OCAPI Settings
{
   "client_id": "<CLIENT_ID_HERE>",
   "resources": [
       {
           "resource_id": "/sites/*/coupons/*/multiple_codes",
           "methods": [
               "post"
           ],
           "read_attributes": "(**)",
           "write_attributes": "(**)"
       }
   ]
}- Set the Client ID and Client Password in the Access Token service. Go to Administration > Services > account.manager.generate.token.credentials and put Client ID in user and Client Password in the password field.
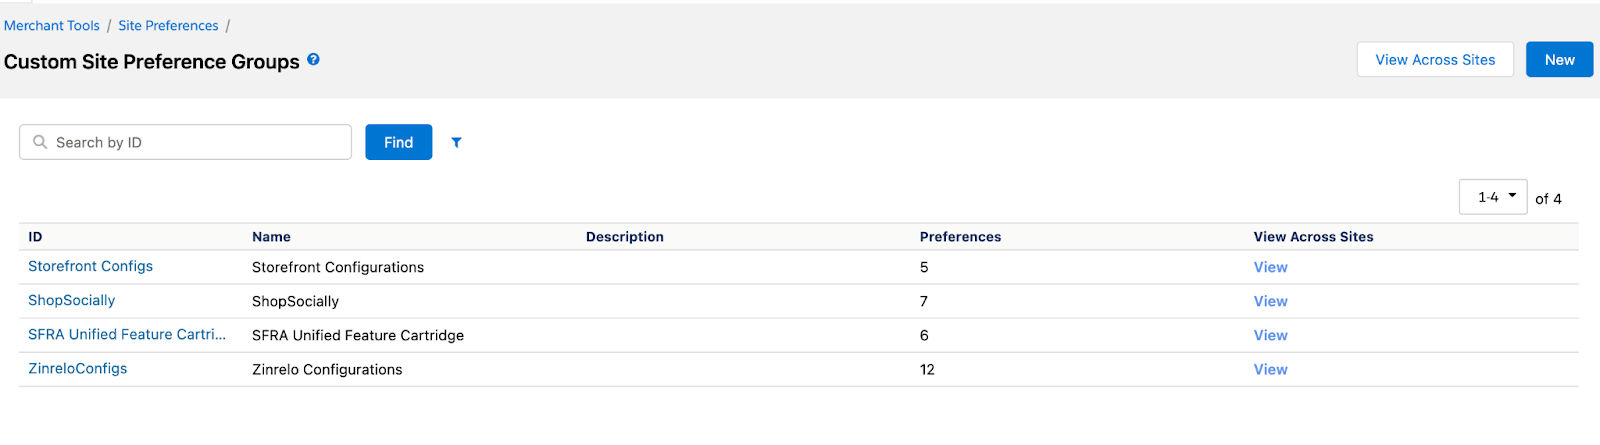
Accessing Zinrelo Settings in SFCC
To access Zinrelo settings in SFCC, follow these steps:
- Log in to your SFCC account.
- Navigate to Merchant Tools >> Custom Preferences.
- From the list of preferences, select ZinreloConfigs.
Configuring Zinrelo Settings in SFCC
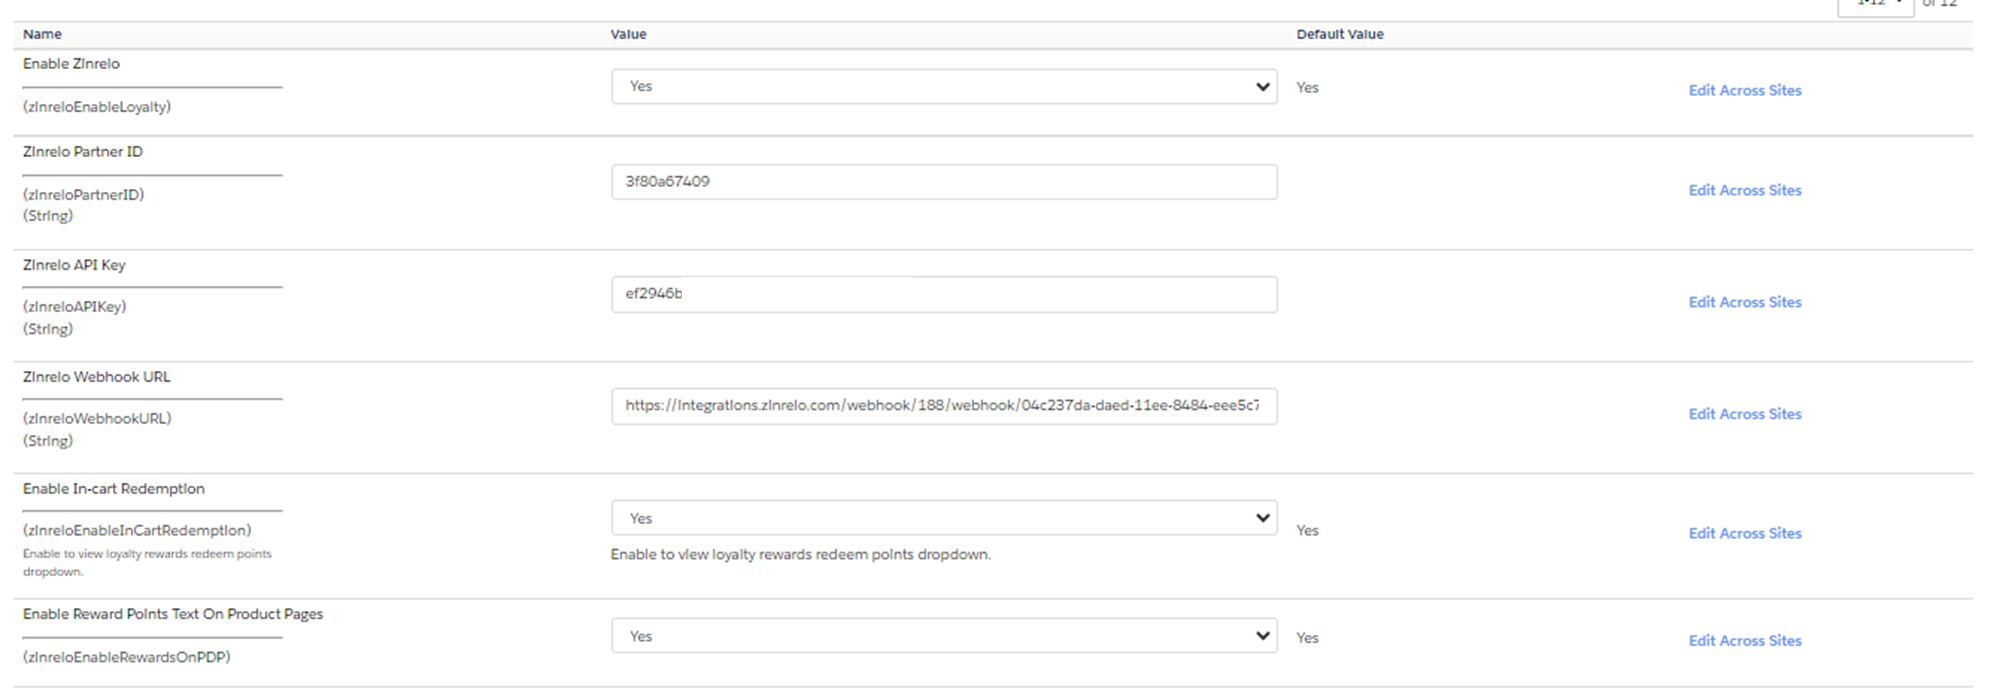
Enable/ Disable Zinrelo Integration
Enable Zinrelo: This setting will enable Zinrelo integration.
- If you select “Yes”, it will enable the Zinrelo integration.
- If you select “No”, you will not be able to see Zinrelo functionality on the website.

Authenticating Zinrelo Account with SFCC
To authenticate your Zinrelo account, you'll need the API key, key identifier, and partner ID.
Obtain these details from the Zinrelo admin console. For more details, refer to this document.
- Zinrelo Partner ID: Enter the obtained partner ID.

- Zinrelo API Key: Enter the store API key.

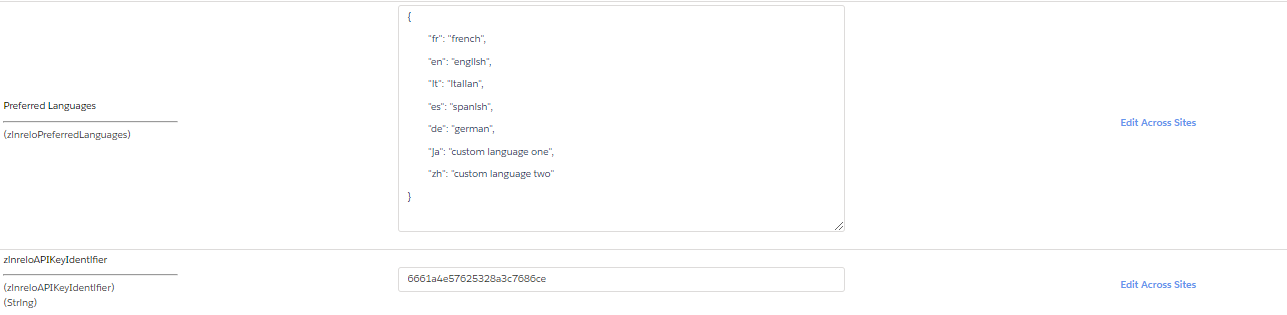
- zinreloAPIKeyIdentifier: Enter the API key identifier.

- Add Custom Attributes: To ensure seamless integration, it is crucial to incorporate two essential custom attributes:
- Last website visit timestamp (Date Type)
- External member id (String Type)
Note: For the creation of these attributes, please contact your account manager at [email protected].
Showing Rewards in the Cart Page
Enable In-cart Redemption: Select “yes” from the dropdown to show rewards on the cart page.

Showing Potential Points and Text on the Product Page
Enable Reward Points Text On Product Pages: Select “yes” from the dropdown to display potential points to customers on the product page.


Labeling Free Shipping Rewards
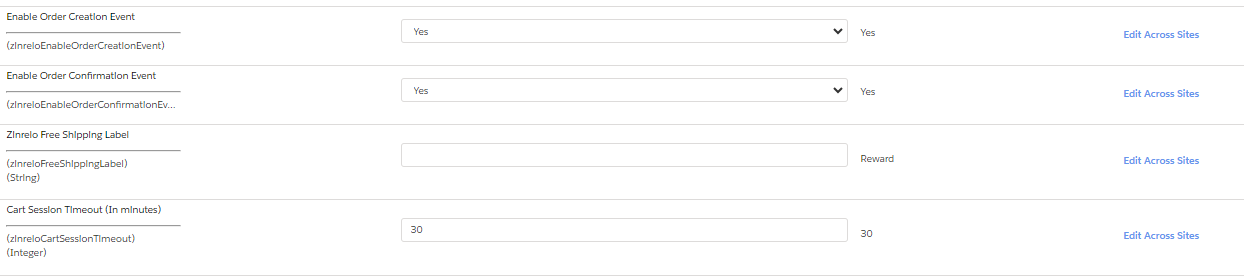
Zinrelo Free Shipping Label: Define the label for "Free Shipping Rewards" that appears when customers redeem them. You can customize this label here.

Preferred Language Mapping
(Only required if the store supports multi-language)
Preferred Languages: For multilingual stores, map your store's language to SFCC. Separate multiple mappings with commas.
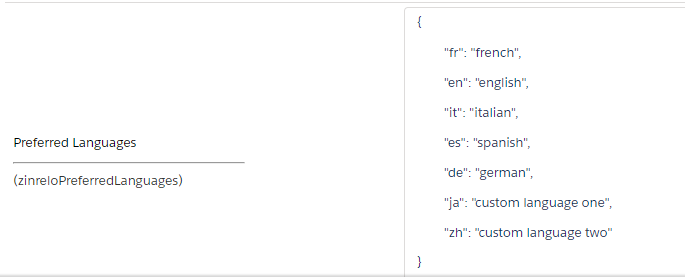
For custom languages, replace “ja” and “zh” with the custom language abbreviations.
Cart Session Timeout
Cart Session Timeout (In minutes): Enter the time in minutes that will be considered to reject pending reward points for abandoned cart and send abandoned cart requests.

Selecting and Configuring Trigger for Awarding Points
You can trigger following status for awarding points to members:
- Order created
- Order placed/confirmation
- Order shipped
- Order paid
You have to specify the trigger on which you want to award points to your customer. From the given list of triggers, you can select just one. To specify the event, write to your account manager at [email protected].
Configuring Statues
- Order created: For awarding points on order creation, enable “Enable Order Creation Event.”

- Order placed/confirmation: For awarding points on order confirmation, enable “Enable Order Confirmation Event.”

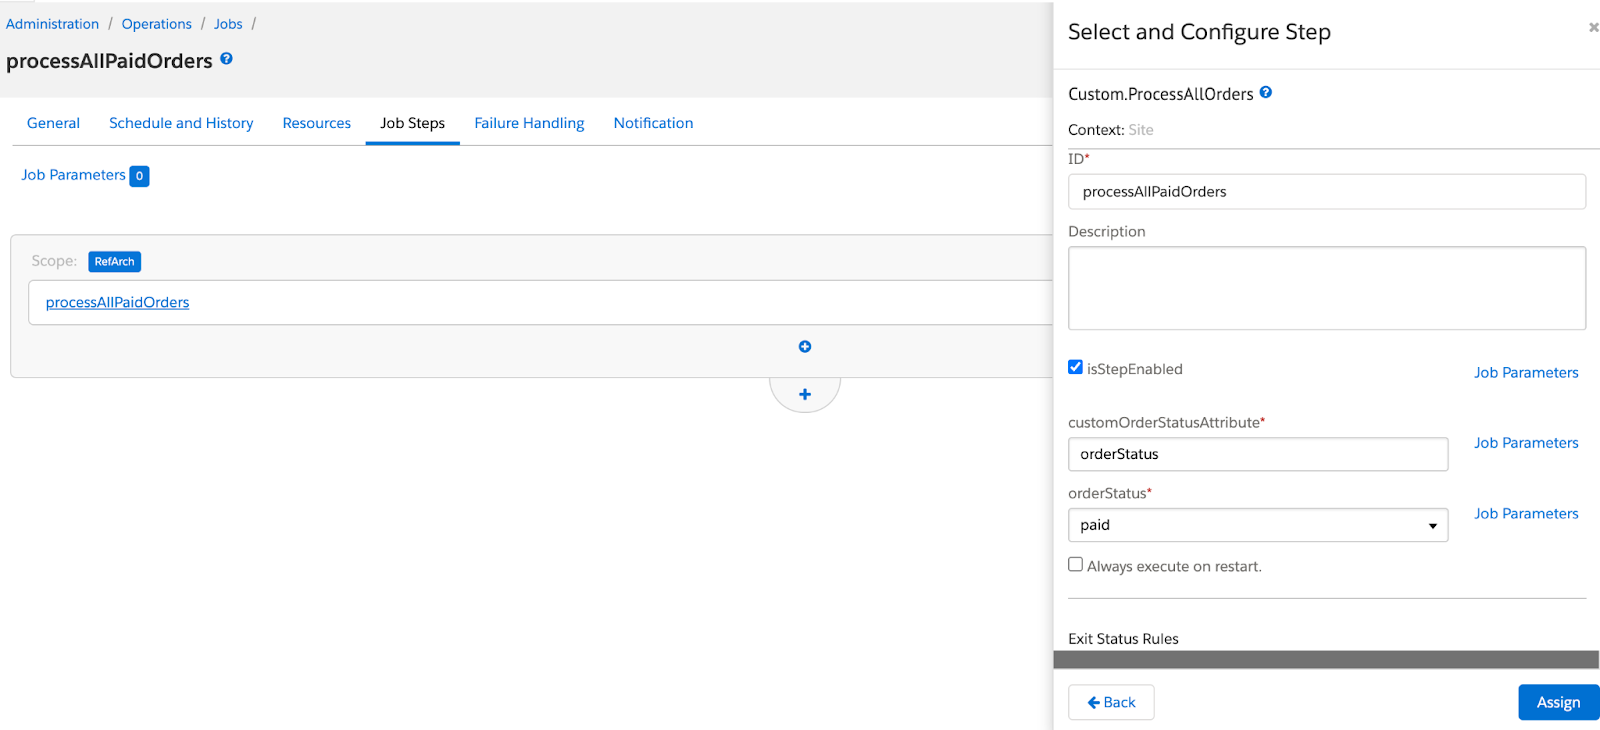
- Order shipped/ Order paid: For awarding points on order shipped/ order paid, you need to configure cron jobs. Following the given steps for configuring jobs:
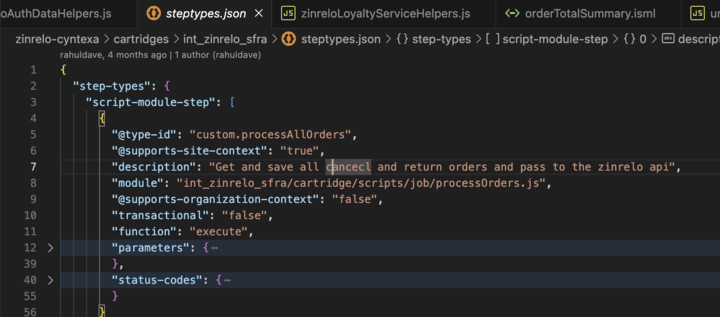
- Navigate to Administration > Operations > jobs > job steps > configure a step
- Enter the type ID from steptypes.json.
- Select the order event (for which this job should run) in orderStatus attribute and also populate the customOrderStatus with the ID of the orderStatus attribute i.e “orderStatus”.
Configuring Triggers for Points Deduction
For point deduction, you need to configure the cron jobs for the following statuses:
- Order canceled
- Order fully returned
- Order partially returned
When the status of SFCC order is changing to either shipped, returned or partially returned via OMS, the OMS flow should also update a custom status attribute in Order object i.e “orderStatus”.
Please Note: These custom attributes are created when the package is imported.
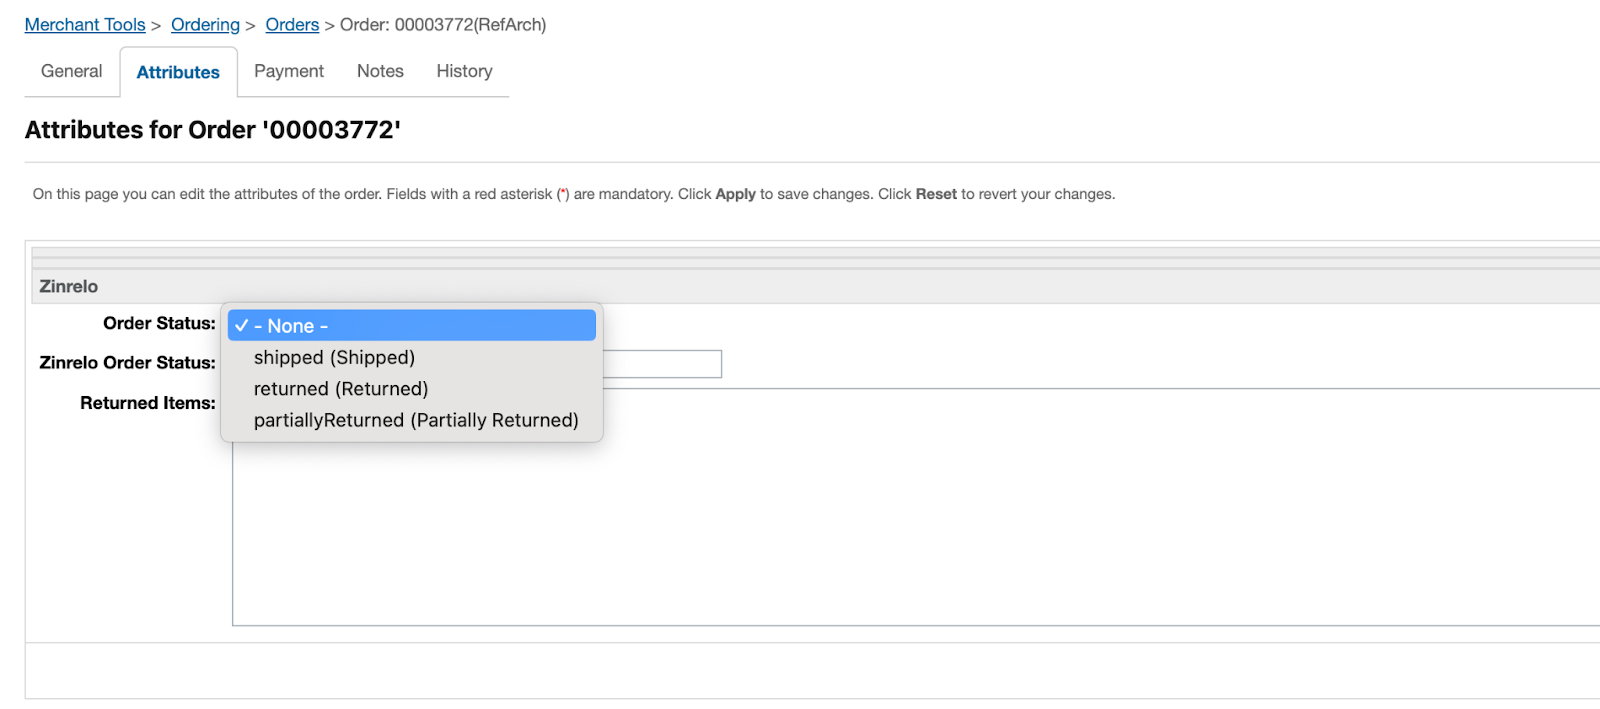
Partial Return Setup in SFCC
To set up the json payload for partial returns, please follow these steps.
Merchant Tools >> Ordering >> Orders >> Attributes >> Order Status (Please select order status as partiallyReturned) & In Returned Items, please pass returned products in below json format. Pid & qty will be changed according to the order. Apply the changes after they are done.
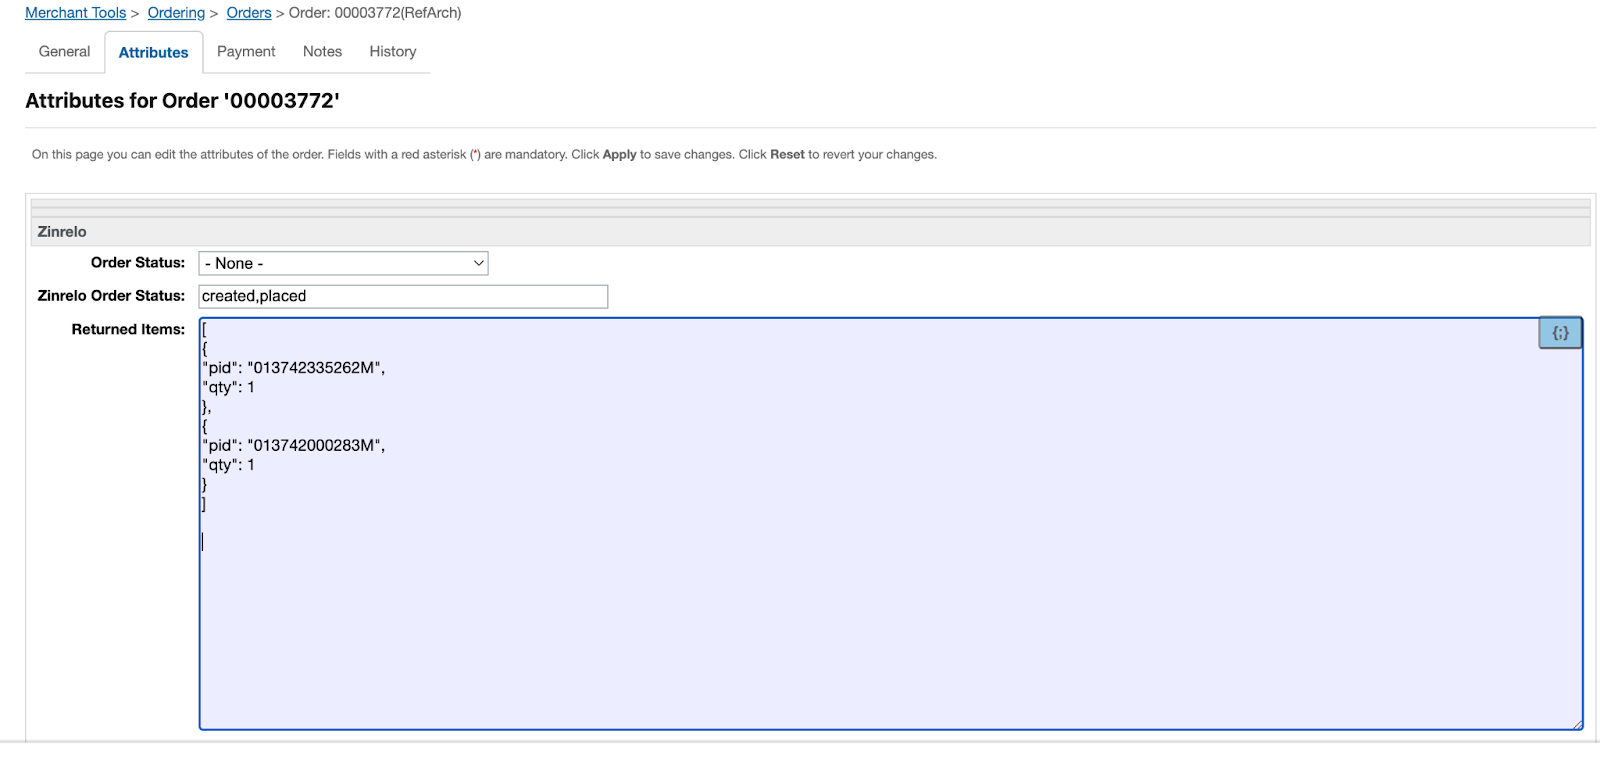
[
{
"pid": "013742335262M",
"qty": 1
},
{
"pid": "013742000283M",
"qty": 1
}
]
Please Note: For clients supporting online and/or Cash on Delivery (COD)/ offline, we recommend the following events setup.
- Award points on order_paid event
- Return points on order_cancelled, order_partially_returned and order_fully_returned.
For its steps, refer to this part of the document.
Purchase and return tracking
To configure a webhook you will need a webhook URL which will be sent by us. To obtain the url write to your account manager at [email protected].
- Zinrelo Webhook URL: Enter the obtained webhook URL here.

Please Note: It is essential to clearly specify the webhook event for seamless integration.
Configuring Rewards in SFCC
To configure rewards in SFCC, please follow the given steps:
Define the rewards in Promotion
- Navigate to Merchant Tools>> Online Marketing>> Promotions.
- Click on the “New” button.

- Fill in the details and enable the “Is Zinrelo Promotion” toggle button. And apply.
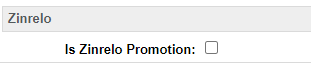
Please Note: Make sure to select “None” in Exclusivity.
- In the Promotion Rule, you have to configure Zinrelo Rewards.
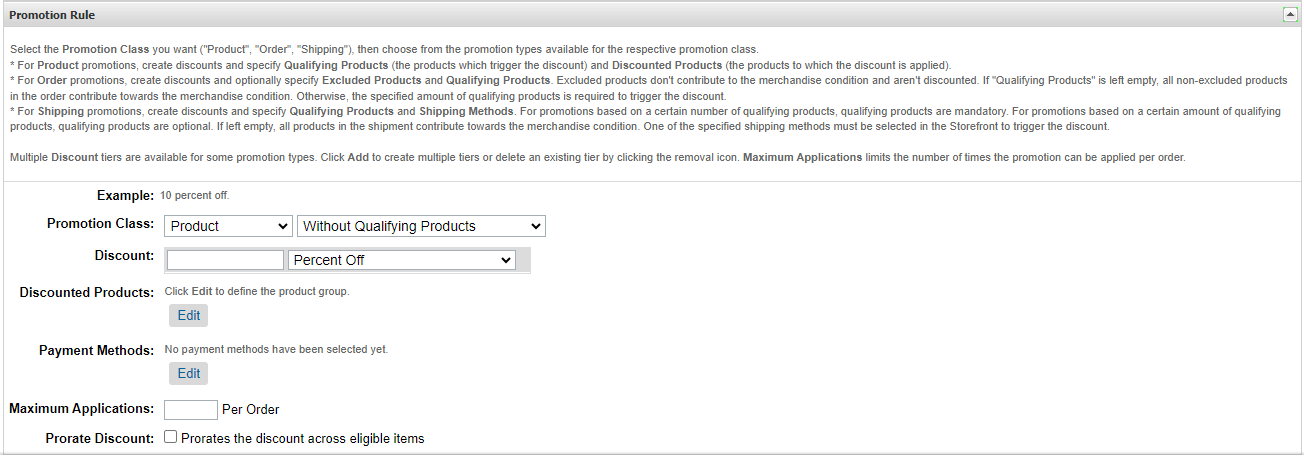
- Fixed Amount Discount: When selected, the member receives a fixed discount on the order subtotal.
- Promotion Class: Select “Order” and “With Number of Qualifying Products.”
- Discount: Add 1 in “Buy”, fixed amount discount value you want to offer in “or More and Get” and select “Amount Off.”

-
Percentage Discount: When selected, the member will get some percent off applied to his order subtotal.
- Promotion Class: Select “Order” and “With Number of Qualifying Products.”
- Discount: Add 1 in “Buy”, percentage discount value you want to offer in “or More and Get” and select “Percent Off.”

- Free Shipping: When selected, the member will not be charged any shipping charges.
- Promotion Class: Select “Shipping” and “With Number of Shipment- Qualifying Products.”
- Discount: Select “Free” from the dropdown.

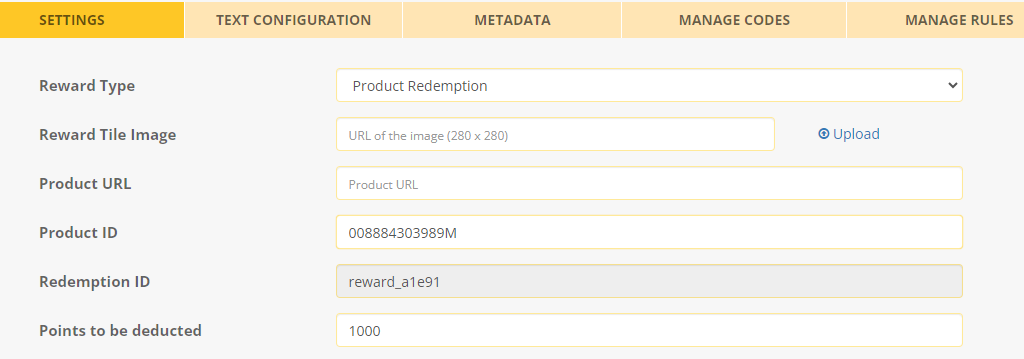
- Product Redemption: When selected, the member will get a free product.
- Promotion Class: Select “Order” and “With Number of Qualifying Products.”
- Discount: Select “Bonus Products” and the product ID from the list of the products.

Once you obtain the product ID, copy and paste the ID into the Product ID text box in Product Redemption Reward in the Zinrelo admin console. Ensure the reward is enabled.
Manage Coupon Codes
There are three ways to create coupons:
- Single Code- Only one code can be generated.
- Multiple Codes- Generate coupon codes one by one. These coupon codes can be defined by you.
- System-Generated- The system automatically generates the codes.
In the context of Zinrelo, only "Multiple Codes" method is useful.
To generate coupon codes, navigate to Merchant Tools >> Online Marketing >> Coupons.
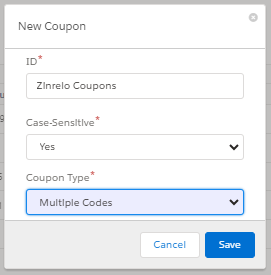
Multiple Codes
- Add an ID.
- Select "Yes" for Case Sensitive.
- Select "Multiple Codes".
- Save your settings.
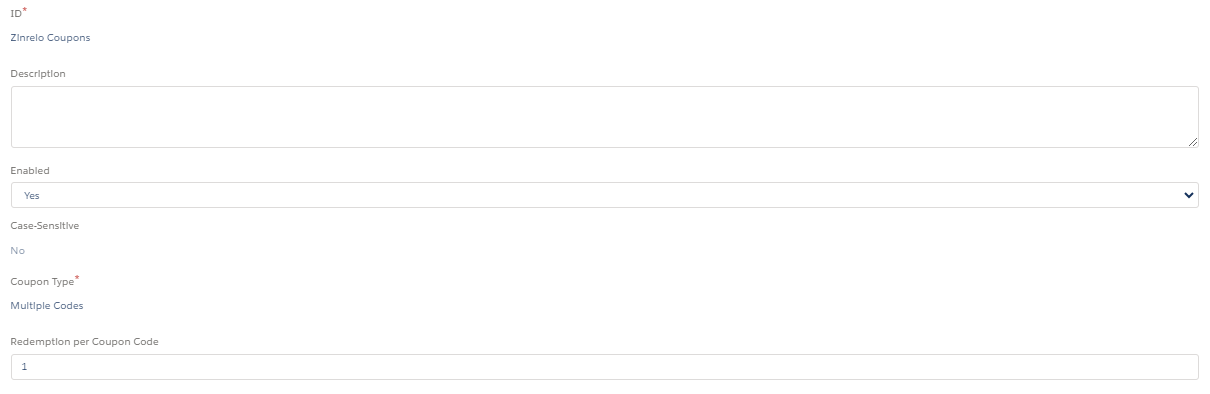
- Fill in the details, enable the coupon, and set the redemption limit to 1 per coupon. Save your settings.
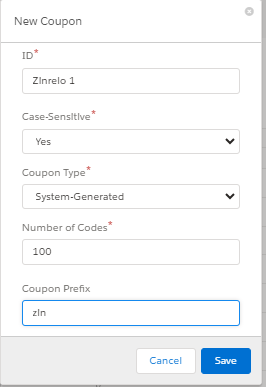
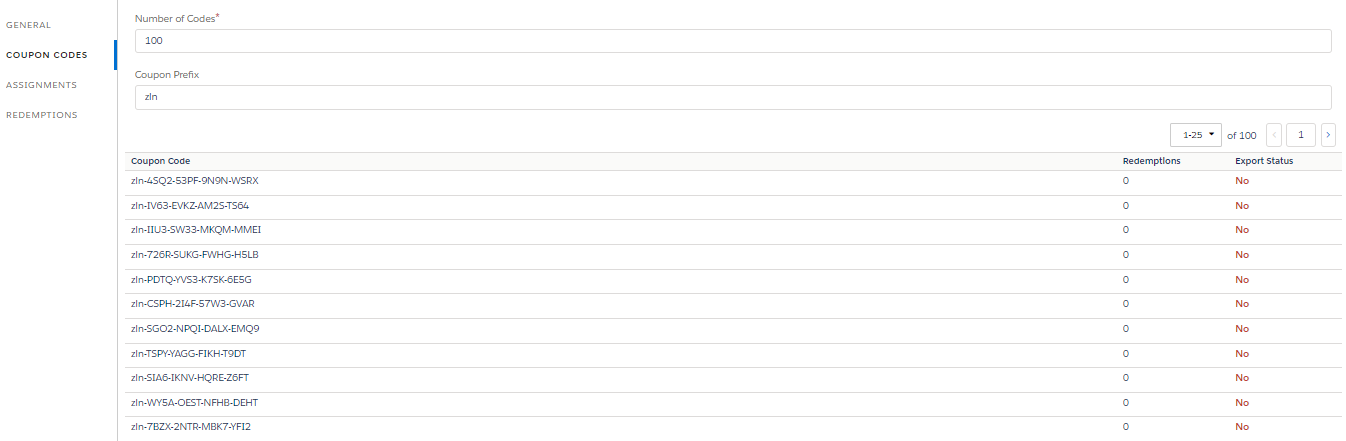
System-Generated Codes
- Add an ID.
- Select "Yes" for Case Sensitive.
- Select "System-Generated".
- Define the volume of coupon codes in "Number of Codes".
- Enter a unique prefix for the coupons.
- Save your settings.
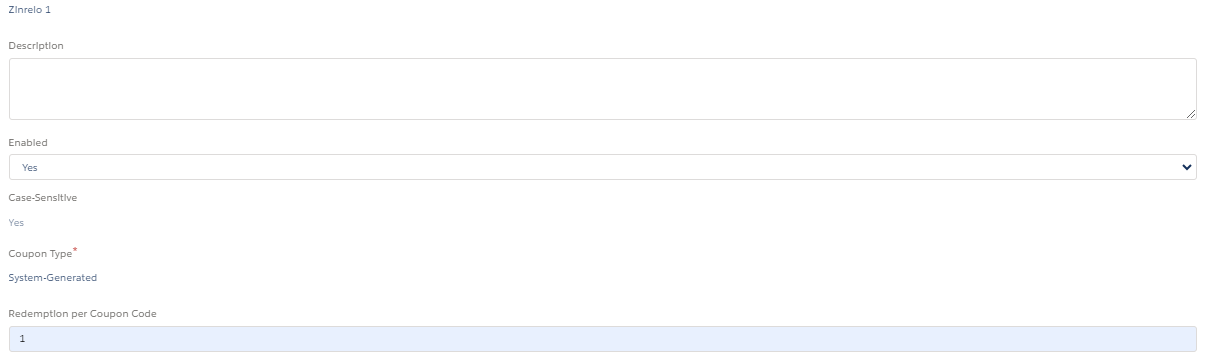
- Fill in the details, enable the coupon, and set the redemption limit to 1 per coupon.
Save your settings.
All coupons will be available in the "Coupon Codes" section.
Please Note: You need to update the same coupon codes to Zinrelo for respective rewards.
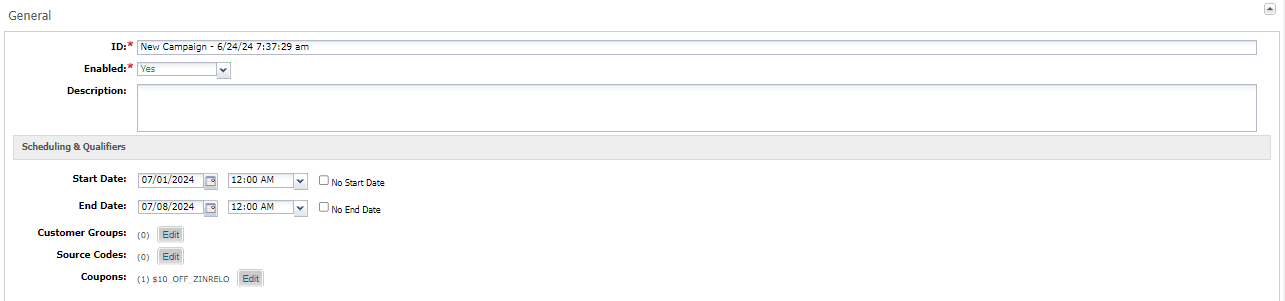
Campaigns
Navigate to Merchant Tools >> Online Marketing >> Campaigns.
- Create a new campaign.
- Make all basic configurations and select the configured coupon from “Coupons.”
Configuring the Text
To configure the text on SFCC, navigate to Merchant Tools > Content > Content Asset.
Configure In-cart text
- Search for InCart to configure in-cart text on the website.
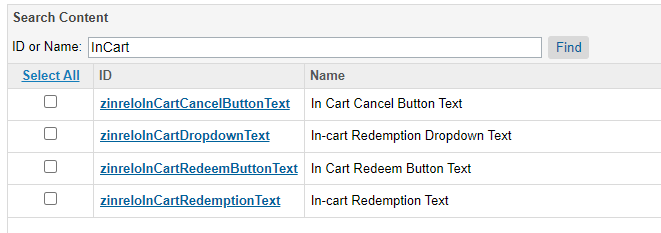
- Click on the ID to configure the text.
- Click on the hyperlink text “Lock.”

- Scroll down to Content > Body.
- Enter the text.
- Click on Apply.
- And then click on the hyperlink text “Unlock” to lock the configuration.

Configure reward text on the product page
- Search for PDP to configure reward text on the website.
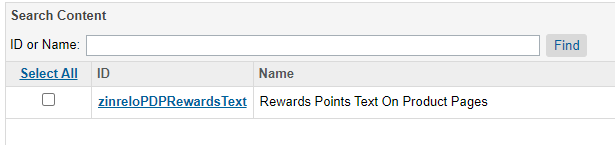
- Click on the ID to configure the text.
- Click on the hyperlink text “Lock.”

- Scroll down to Content > Body.
- Enter the text
- Click on Apply
- And then click on the hyperlink text “Unlock” to lock the configuration.

Updated 2 months ago