WooCommerce Integration
Integrating Zinrelo on your WooCommerce store
Setting up a Zinrelo on your WooCommerce store is an easy 5 step process:
- Step 1: Sign up for a Zinrelo Trial and complete the basic setup (Required)
- Step 2: Install the Zinrelo extension on your WooCommerce store (Required)
- Step 3: Set up Redemptions
- Step 4: Set up ‘Loyalty Points message’ on Product Pages (Optional but recommended step)
- Step 5: Verify configuration in Zinrelo Admin console and launch your store
Let’s understand these steps in detail.
Step 1: Sign up for a Zinrelo trial account and complete the basic setup:
To install Zinrelo extension on your WooCommerce store you will need to sign-up for a Zinrelo trial account and complete the basic setup if you haven't already - https://app.zinrelo.com/store/signup
During the basic setup, you can set up the loyalty activities and rewards. If you are unsure of the rewards or don’t have coupon code information handy , you can skip the Rewards setup step or add some dummy coupon codes and revisit it later.
At the end of this setup, you will land on the home page of Zinrelo Admin Dashboard.
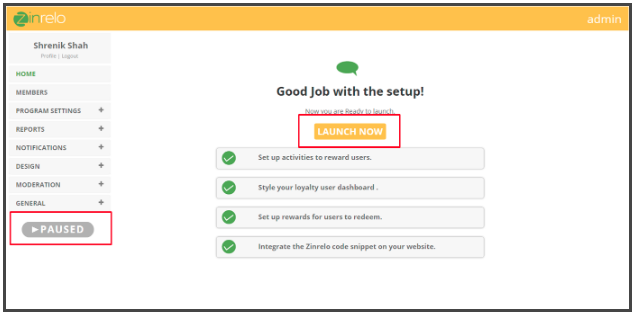
If you encounter any issues or have any questions during the setup, please reach out to Zinrelo support at[email protected].
On the home page, on the left side navigation panel, go to General > Settings Make a note of your Partner ID and the API-Key. You will need this in the next step after you install the Zinrelo extension on your WooCommerce store.
Also, on the same General > Settings page, enter the Sign Up URL and Login URL for your stores in the Store Sign Up URL and Store Login URL fields and scroll down to save.
Step 2: Install the Zinrelo Extension on your WooCommerce store
If you do not have the Zinrelo WooCommerce Extension already, please contact [email protected] and request for the extension
Log in to your WooCommerce store admin console and navigate to Plugins > Add new.
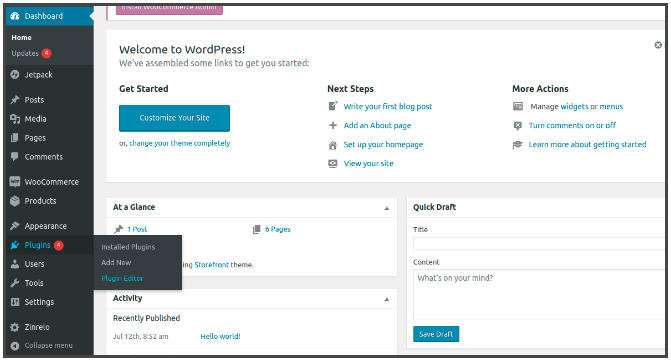
Click on Upload Plugin - Choose Files and browse to the location where you have saved the Zinrelo WooCommerce extension on your local machine. Select the extension zip file and upload.
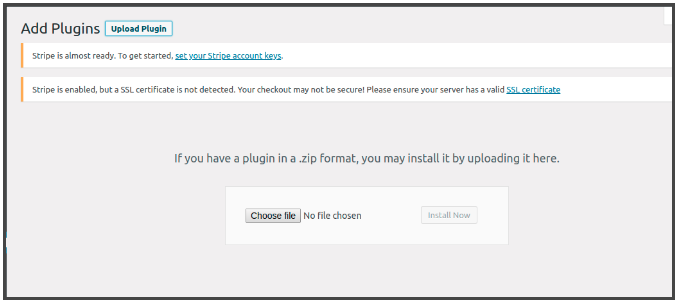
Click on Install Now. The extension will be installed on your WooCommerce store. You can verify by navigating to Plugins > Installed Plugins.
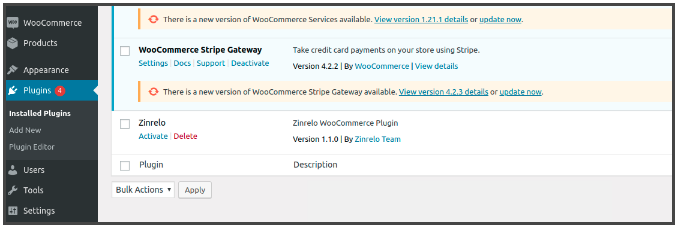
Activate the plugin. Once the plugin has been activated you would see 'Zinrelo' added to the left navigation bar at the bottom.
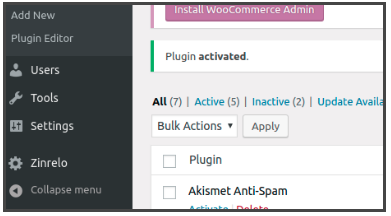
Click on 'Zinrelo' in the left navigation bar. You will be displayed a screen where you can enter the Zinrelo Partner-ID and Api-Key. Enter the Partner-ID and Api-Key that you may have obtained in Step 1 and save the changes.
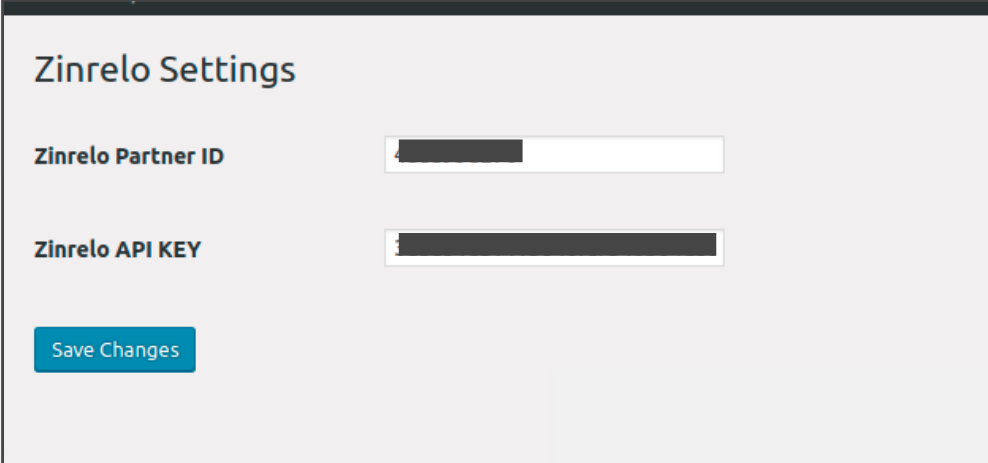
If you do not have the Partner ID and API key, please go back to the first step and follow the instructions to get your Partner ID and API key.
If you face any problems while setting up the Zinrelo extension on your WooCommerce store, please contact Zinrelo Support at[email protected]
Step 3: Set up Redemptions
There are two ways to set up redemption options in Zinrelo for your loyalty program on WooCommerce store.
- Set up coupon based redemptions in Zinrelo OR
- Set up in-cart redemptions
Set up coupon based redemptions in Zinrelo:
For this option, users will be able to redeem their points for coupons in the Zinrelo dashboard . They can then use this coupon at checkout.
Coupons must be set up in WooCommerce first. There are various plugins available on wordpress.org that allow you to create coupons in bulk. Use one such plugin to generate coupons for the reward options that you’ve decided. After you have generated the coupons, you can verify the list of generated coupons under WooCommerce admin console > WooCommerce > Coupons.
To set up coupons on the Zinrelo side, log into your Zinrelo account and go to Program Settings > Rewards.
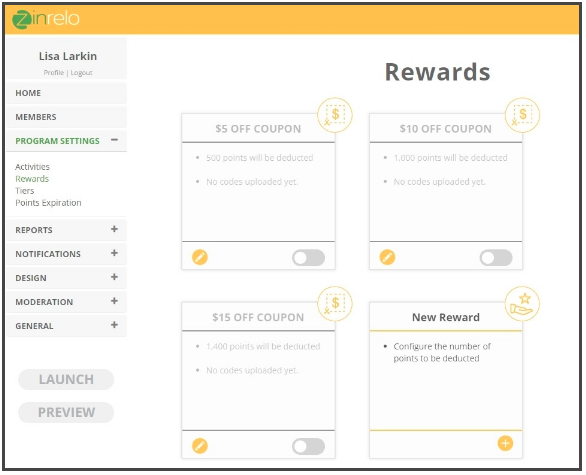
Select one of the available reward templates or create a new one via the New Reward option. Specify the discount value equal to the coupon value you generated. The instructions to upload coupons to the reward have been elaborated in detailed here.
To add the WooCommerce coupon codes follow the following steps:
- Click the Edit button (circle with a pencil icon) in the lower left corner of the reward box.
- The coupon dialog appears. Click on the MANAGE CODES tab.
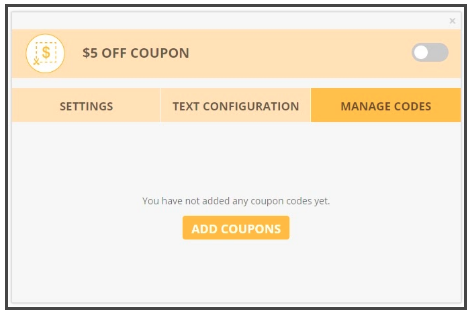
- Click the ADD COUPONS button.
- Add the previously generated WooCommerce coupon codes to the text box (one per line).
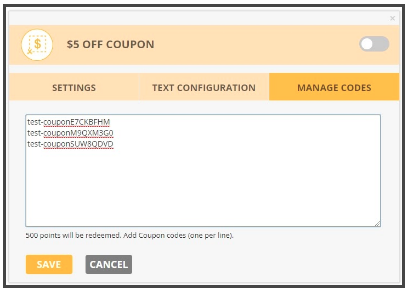
Note: Each code must be unique. If you try to add the same code more than once, the system will reject the duplicates. Add single use, unique coupon codes only. The system will notify you when your codes are running low or exhausted. Click SAVE.
3.2 Set up in-cart redemptions in Zinrelo
In-cart redemption allows users to redeem their rewards from their shopping cart without leaving the purchase flow. It is implemented on the payment page during the checkout process. This achieves the following objectives:
- It makes redemption easy for customers.
- It increases conversion percentages.
- It attracts customers back for more purchases.
In-cart redemptions functionality is inbuilt in the Zinrelo WooCommerce extension and enabled by default. This is how the in-cart redemption functionality looks on the checkout page .

Users will be able to select a reward from the dropdown and apply the reward directly to checkout. The points will be deducted after the purchase has been completed.
Note: You will still have to configure the reward in the Zinrelo admin console and add DUMMY coupons to it to make the reward active. Only active rewards that the user is eligible for will be displayed in the in-cart redemptions dropdown.
If you DO NOT wish to enable the in-cart redemptions functionality on your WooCommerce store, please follow the below steps -
- Deactivate the plugin
- Go to Plugins > Editor and select Zinrelo from the dropdown. Click on the Select button.
- Click on the reward-form.php

- Add style=”display:none” to the first line as shown in the image below.

- Save the file and re-activate the extension.
This should disable the in-cart redemptions functionality on the checkout page.
Step 4: Set up ‘Loyalty Points message’ on Product Pages.
When users visit the product pages on your website, it is a great idea to let them know that they will earn loyalty rewards points for buying that product. This achieves two objectives:
- Improves the purchase conversion rate
- Increases awareness of the loyalty rewards program
Follow the steps below to set up the ‘Loyalty Points message’ on Product pages -
- Go to the Zinrelo Admin Console - https://app.zinrelo.com/store/login and login.
- On the left side navigation panel, navigate Notifications > On-site notifications > Product Identifier javascript
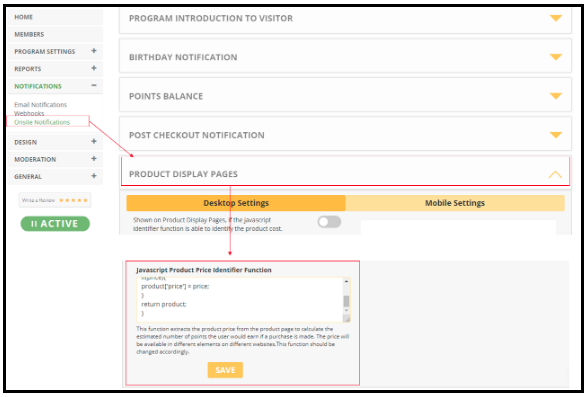
- Update the Javascript Product Price Identifier function with the code below -
zrl_mi.price_identifier = function(){
   var product = {};
   price = window.prod_price;
   category = window.prod_cat;
   product_id = window.prod_id;
   if(price){
    product['price'] = price;
   }
   if(product_id){
    product['product_id'] = product_id;
   }
   if(category){
    product['category'] = category;
   }
   return product;
}- After this, users will start seeing the loyalty points information on the product display pages as shown in the image below -

If you wish to edit the message or remove this message, please follow the below steps -
- Deactivate the plugin
- Go to Plugins > Editor and select Zinrelo from the dropdown.Click on the Select button.
- Click on class-zinrelo-backend.php.
- Search for the text - “data-zrl-product-points”. If you wish to hide the message add style=”display:none” as shown in the image below.

- If you wish to change the message, you can edit the text displayed inside the div as shown in the image above. Please ensure that the element will be required in the message. Zinrelo fills this element with the points the user will get on purchase of the particular product.
- Save the file and re-activate the extension.
- Your changes should be reflected on the product pages.
Step 5: Verify configuration in Zinrelo Admin console and launch your store
- Go back to the Zinrelo Admin console - https://app.zinrelo.com/store/login and login to your account that you created in the first step.
- Verify the activities and rewards. In case of Coupon-based redemptions, ensure that the appropriate coupons have been uploaded to the reward options. In case of In-cart redemptions, ensure that DUMMY coupons have been uploaded to the reward options.
- Once all the activities have been completed, you are ready to launch your loyalty program.
- Click on ‘Launch Now’ to launch the program.
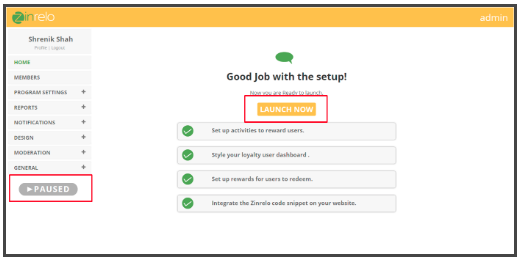
At this point, you should be able to see a Rewards Program tab on your WooCommerce store as shown in the image below.

Congratulations! You have successfully launched a loyalty program for your WooCommerce store.
Updated 2 months ago
