
Configuring End User Dashboard
The end user dashboard is the primary interface for customers with the loyalty program. If this interface is visually appealing, the program is likely to see higher participation. Zinrelo provides four built-in templates for setting up visually appealing end user dashboards.
Templates
The four templates are:
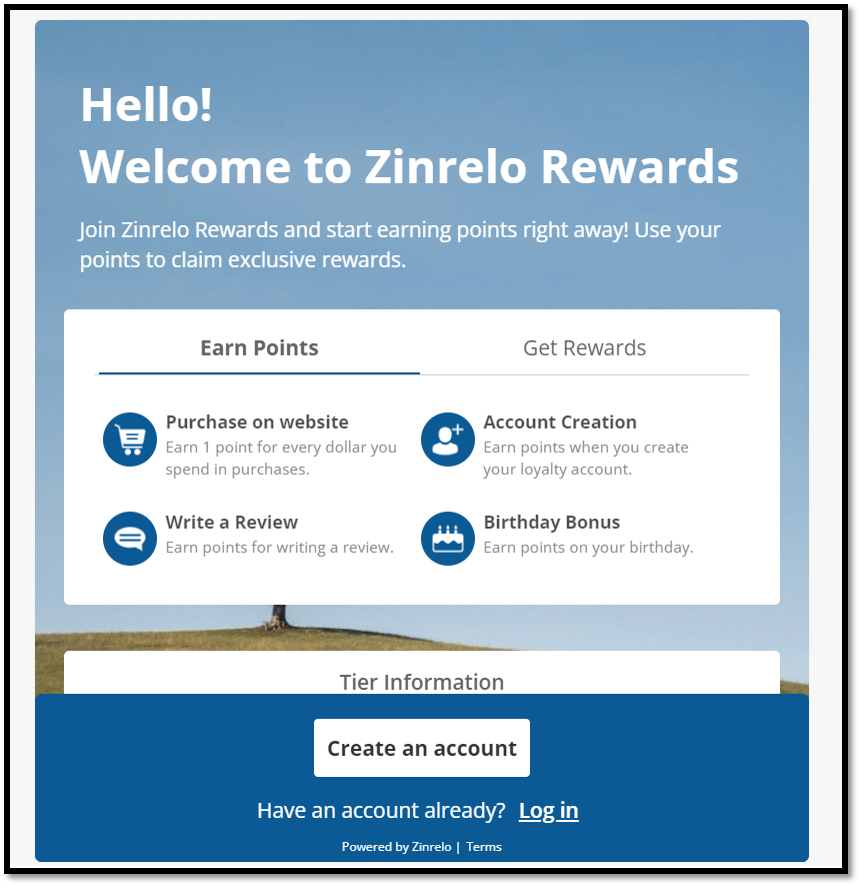
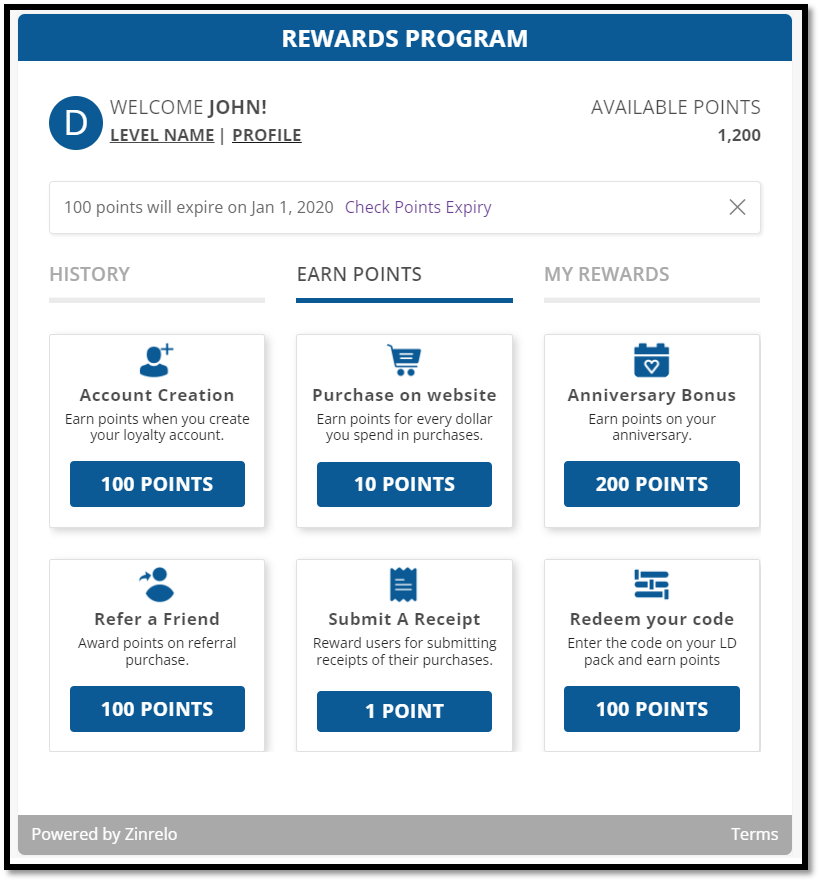
Default

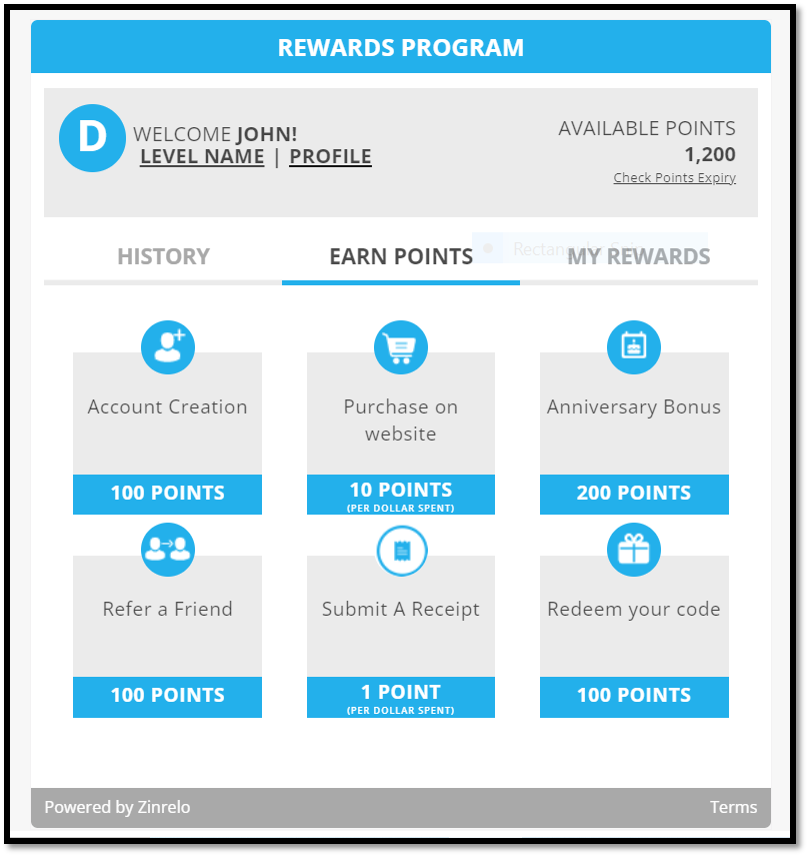
Classic
Assets Size:
- Icons - 112pxX112px
- Images - 560pxX560px
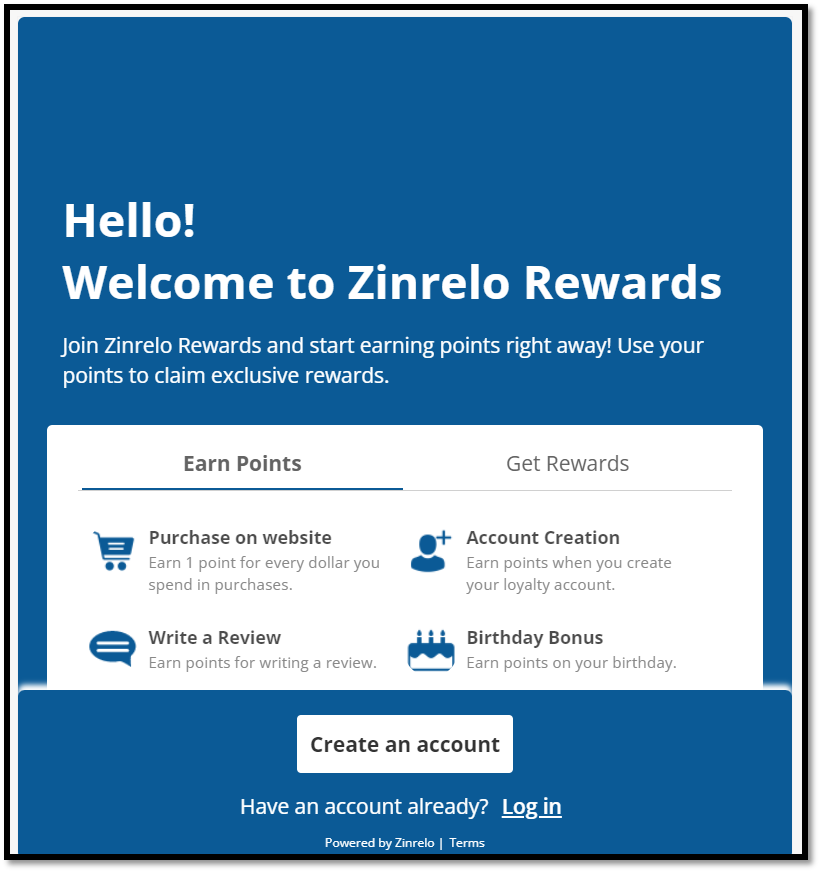
Modern
Asset Size:
- Icons - 184pxX184px
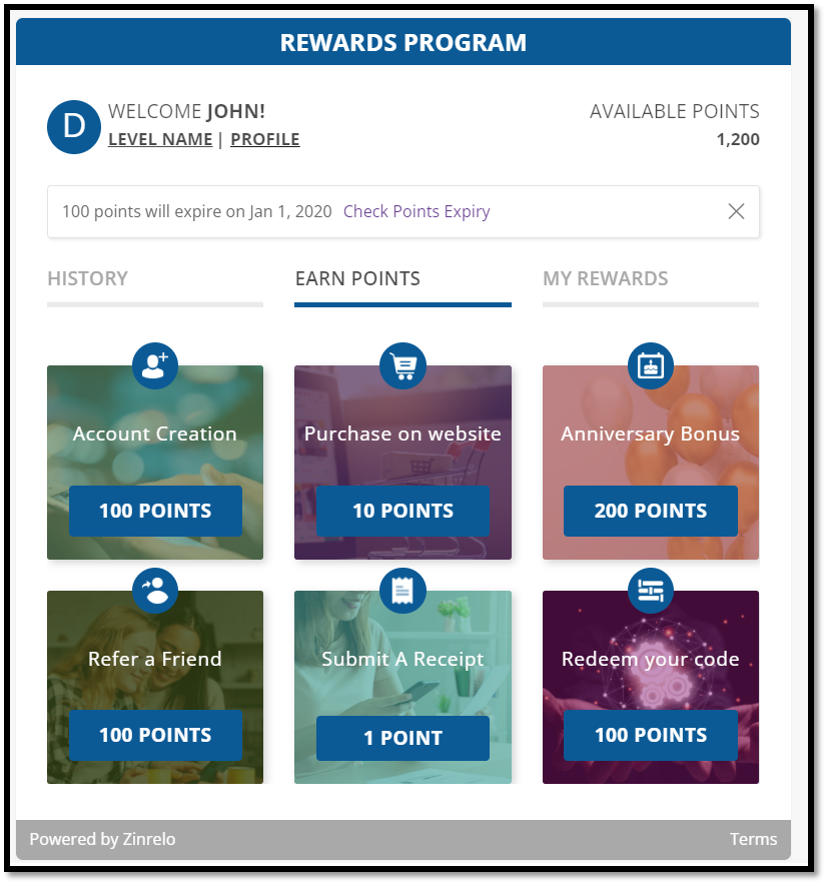
Vivid
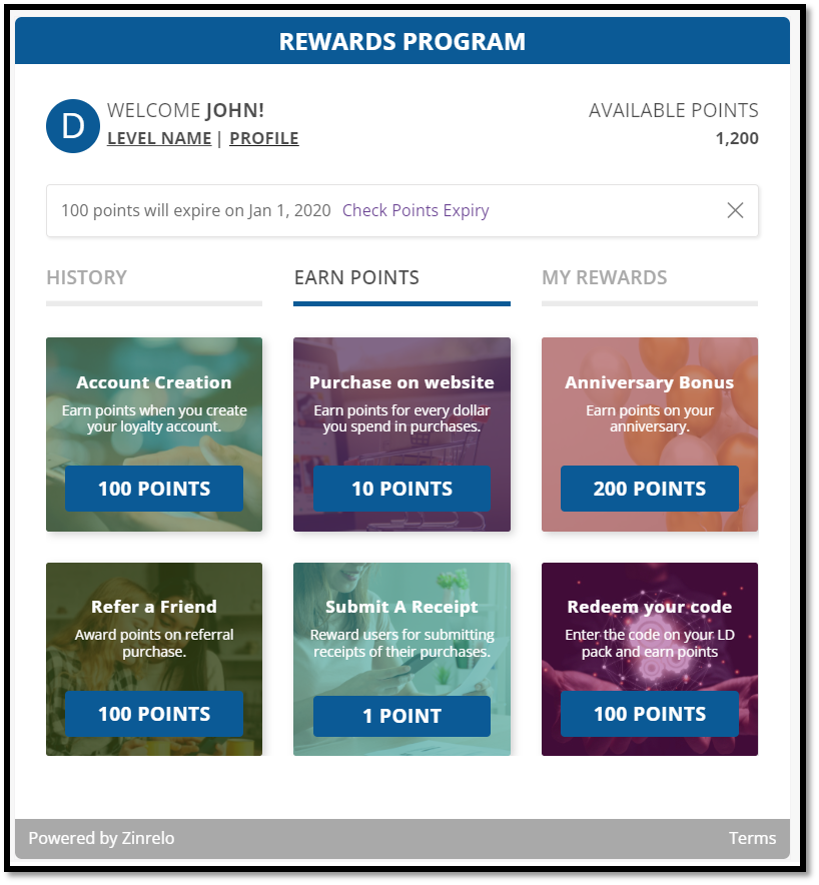
Asset Size:
- Images - 560pxX560px
You can choose the template that suits your brand and then proceed to customize it.
Configuration
The configuration process is similar for all the themes.
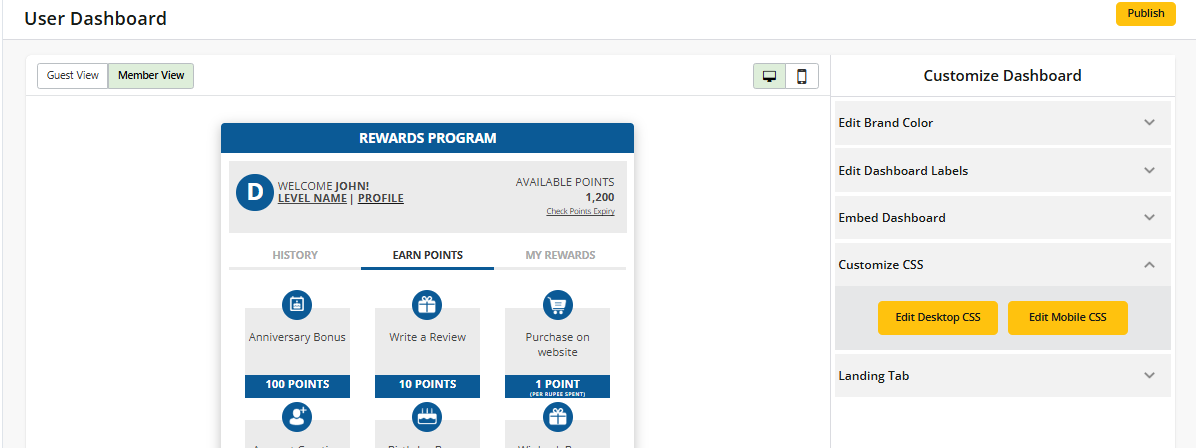
Step1: Navigate to Design >> User Dashboard from the admin console. Select the template of your choice by clicking on the respective template.
Note: In this view, you will see a “Live” sign at the bottom of the template which is currently active.
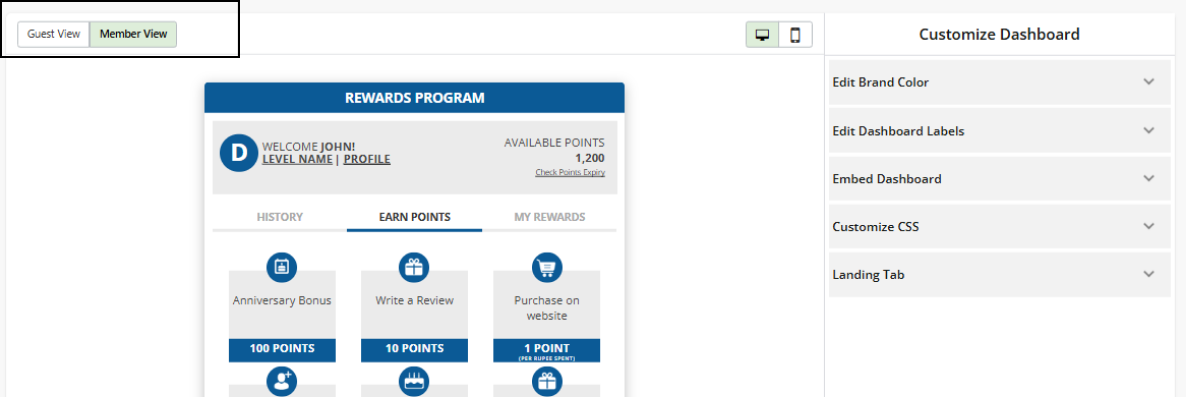
Step 2: Follow the configuration steps in the ‘Customize Dashboard’ section.
Note: You can toggle between the guest view and member view and also between the desktop view and the mobile view to see how your configuration changes take effect.
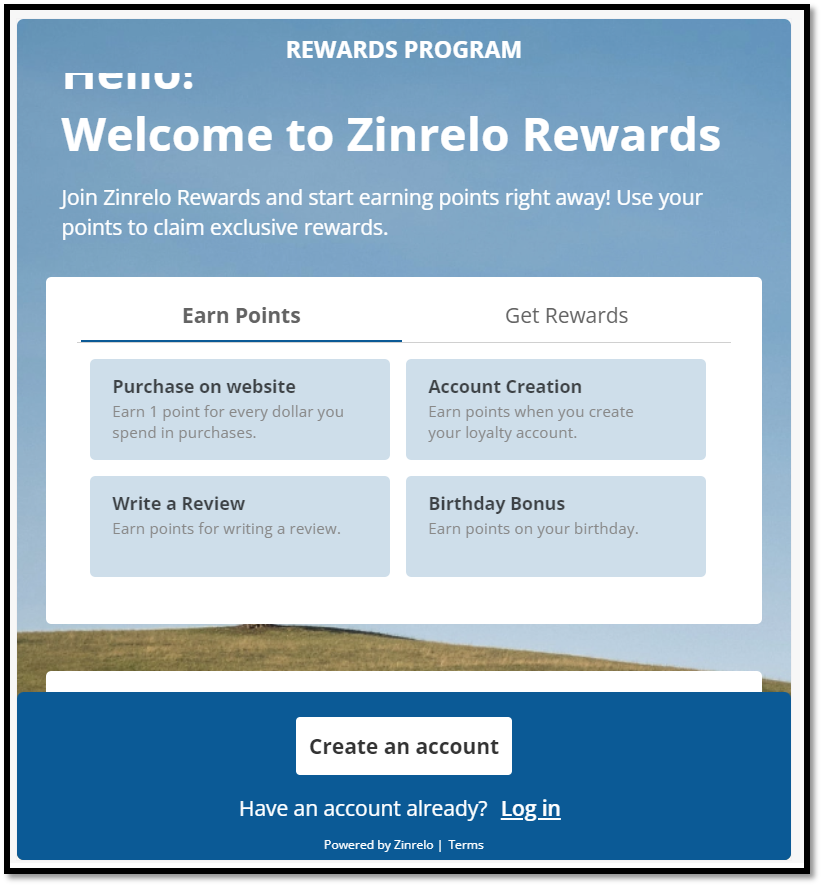
Upload Background image
The Classic and Vivid templates require a background image for the guest view of the dashboard. The recommended size for this image is 625x650 pixels.
Edit Brand color
You can customize the color theme to match your brand. You can add custom colors by specifying the HTML codes for the colors.
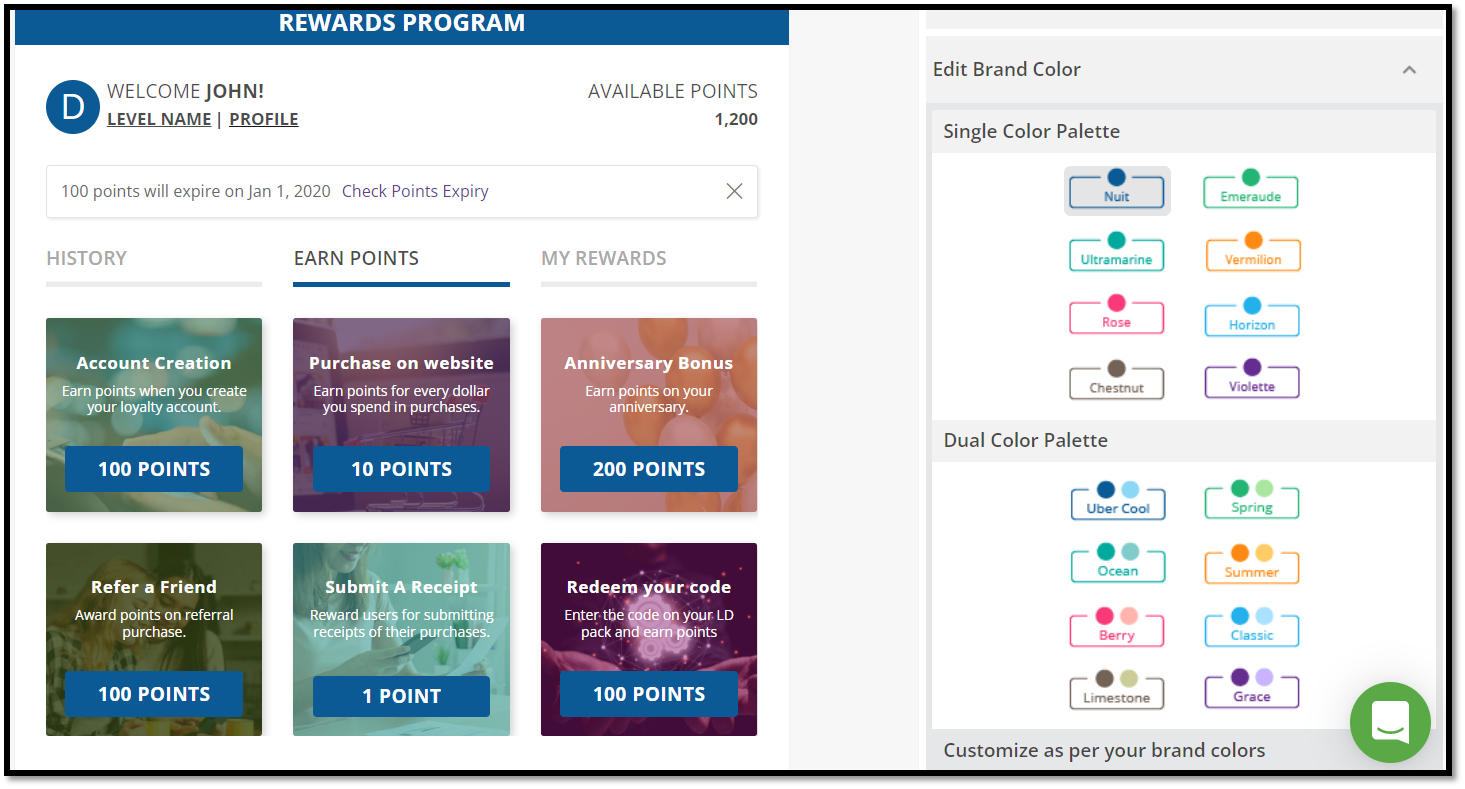
If you are looking for more flexibility for customizing the dashboard you can consider updating the CSS.
Edit Dashboard Labels
All the text fields in the End-user Dashboard can be edited. You will find two views:
- Guest Dashboard ( This view will be displayed to the members who have not enrolled or have not logged into their accounts).
- Logged-In view ( This view will be displayed to the members who have logged into their accounts).
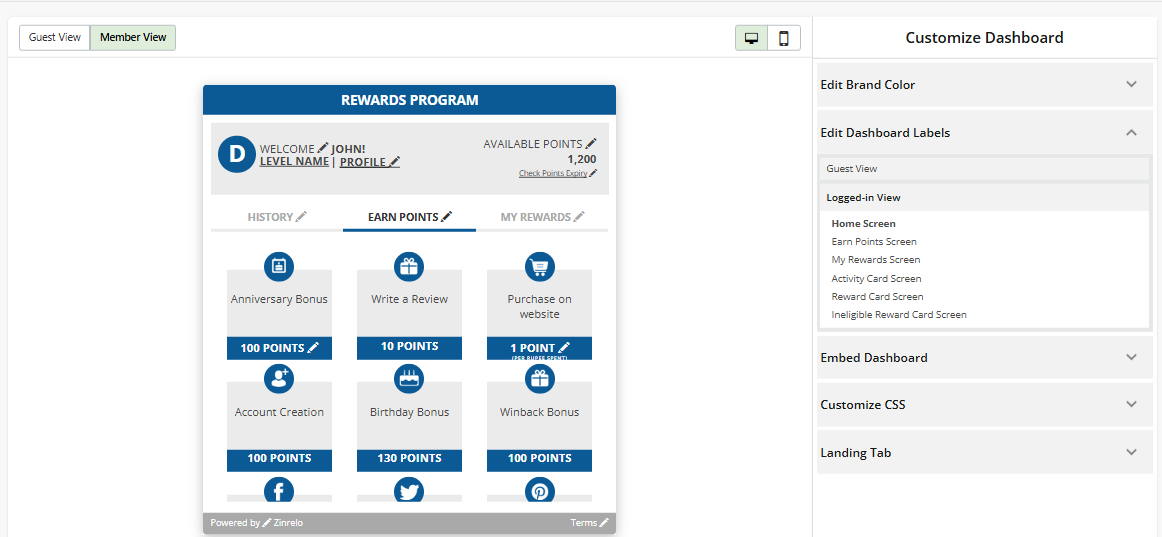
Note: It will show you the related screens associated with the ‘view’ stated above. You can click on them and start editing.
The fields have a pencil shown next to them. While clicking on the pencil, you activate the edit mode for that field.
After editing the text, you can save the changes by clicking on the tick mark which will now be present instead of the pencil.
To know about language customization, refer to this document.
Embed Dashboard
This section will help you to follow step-by-step instructions to embed this dashboard onto your website. The dashboard is usually embedded in the 'My Account' section of the site.
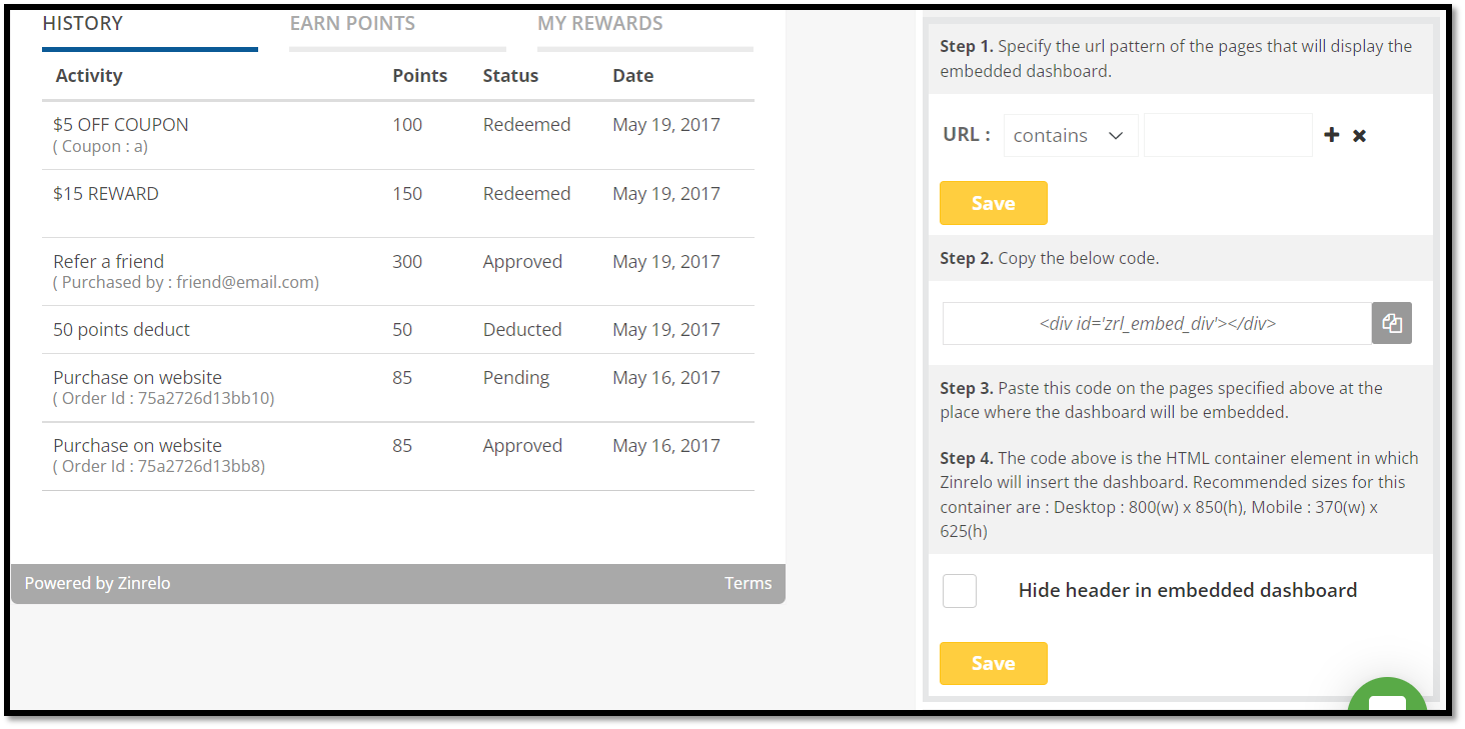
The alternative to embedding the dashboard is to render it as a pop-up. The configuration for the Pop up widget can be found in a separate section.
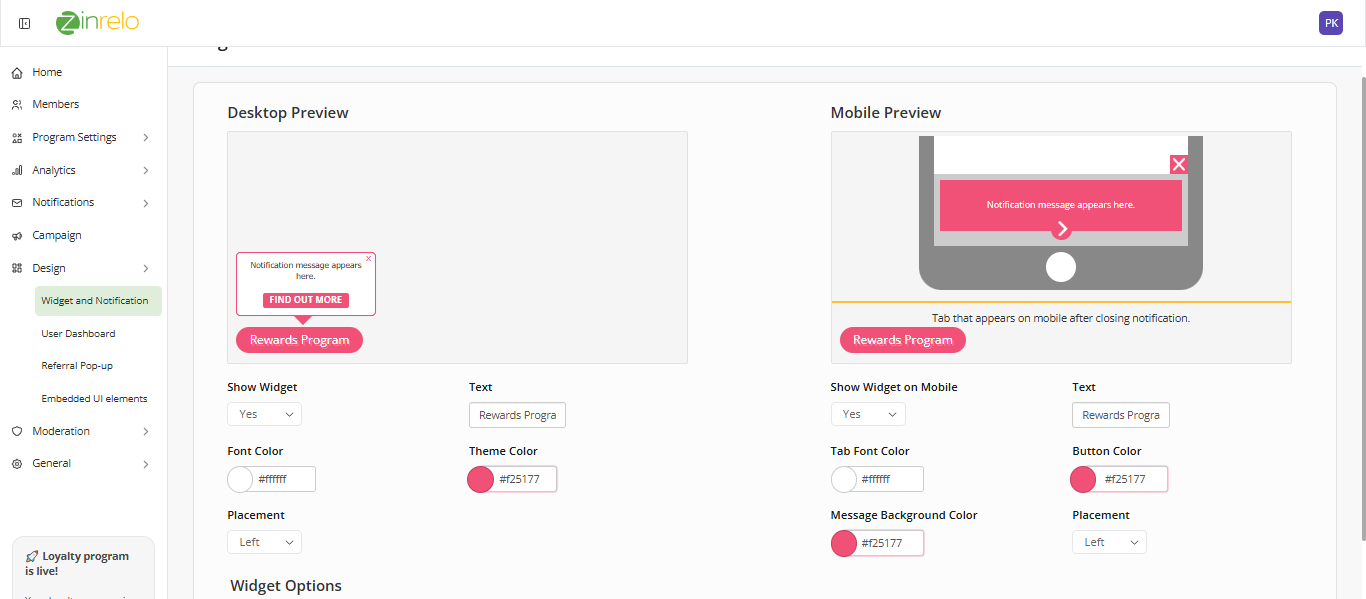
Go to Design >> Widget and Notification.
You can change the text and color similar to above dashboard changes.
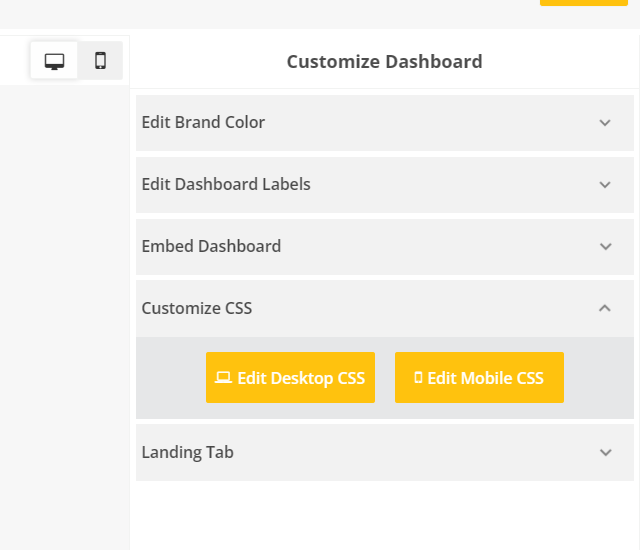
Customize CSS
You can upload a Cascading Style Sheets to further customize the End user dashboard.
You can update the CSS for the desktop view and the mobile view separately. On clicking a pop-up will appear where you can input the code and save it.
Please Note: The small icon size of the default template is 112px X 112px.
Note: This would require development expertise.
For more information on how to leverage the power of CSS to customize your dashboard, please refer to this document. .
Landing Tab
You can configure which tab gets loaded first in the End User dashboard.
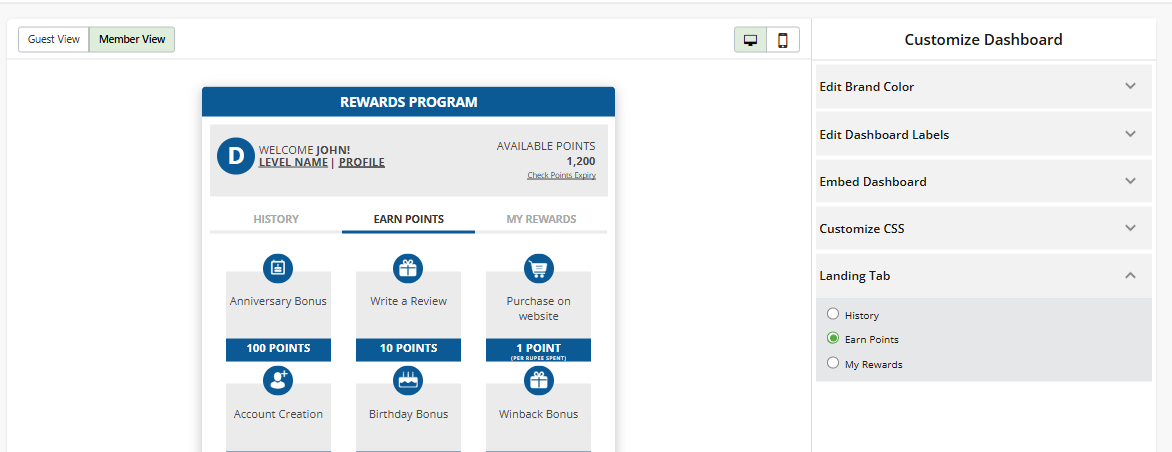
Step 3: Click on the “Publish” button to save the changes.
Frequently Asked Questions
How do I edit images in my template?
The Classic and Vivid templates require images in the activity and rewards tiles. These images can be uploaded from the respective activity and reward settings.
To upload the images go to: Program Settings >> Activities/ Rewards
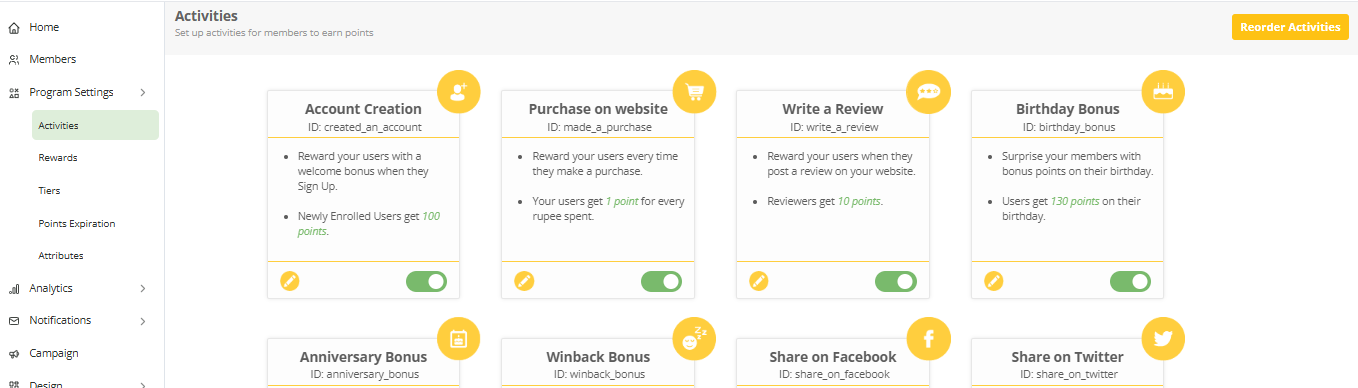
- Select the activity you want to upload the image for
- Click on edit
- Activity/Reward tile image >> Upload
- Save.
Note: The size of the image has to be 280X280.
Please Note:If long text in the activity description is getting cut off, you can fix this by adding the following CSS:
Add the following CSS in Desktop and/or Mobile Custom CSS to truncate activity/redemption names in Earn Points and Rewards Tabs and add ellipses at the end-
.zn-earnpoints-name, .zn-redemption-name {
    display: -webkit-box;
    -webkit-line-clamp: 2;       /* The line-clamp property truncates text at a specific number of lines.*/
    -webkit-box-orient: vertical;
    overflow: hidden;
   /* if there is still space below the line-clamp remaining lines will still be shown to hide them alter the height*/
   /* height: 30px ;*/
}
Add the following CSS in Desktop and/or Mobile Custom CSS to truncate activity/redemption description in Earn Points and Rewards Tabs and add ellipses at the end-
#made_a_purchase_instruc, #referral_instruc, #birthday_bonus_instruc, #created_an_account_instruc, #share_on_pinterest_instruc,#share_on_twitter_instruc, #share_on_facebook_instruc, #write_a_review_instruc, #follow_on_twitter_instruc, #task_completion_instruc, #upload_photo_instruc, #submit_a_receipt_instruc, #anniversary_bonus_instruc, #follow_on_instagram_instruc, #code_submission_instruc, .zn-redemption-disc, div[id$="custom_activity_instruc"]{
display: -webkit-box;
-webkit-line-clamp: 2; /* The line-clamp property truncates text at a specific number of lines.*/
-webkit-box-orient: vertical;
overflow: hidden;
/* if there is still space below the line-clamp remaining lines will still be shown to hide them alter the height*/
/* height: 30px ;*/
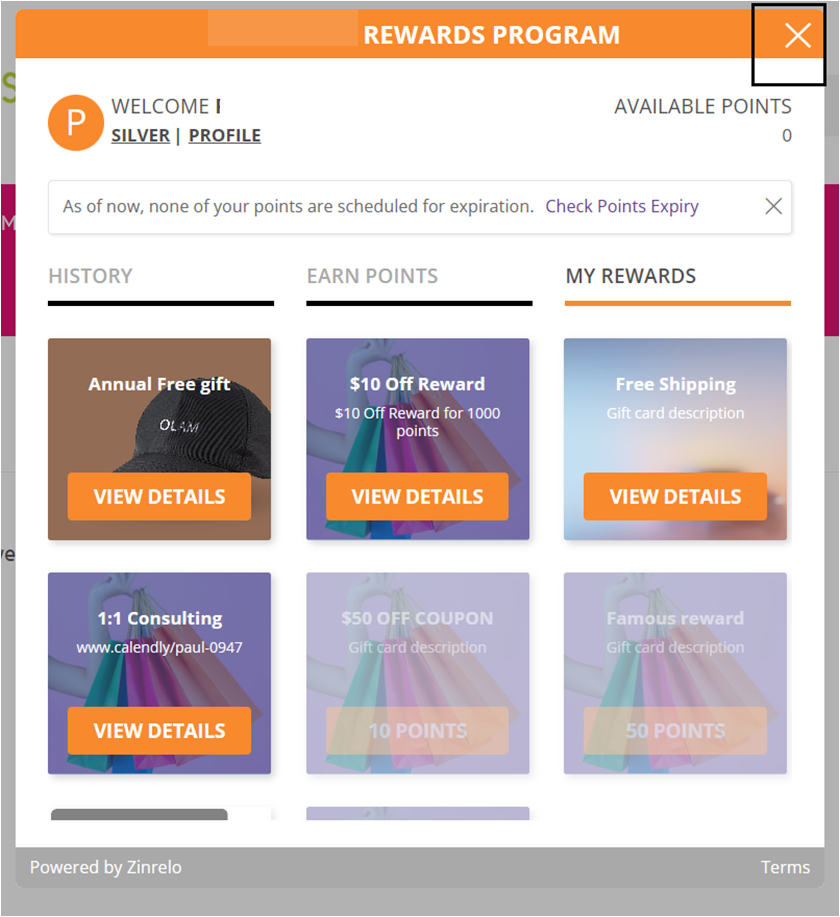
}How can I modify the color of the cross button on the dashboard?
To modify the color of the cross button on the dashboard, follow the given steps:
- Log in to your admin console.
- Navigate to Notifications>> Onsite Notifications.
- Look for the "Product Display Pages" option and access it.
- In the "Javascript Product Price Identifier Function" field, paste the provided code snippet:
ss_mi.attach_style_block("", "#zrl_ld_close_button > div{color: black !important;}");- Customize the color by replacing "black" with the desired color code or name.
- Save the changes.
How can I hide the End User Dashboard Widget on specific pages?
To hide the EUD widget from specific page, follow the given steps:
- Log in to your admin console.
- Navigate to Notifications>> Onsite Notifications.
- Look for the "Product Display Pages" option and access it.
- In the "Javascript Product Price Identifier Function" field, paste the provided code snippet:
function hide_element() {
    if(window.location.href.indexOf('checkout') > 0 || window.location.href.indexOf('cart') > 0){
        if(document.getElementsByClassName("zinrelo-tab")[0]) {
            document.getElementsByClassName("zinrelo-tab")[0].style.display = 'none';
        } else {
            setTimeout(hide_element, 100)
        }
    }
}
hide_element();- Replace the page names in the code snippet ('checkout' and 'cart') with the actual page names from which you want to hide the End User Dashboard Widget.
- Save the changes.
How to fix scaling issues of the mobile?
To fix scaling issues on mobile devices, please follow these steps:
- Go to the "Design" section and select "User Dashboard".
- Choose your live template from the available options.
- Under "Customize Dashboard", click on "Customize CSS".
- In the "Customize CSS" section, locate the "Edit Mobile CSS" option.
- Copy and paste the provided code snippet into the "Edit Mobile CSS" field.
@media screen and (max-width: 450px) and (min-width: 370px)
.zn-dashboard-tab {
    /* padding-top: 11px; */
    padding: 12px 0px 5px 2px !important;
}- Save the changes.
Updated 2 months ago